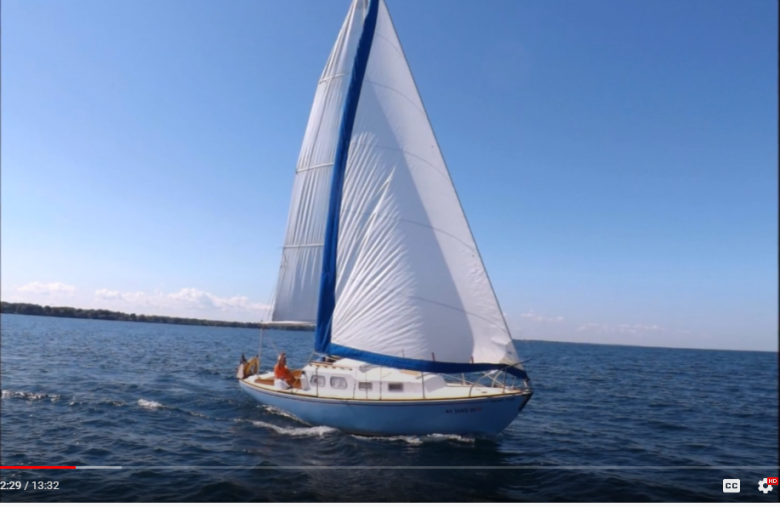
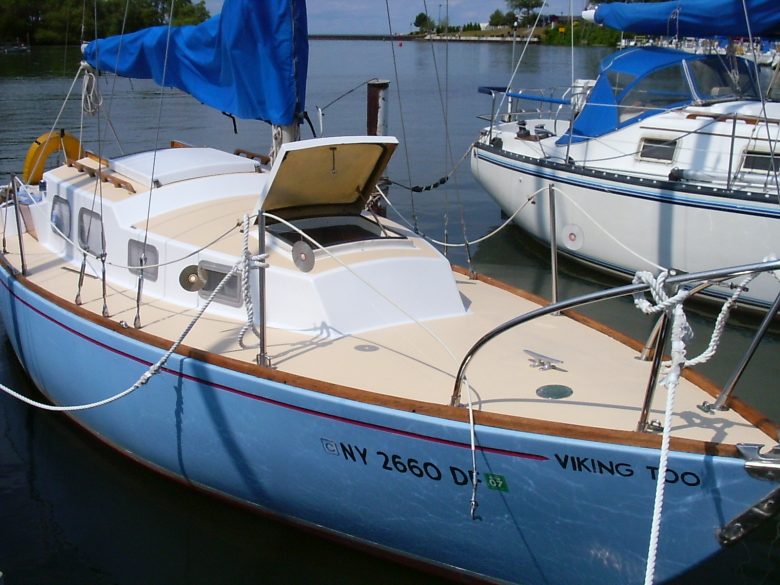
Hull #082 - Viking Too
Quick Facts
- Model: Cruising
- Year Built: 1966
- Hull #: 82
- Vessel Name: Viking Too
- Owner Name: Dean Aschenbrenner
- Hailing Port: Wilson, New York
- E-mail: dmaschen@verizon.net
Sailboat History
August, 2011 – I am the third owner. She has been in Wilson since initial launch. I bought her in April 1980 and have owned her since. First owner planned to cruise the lakes so all her rigging is ‘oversized.’ She was ordered with an outboard – originally an Evinrude 18HP. I repowered her in 1994 with an Evinrude 15 – long shaft. Added a Standard Horizon depth sounder in 1999 but compass and Kenyon knot meter are original. For safety I added a second battery and a second 6 gal. fuel tank shortly after I bought her.
Owner Comments
November 16, 2025 – Just finished 46 years with the old girl and rolled the knotmeter to 9505.32 that I put on her! She’s pretty much in the same layout as back then. I’ve tried to keep her ‘original.’ I’m stripping and refinishing the toe rails and the seat backs and tiller over the winter. Repainted the decks in 2021. Other than safety stuff she’s about the same.

Viking Too’s interior, looking forward from companionway.
2024 – Finally had to replace the tiller pilot. Went with AutoHelm ST2000. She was fine with the 1000 for all those years but I got familiar with the 2000 on my friend’s Ericson 27 and when I needed to replace the cost was minimal for the upgrade.
October, 2020 – I’m 41 years and 8800+ miles into her and she is still in great shape and sailing well. On the hard for the winter. Plans next week are to pull the outboard & then to cover.
February, 2016 – In 2014 I installed Moor wind instruments and in 2015 finally replaced the Compass with a new Ritchie and my 1995 GPS with a Standard Horizon. Enjoying both. Viking Too & I have now just over 8000 miles together and we are looking forward to another great season. I’ll repaint the decks this summer as she is showing wear in those spots I traditionally stand to rig and sit to sail.
May, 2013 – 20 May, 2013 at 1050 EDT the knotmeter reset and the old girl and I completed 7000 miles. We’re ready for the NEXT 7000. Decks are beginning to show a bit of wear. Maybe next year a ‘finish coat.’
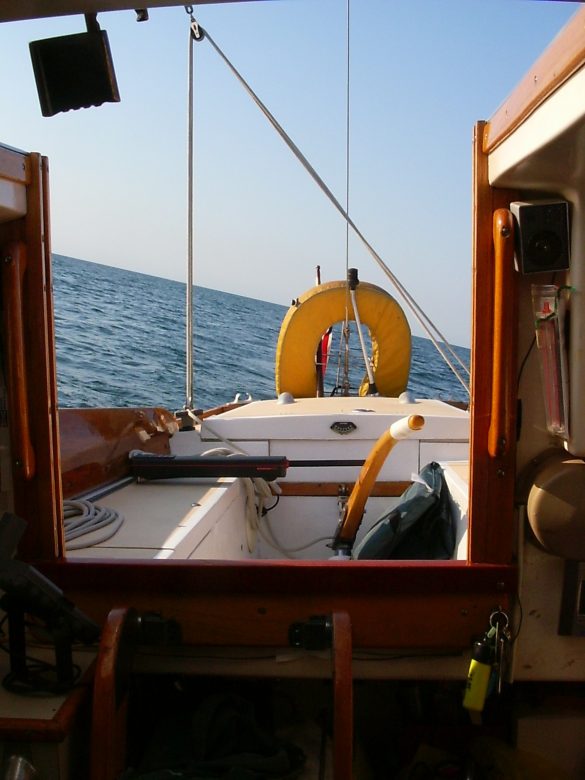
Looking out the companionway.
2009 – 2013 – Repainted the decks in 2006 (see below). I have sailed her just over 6500 miles. She is set to single hand which I do most of the time. I run an Autohelm 1000 tiller autopilot installed in 1990. She’s full keeled and heavy so she likes the wind. I replaced the main in 2003 and replaced the jib and added roller furling (CDI) in 2006. This was the first sail change in her history!!!! I’ve tried to take care of her so she’s almost all ‘original.’
I have NO intention of trading for a ‘bigger’ boat! We average 35 – 45 sails per season which in our area runs Late April to early October.
The ‘ammo container’ in the right of the v-berth pic is the ‘garage’ for ‘Otto’ my Autohelm 100 autopilot. Safest place to store it.
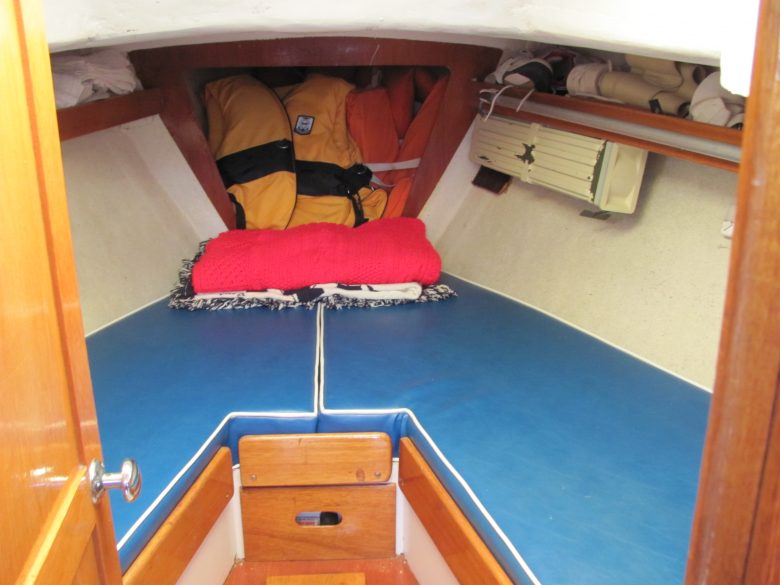
V-berth with auto-helm stowage.
The bungies in the head area hold the board and the gimbals for my alcohol stove. It fits over the sink and hooks under so I get the swing and sway to keep the pot from spilling.
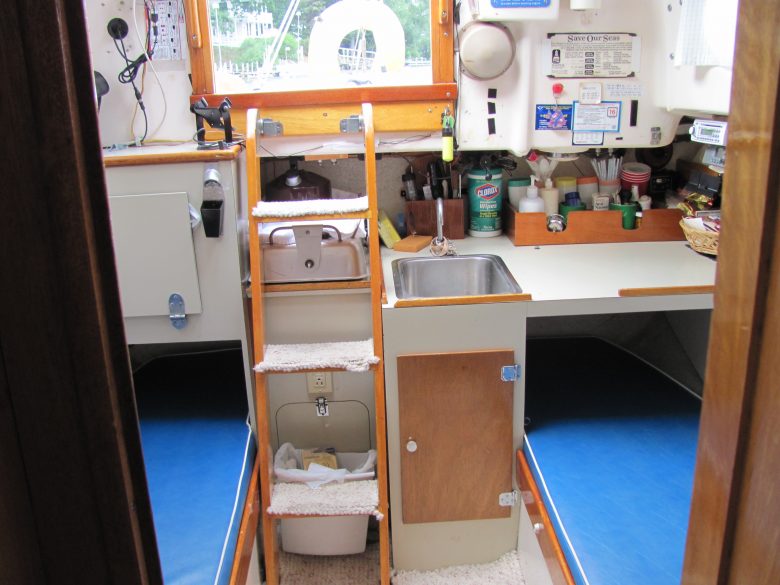
Below companionway and galley area, looking aft.
The black ‘Start’ switch was added to control power to the autopilot. There WAS no start switch since she is outboard powered!
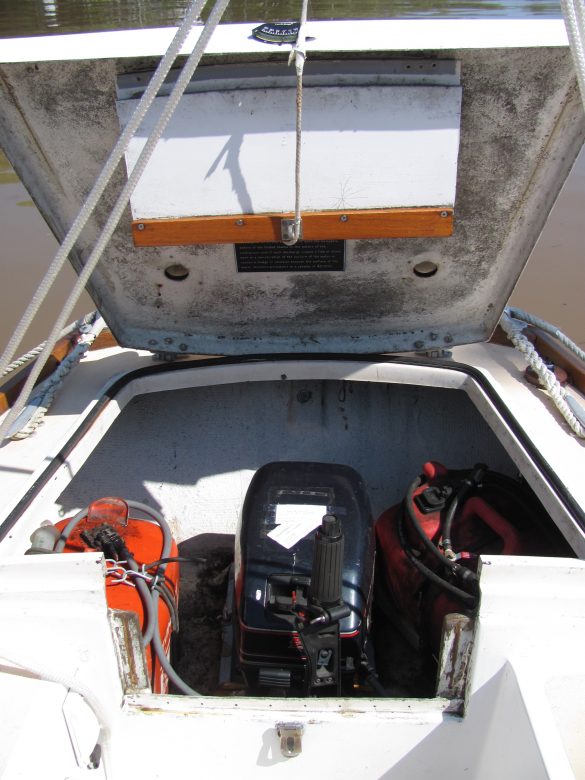
[The motor well] hole is in the ‘bottom’ of the boat in the lazarette – NOT in the transom. Hinge is at the back of the opening cover. Should be the same as what you have as even with the inboard the space was a ‘storage’ locker. The original front opened down and interfered with the tiller AND caused some rot there so I reconfigured it to open UP and store into the hatch cover. She needs cleaned! It’s been so wet here the mold is wild!!
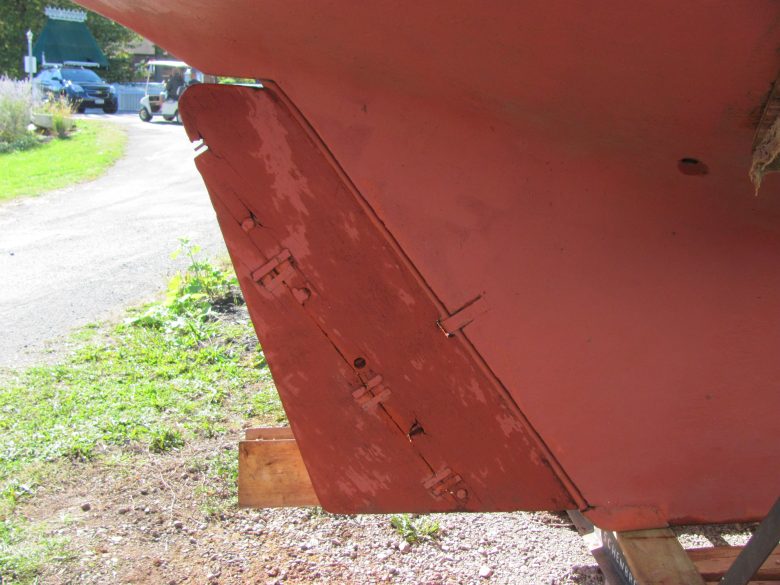
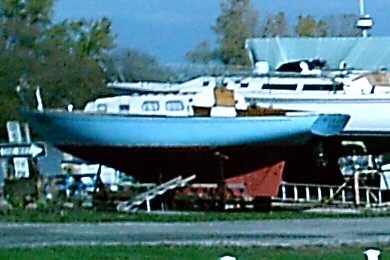
The rudder sets in a bearing at the heel of the keel. I have had that apart once many years ago to do some rudder repair. She’s looking a bit rough now as the pics were taken just after she was pulled. [My rudder] is DEFINITELY wood! Lots of people look at it during the winter/spring and express ‘concerns’ about the gaps, the ‘loosness’ on the shaft, etc. I tell them just come back a day or two after launch, dive, and it will be VERY tight! (Used to own a wood sailboat so I know about ‘soaking up!’)
Looking at your pics and a ’74 Bristol 27 we also haul I’m wondering if the rudder config has/had to do with inboard or outboard motor. The ’74 is an inboard and looks a lot like your pics. Mine is ’66 and outboard and was ordered as such.
[In an e-mail comparing Dean’s Bristol 27 Rudder to Andrew’s Bristol 27, Andrew wrote:
My rudder is a single shaft up top and terminates where the prop aperture is, while Dean’s is a full length shaft. The top rudder shaft might have some interior metal connected to the shaft to give the rudder more sheer strength. That is sometimes done in other rudders. The metalwork would probably be welded to the top rudder shaft, with metal extending through the fiberglass rudder down to the pin in the bottom. I can’t be 100% sure that’s true though. Part of me thinks it isn’t, because from my grinding on the rudder and working on it, I never saw signs of metal connected to the shaft, Though, that’s not to say they aren’t embedded deep in the rudder where I didn’t get to, though. Perhaps the solid fiberglass was considered strong enough to not need an interior metal cage connected to the top rudder shaft?
And Dean replied…]
From working with other rudders. I’d bet on a cage or reinforcement of some kind internal to the rudder. I don’t think the glass/metal bond alone would be strong enough for the rudder torque. The bolts that hold mine onto the shaft go right through to the first seam. The ‘straps’ and another set of shorter bolts hold the second part to the first so they did reinforce even back in ’66.
Owner Projects
Rehab of the Decks on My Bristol/Alberg 27
The main reason for the deck rehab was that she was beginning to show her age after 40 years of walking on and scrubbing decks. You could see ‘swirls’ of the underlying fiberglass in the nonskid and everything I read in BoatWorks and other places suggested that that was a bad thing that would lead to UV damage/degradation in the decks.
Old deck paint showing its wear.
Prep Work
I decided to spend extra time and TAPE a lot rather than PULL DECK HARDWARE. The main reason being that I felt that I really didn’t want to ‘mess’ with 40 year old fittings, screws, etc. and besides, nothing leaked!! The original non skid texture was basically in good shape however I decided to ‘add to it’ by using Interlux’s Interdeck paint with the microballons in it. I am VERY happy with the results!
I spent some time repairing some small nicks and scratches but overall the deck was solid. I scrubbed the decks with soap, cleanser, and water to get them clean and then taped with 3M painter’s tape. Before painting, I went over everything again with Acetone to make sure that the decks were scrupulously clean.
I painted the ‘flat’ white areas first as I felt it might be easier and the area was smaller. The paint I chose was Interlux Premium Yacht Enamel – Semi Gloss White. I started with the bow hatch and surrounding area just to see how it would work out. I used a brush and then ‘tipped it off’ with another and was pleased with the result. It’s not perfect but it really protected the decks and looked great.
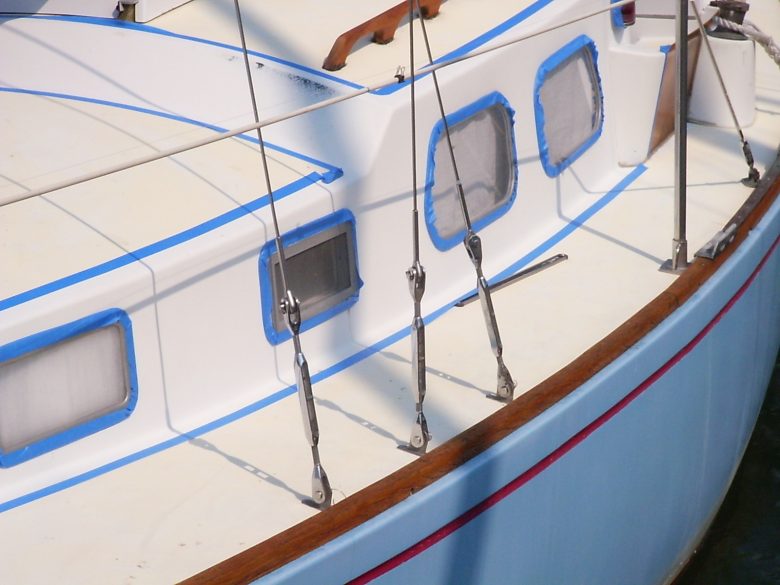
Taping off the cabin-top for paint.
New deck paint
The nonskid came next and was done in three (3) sections. I used Interdeck – Beige for the non skid and did the cabin tops first which gave me a place to ‘stand’ as I worked the decks. The cockpit came next, with the same intention. My last steps were to begin at the bow and paint toward the stern. The directions suggested that a roller would work also, but I decided that the brush had worked so well on the white that I was better off to stay with what worked. I did NOT tip off the nonskid paint.
As to time, the cleaning and repair preparation took a couple days. The white took another day and the non skid was completed over two to three more. I taped each day before I started, painted, and then after a few hours to let it ‘dry’ I pealed the tape. (Even though it’s SUPPOSED to be OK, I didn’t trust the tape not to leave a mess!)
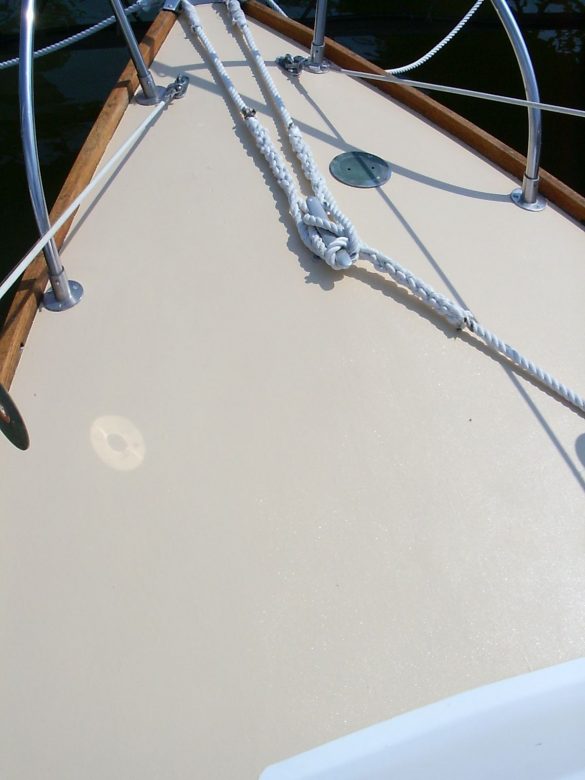
Foredeck looking much better after paint.
Cockpit with fresh paint.
Following Up
This year I ‘touched up’ a couple spots that I was not happy with and just did my usual spring clean up. The boat looks great and I am very happy with the result. I should add that I had planned to do the work in the summer of 2005 but was hurt in a fall with my dog in July and shattered a leg. I had just purchased the paint and a call to Interlux Tech Support assured me that the unopened paint would last over a year with out problem. This indeed was the case as all went well.
The CD’s on the lifelines in some of the shots have proved a great way to scare the birds so they don’t mess up the decks! It’s also a great way to use up all those ‘free’ AOL, etc. discs and maybe the birds just don’t like my choice of music!! I also over the winter (2006-07) refinished all the exterior mahogany woodwork…but that’s ANOTHER story!!
The painting was done in July 2006…I will be glad to talk to anyone else contemplating a job like this.
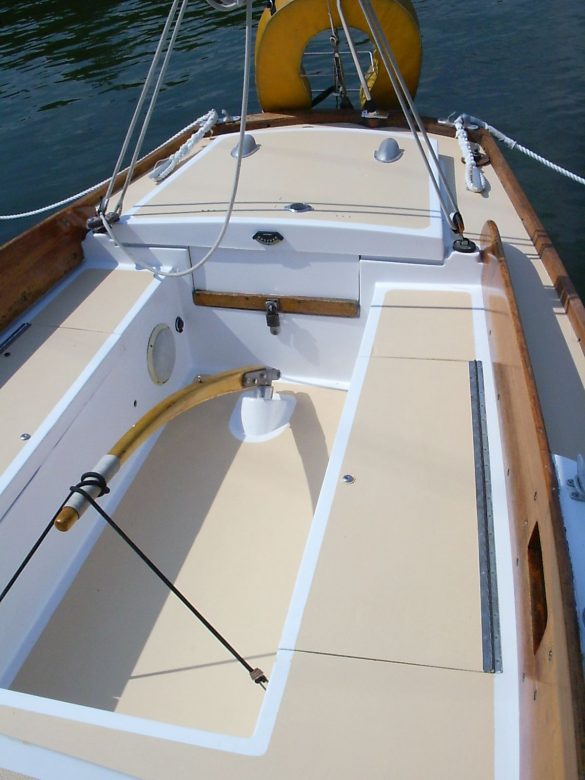
Decks after painting
Image Gallery


Comment Form