Hull # - Vittoria
Quick Facts
- Model: Cruising
- Year Built: 1968
- Hull #:
- Vessel Name: Vittoria
- Owner Name: Gregory Soule
- Hailing Port: Cushing, Maine
Owner Comments
12/18/09 – The cockpit drains work fine while the boat is on the mooring or at anchor. The cockpit sole, by design, is slightly pitched forward so the water flows towards the stock drains (at my forward end). Yes, the thru-hull portion is below waterline but the drain in the cockpit sole is above waterline so it works just like the sink drain. There is always water in the line up to the waterline mark but never above it as the water in the drain and the ocean are always reaching an equilibrium. Some sailors going offshore choose to make the thru-hull for the cockpit drains equipped with a ball-valve seacock so they can completely shut off that hole in the hull if they suffer cockpit drain damage somehow. I haven’t done this, instead I carry underwater workable epoxy to fix the glass thru-hull and replaceable hose and think I could manage to get a repair in underway. I’ve been sailing and at anchor in severe thunderstorms and never had any water accumulate in the cockpit at all. I think of it like this: the stock drains are fine for rain, the auxiliary drains are for wave filled cockpits. Happy designing.
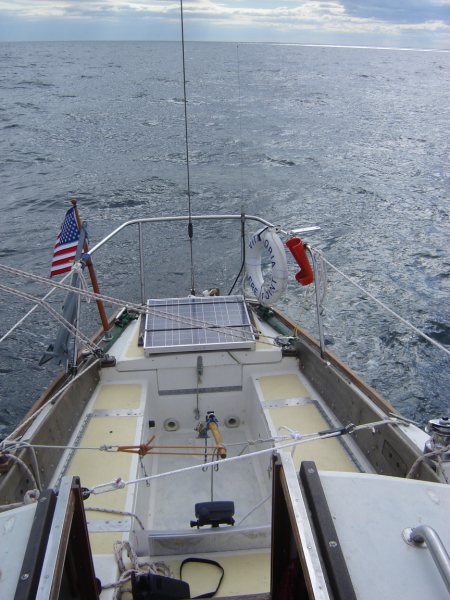
Vittoria’s Cockpit
12/16/09 – The cockpit scuppers you mentioned I assume are the additional ones in the rear. The forward ones are stock and a little small by themselves. The rear ones are simple plastic threaded thru-hulls with flexible plastic tubing on the lazarette side that goes a very short distance into another set of plastic threaded thru-hulls in the outboard motor plug. It drains out through the thru-hulls in the plug, which is above waterline. When I want to use the engine I remove the hull plug and also take off the tubing from thru-hulls and leave them temporarily disconnected. The drains are simple, easy, big, inexpensive and I think they would drain a bunch of water if I ever get pooped.
The ice box got moved into the dumpster. Since I have the outboard model the entire underneath of my companionway counter and cockpit is all storage. When you let down the door (hinged on the bottom with the step in in) I have a nice little 6 bottle liquor cabinet on the bulkhead on the left, an igloo cooler in the middle and the sink drain, interior manual bilge pump and the other bilge pumps (cockpit manual, low level electric and high level electric) hoses on the right. The cooler lays on a sled of wood with fiddled sides, back and bungees holding it down in, not that there is a lot of room for it to move, the clearances for everything are minute and it took me a lot of head scratching to figure out how to cram it all in there. I pop off the bungees and the cooler slides out, through the door opening and on to the back side of the door, which is horizontal and parallel with the floor 6″ higher than the sole because the step in the door hits the sole and keeps the rest of the door high and in-line for the cooler slide move. Then I sit on the settee and open the cooler as it rests on the back of the fold-down door. It works great and the cooler stays cool in the bilge area and ice lasts 6 days.
A future project I’m looking forward to doing is the final step in the cooler transformation. I see you glassed in the cockpit access hatch to the old ice box and made it all flush. I was thinking of leaving a small lip and somehow fastening on a piece of smoked lexan with a wooden rim and making a chart table skylight. I’ll let you know how it goes whenever I get around to doing it.
I don’t have any pictures of these specific areas yet but I’ll take some next time I climb through the tarps into the boat to check on things. I’m always glad to talk boats. Cheers.
Vittoria’s below companionway area before…
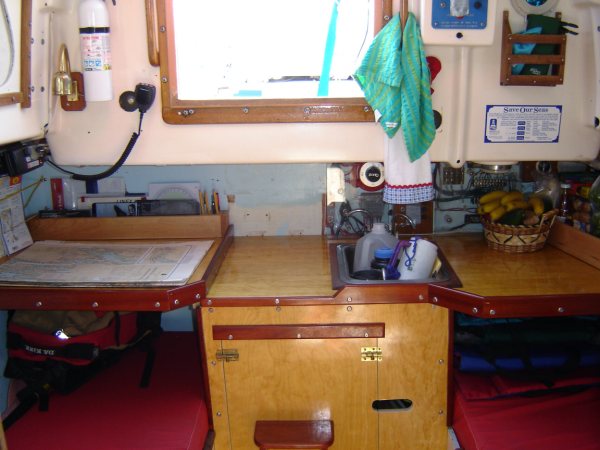
Vittoria’s companionway, nav-station and galley area.
12/13/19 – I bought my 1968 B27 several years ago and have absolutely loved sailing her. She is a hoot to sail and is very seaworthy. We push her pretty hard sometimes and with the right suit of sails on she does great. We have taken her out for cruises up to 3 weeks in length, docking a little here and there to fill back up with water or put some gas in the can. We have the outboard motor in the lazarette model and use a little 1980’s Johnson 6hp as our auxiliary. It’s just enough to get us home when the wind dies or get us on/off the dock easily.
I’ve done quite a few modifications to her with the theory of always having her ready to sail each season. When she hits the water I don’t work on her any more, except little puttering type projects at anchor. I work on her quite a bit but when the season comes (Maine) I hang up the belt and sail as much as possible. I try to keep cost down and not go overboard by having a cost/benefit approach to each project. I’m attaching some pictures but I must admit I don’t take a lot of pictures of projects so they leave a little to be desired.
In addition to major projects I’ve done countless little ones like paint removal (all exterior wood was painted) and now I let all the wood turn silver, reefing system for mainsail, and in general just trying to always improve and always simplify. I hope the pictures email okay and please feel free to email me back if you have questions about the pictures I’ve sent or you want to learn more about what I’ve done to Vittoria.
All the titles explaining the photos got erased or something, stinking computers. This is the explanation of the pictures (hopefully in order):
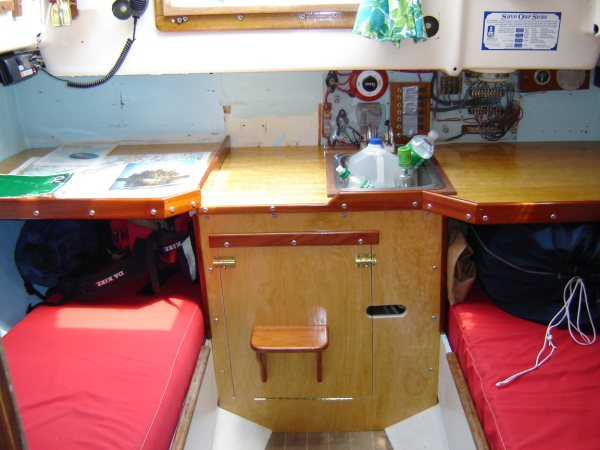
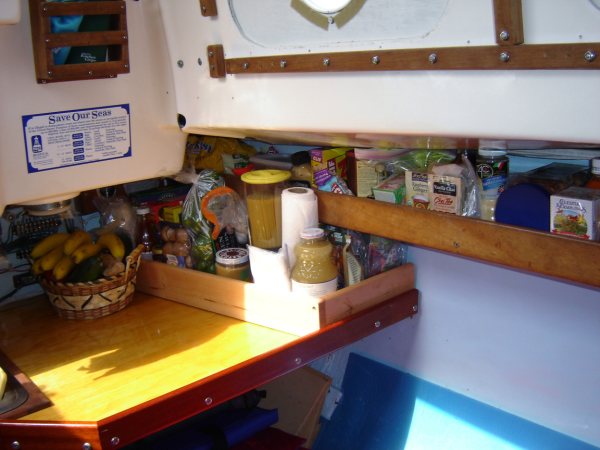
1. The new galley. The food can be stored more shippy while underway but is convenient while at anchor.
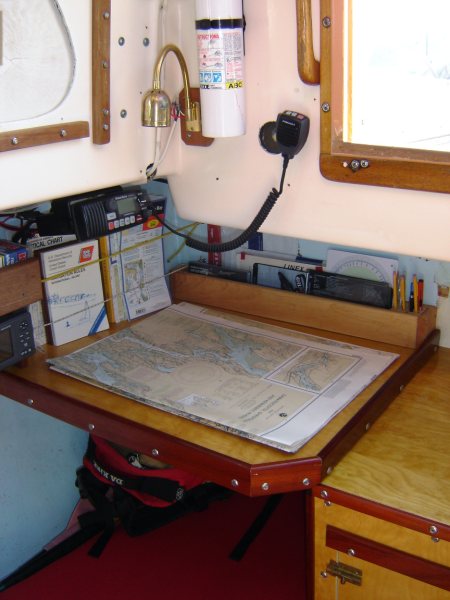
2. New nav. station with chart area,light, reference books, tools, VHF w/ mic that reaches cockpit and interior gps.
3. New companionway area minus the galley box in the middle. I made this out of birch and cherry. The slot by the stair is for the handle to the interior operated manual bilge pump.
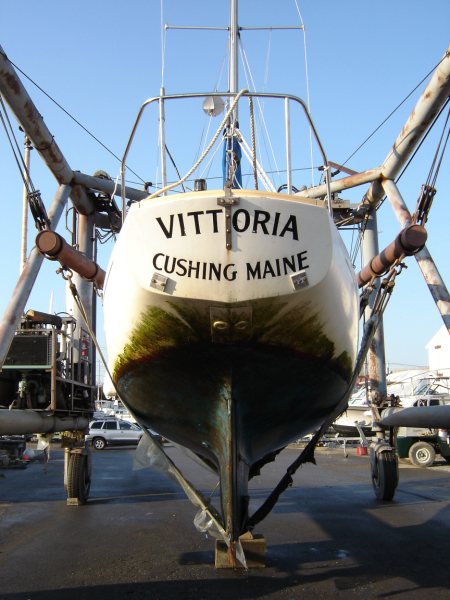
4. Her old hailing port, obviously stern heavy when we got her.
5. Old plumbing was complicated and in the v-berth which took away the double bed.
6. Old galley with stock companionway stairs and solar panel mount under counter.
7. Old storage bin area. You can see the corner of the old nav station facing the bulkhead which you had to sleep below and bang your head on unless you wanted to sleep forward with the holding tank.
8. I gutted the main cabin and started over.
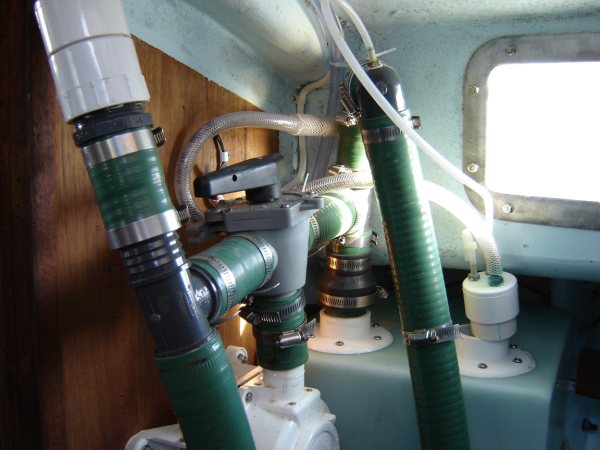
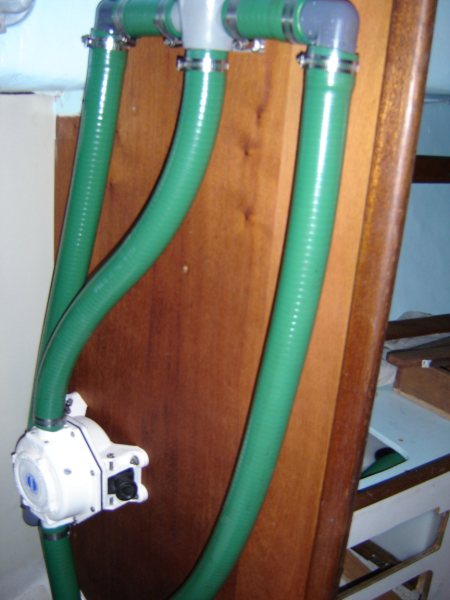
9. New streamlined plumbing back in the head does everything the old plumbing did. With that one whale pump and 2 diverter valves I can pump directly over-board, into the holding tank or pump the holding tank over-board.
10. Old interior showing old nav station and battery bank on floor of head so you couln’t walk forward or stand up at head.
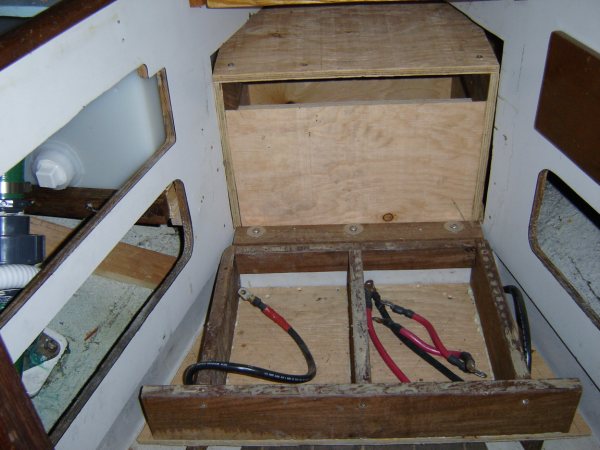
11. New battery boxes in v-berth got them out of the head. I have 4 6volt golf cart batteries.
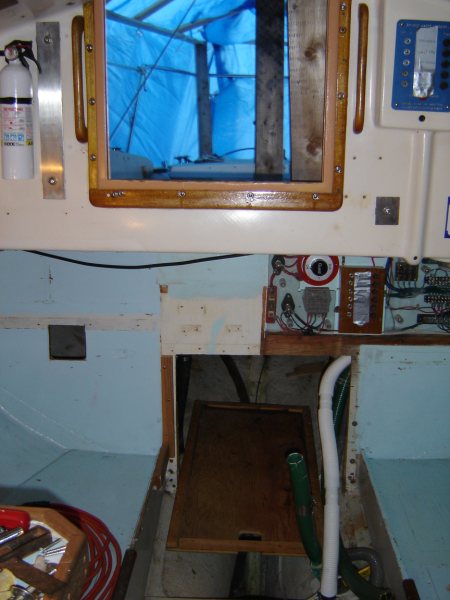
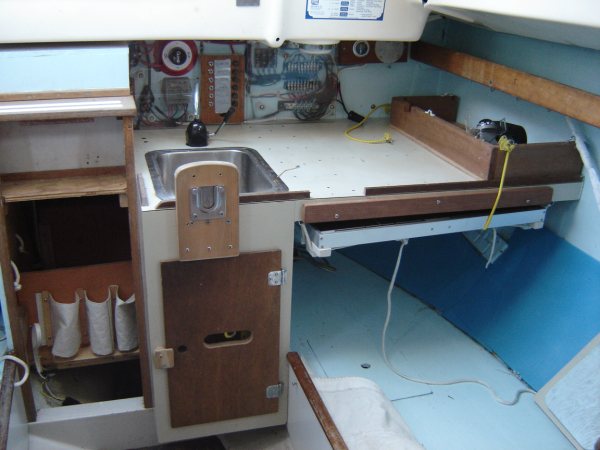
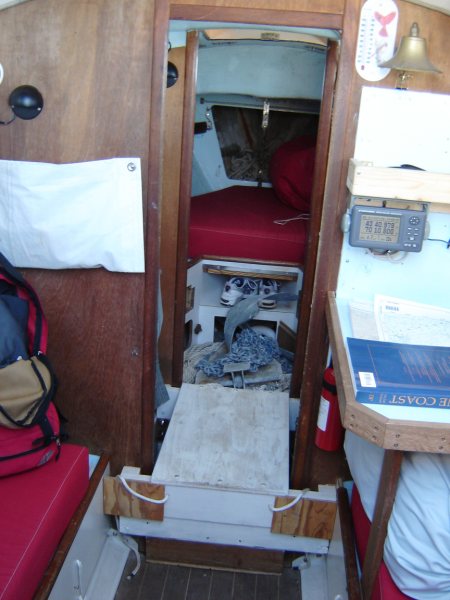
12. New counter top area in progress but shows the trap door/step better than other photo.
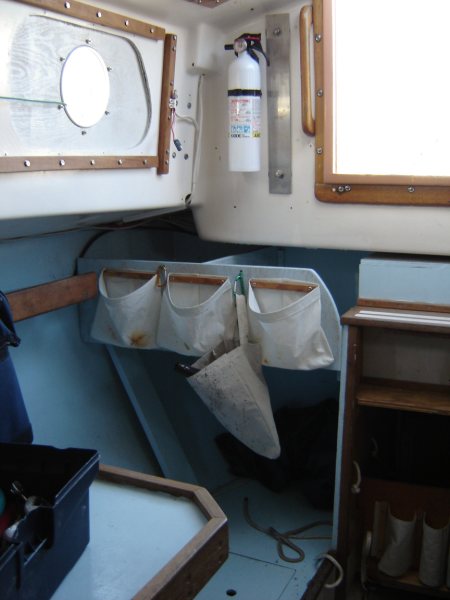
13. Head again and new solar panel storage area with shelf above. I slide the panel in there if the weather is so rough I don’t want it outside. 60w panel.
14. New interior in progress. Battery box is used as step to access hatch. Duffle bag is jordan series drogue. I now have a bookshelf on the right where the blue plywood is.
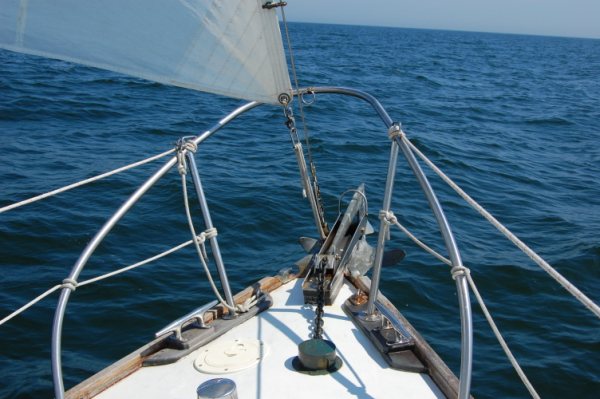
15. New bow roller, chain pipe, bow cleats and life lines.
16. My friend checking out the fleming windvane, absolutely awesome! All paint removed or redone. ST winches for main, original winches for removable inner stay cutter rig option. Note solar panel on rail, that’s an improvement.
17. Fleming global minor 301, worth it’s weight in gold.
18. Pre-windvane sheet to tiller self-steering. This is a simple point of sail, it gets more complicated sometimes. Note solar panel on lazarette and only 1 set of winches.
19. At anchor, note beefed up ports with plywood surround, exterior chainplates. I’m actually taking a picture of a 45′ morris grounded on a ledge.
20. Our galley at anchor. We extend the counter top with another piece for the alcohol stove.
21. Sailing
22. Sailing
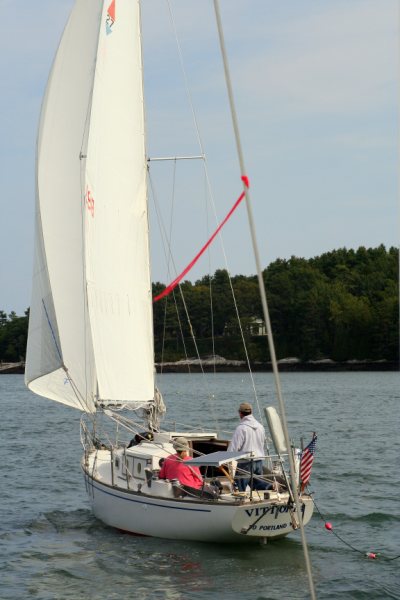
Vittoria under sail
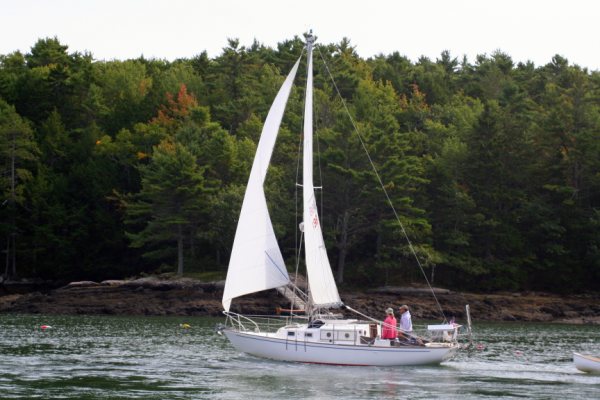
Vittoria underway
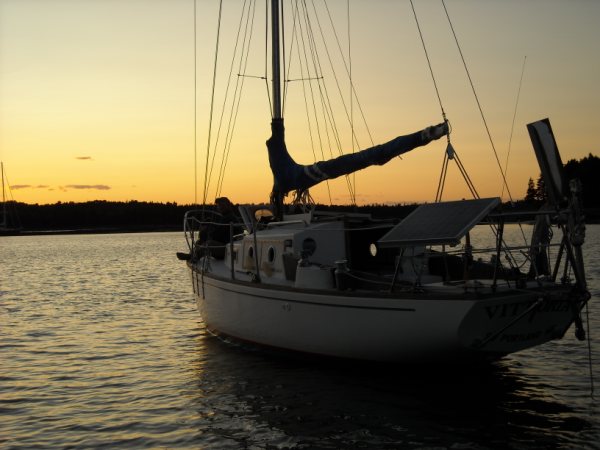
Vittoria at anchor for the evening.
Image Gallery


Comment Form