Anchor & Mooring System
Project Logs
November 22, 2011
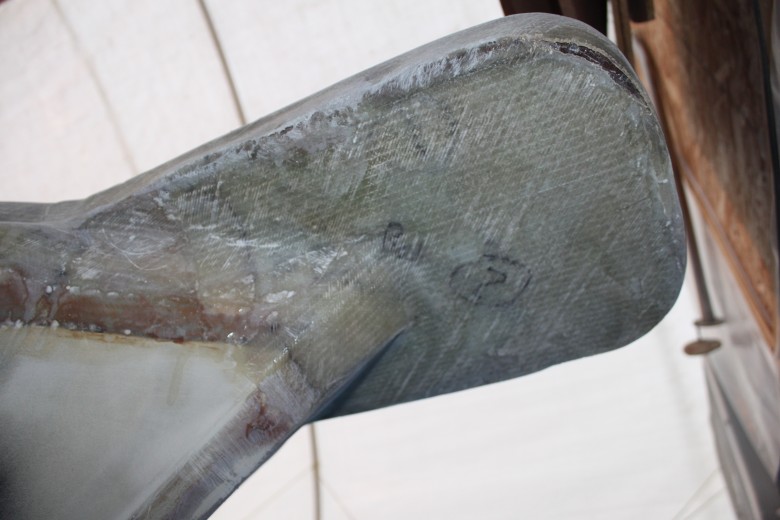
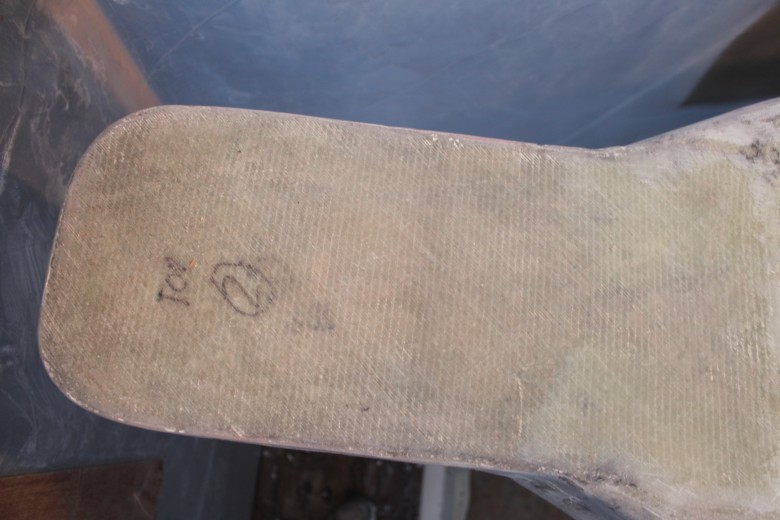
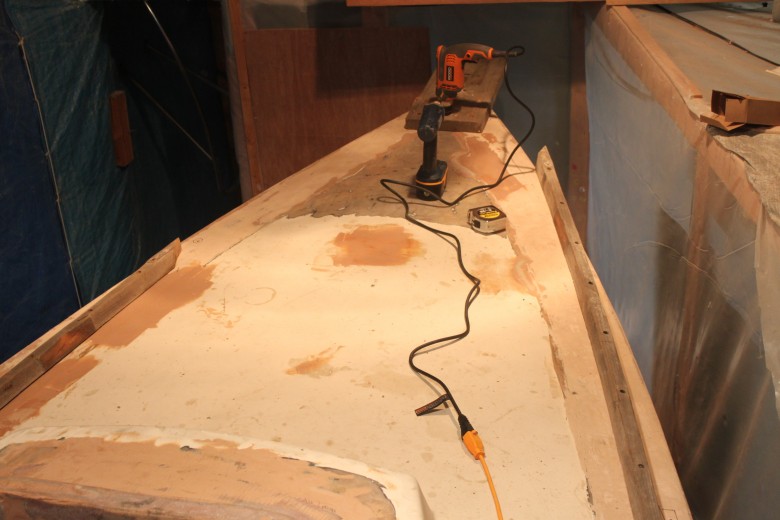
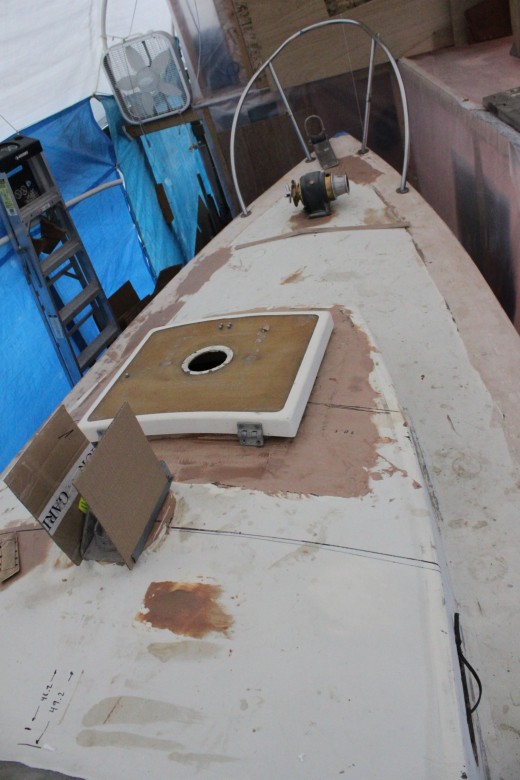
I did some final glasswork on the bow platform this past weekend. I noticed the bow platform had a slight slope on the left side, so I added an extra piece of glass there. I also found that glassing around the corners of the platform to be a little difficult, and therefore had a few air bubbles along the corners. To remedy this, I used a chisel to carve out these air bubbles, then filled them with thickener and installed a small fiberglass patch over the thickened hole. After the fiberglass was tacky, I then faired the bow platform. So far, I’m happy with how it turned out for it’s first fairing and there will be more sanding/fairing to come!
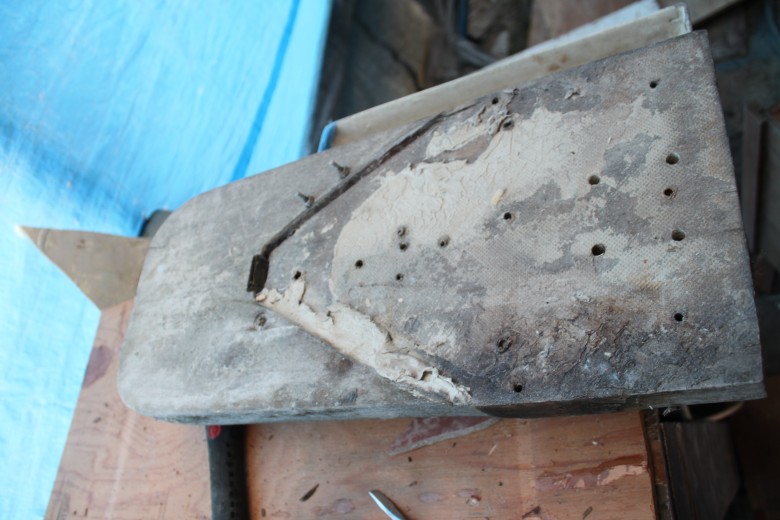
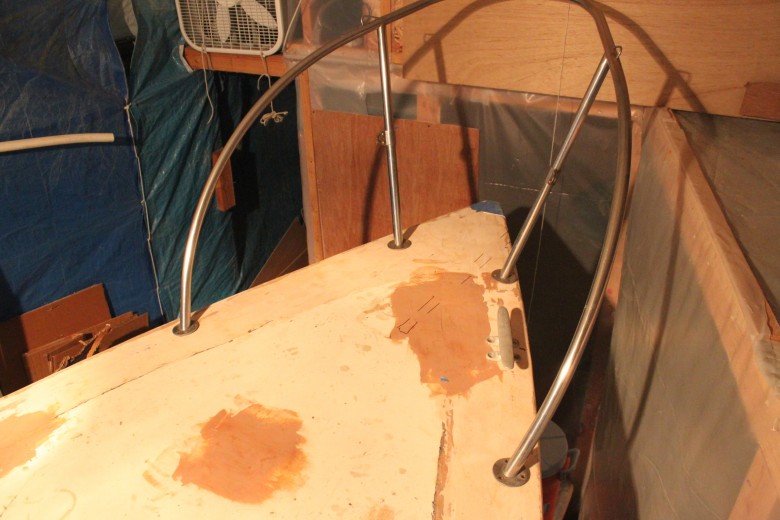
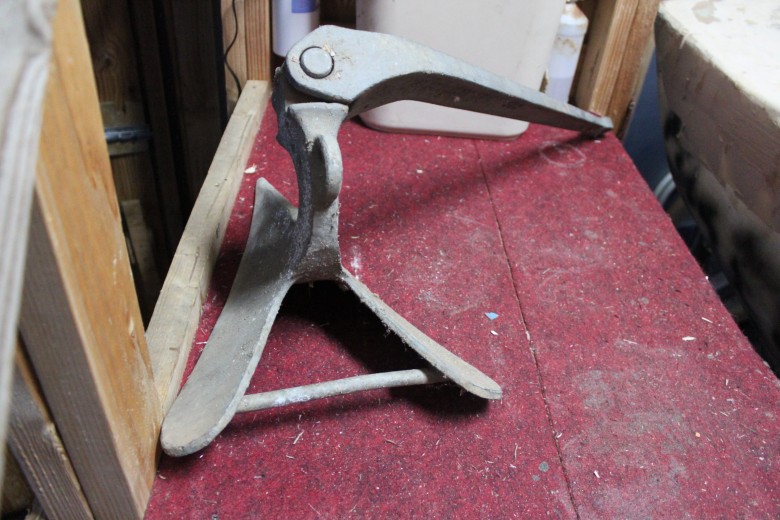
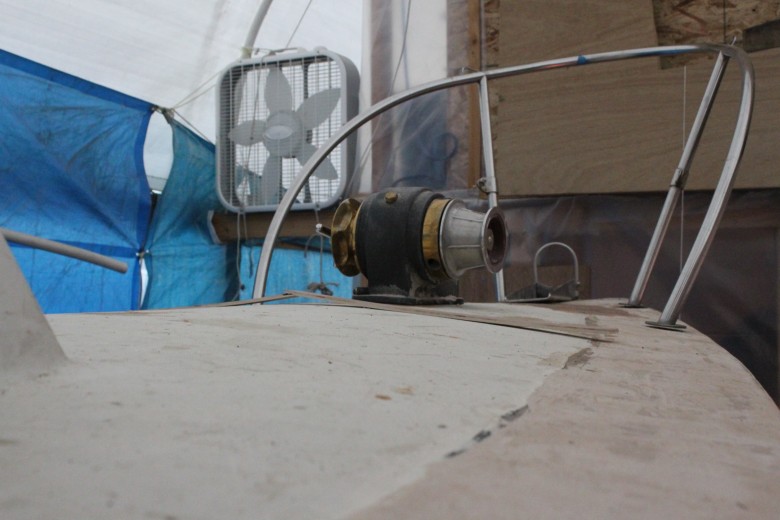
I also t fit a test bow roller on the newly installed bow platform. I think I’ll be able to fit two anchor rollers on the bow platform nicely. It will be a tight fit, but there’s enough room. I’ve also installed a block on the stern toe rail. This will allow me to mount a stern anchor roller for my stern anchor locker. I’ll likely have more information about this project as I move to install these two final pieces, but for now, I’ve completed preparation work for the future installation of the anchor rollers. Here’s an image of the bow platform fit with a candidate bow roller:

Image showing a test fit of a bow roller similar to the one I might use.
November 10, 2011
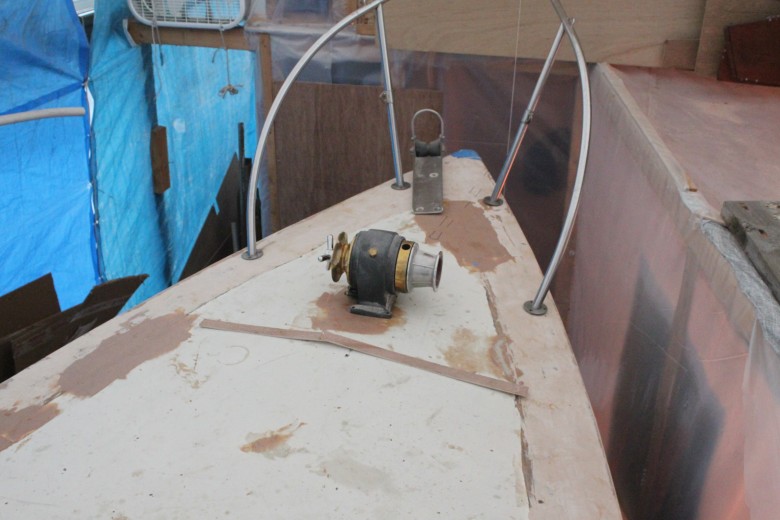
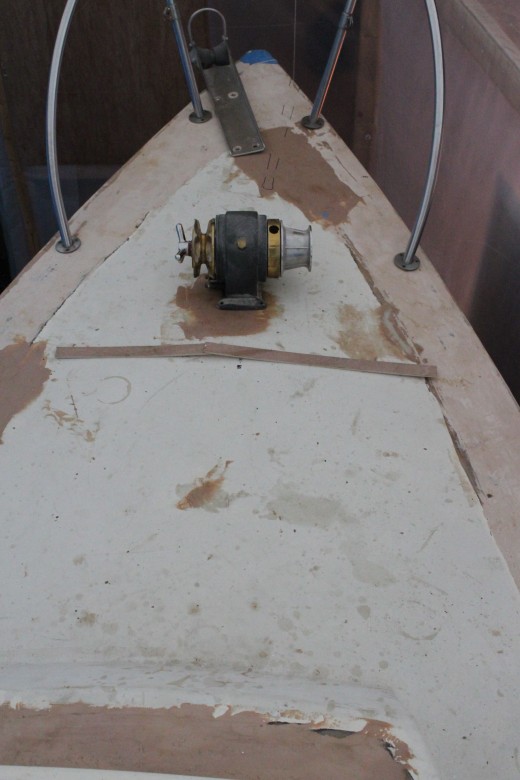
I’ve just installed the bow platform which means I will now be able to size my bow rollers and anchors for the platform. I also installed the aft block for a stern bow roller. All I need to do now is to mount the stern bow roller that is sized for the block, and it will easily feed line into the future stern chain locker hawse pipe (inside the lazarette).
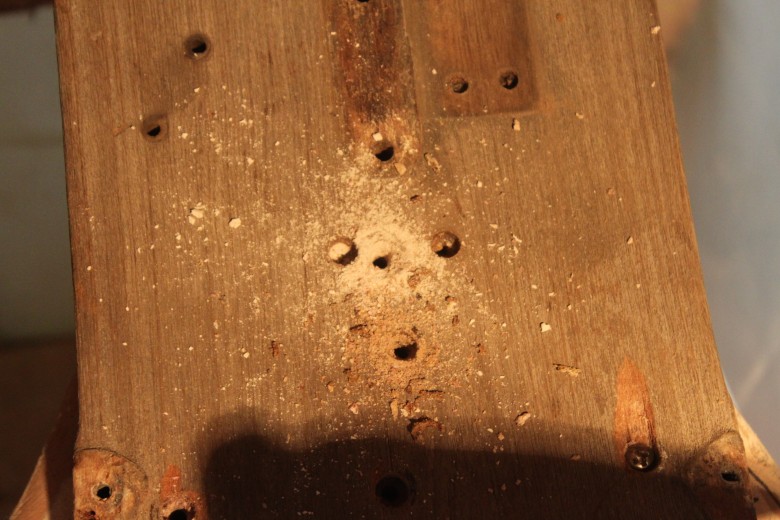
Regarding the bow platform, I installed it while I was installing the toe rail, as the two pieces are connected. Here are the steps I took to install the bow platform:
- Cleaned caulking from old teak bow platform. I decided to use the original platform as it is solid teak, already fits well and will allow for 2 anchors + rollers to fit.
- Used the original faster holes as a pattern for drilling new fasteners holes through the deck.
- Fit all the fasteners, then removed the platform.
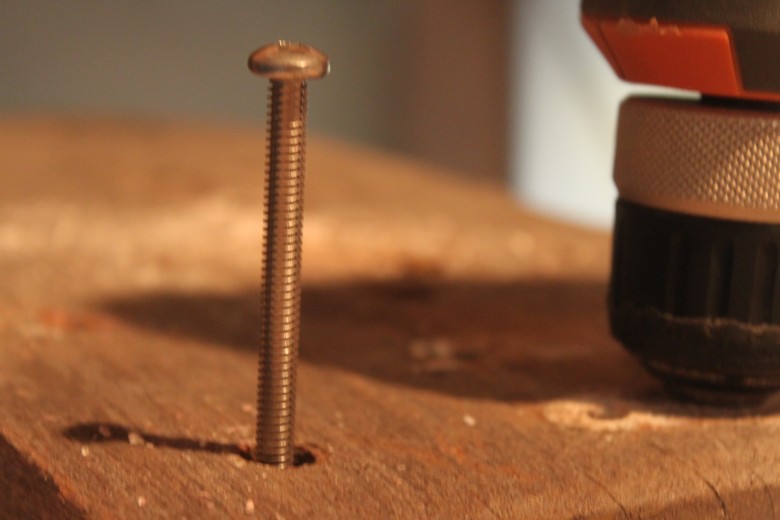
- Wet out, then thickened the bottom of the bow platform and inserted fasteners
- Tighten fasteners down to clamp the piece down and make a firm bond between the deck and the platform.
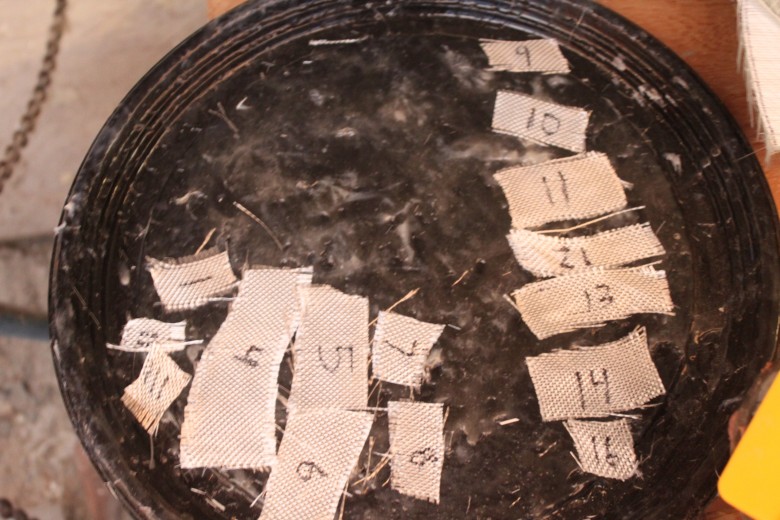
- Cut fiberglass pieces for platform. I used 2 layers of 1708 biaxial for each side of the platform, with the main connection points to the deck getting 4 layers in some places.
- Layup fiberglass – starting with the top of the platform first, then the bottom. I laid down a layer of thickener prior to laying down the glass because the platform had some grooves on the surface (which could introduce bubbles into the layup). I also wanted the thickner there to “stick” the wetted fiberglass into position and to hold it there.
- Trim dried fiberglass, water wash and sand platform.
- Once all the deck construction is complete, then I will come back and fair the platform

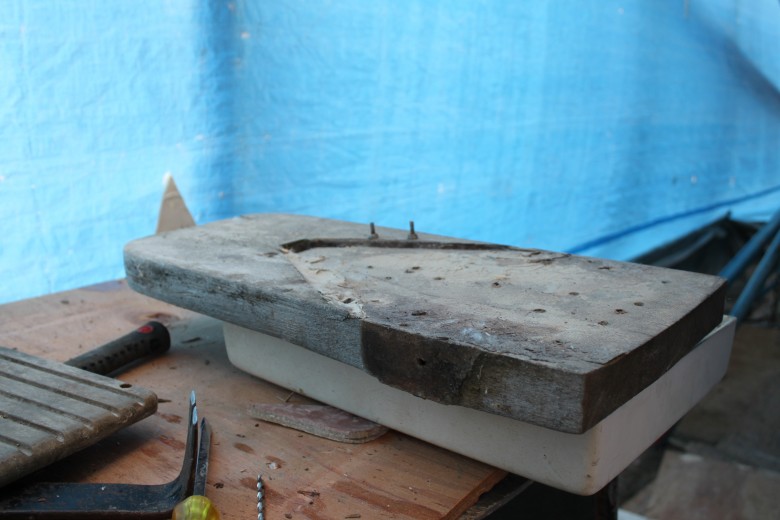
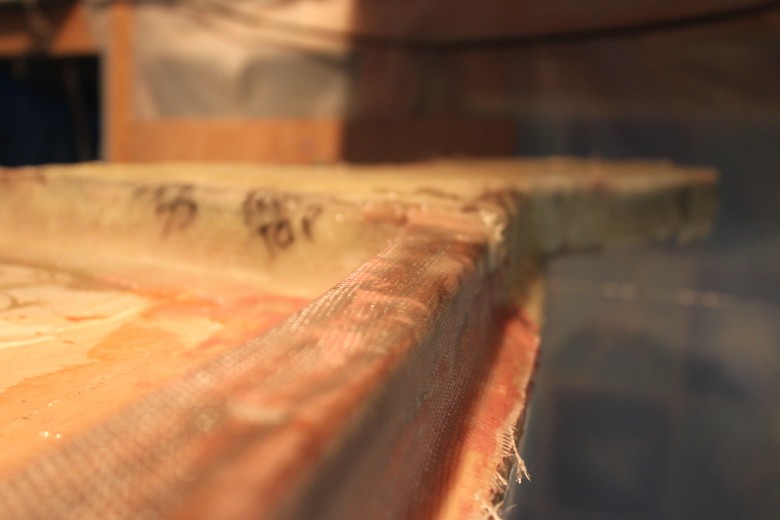
Image showing the bow platform after the fiberglass has kicked. Some fiberglass on the edges needs to be trimmed, then a few gaps along the edge of the platform filled with thickened glass.
November 9, 2011
Research
Anchor
- Ideally, one seeks an anchor that will be effective in any bottom condition…however, a combination of two selected anchors can provide good holding for almost any condition that is likely to be encountered….should have a second anchor aboard for greatest security in the event of extremely severe weather, or the unhappy necessity of anchoring in an exposed area under severe conditions, or as insurance against the loss of a single anchor. Hence, we urge that at a minimum of two anchors be carried. (Desirable and Undesirable Characteristics of Offshore Yachts, p. 229)
- My two working anchors are a 60-pound CQR plow and an old 55-pound Fortress. I also carry a 35-pound CQR on deck at the bow, with around 10’ of chain at the ready. On the stern I carry a 45-pound fisherman’s anchor and a 90-pound Hi Tensile Danforth. Overall, the 60-pound CQR has been my most versatile and reliable anchor. The CQR will reset itself i the boat swings and starts to pull from the opposite direction. This is a normal occurrence, especially in storms. The Danforth is similar anchors will sometimes snag the anchor rode as the boat comes around….My philosophy is, if you know a few proven anchors that have made cruisers all over the world happy, stick with them. The CQR and Fortress are two such proven anchors. (All in the Same Boat, p. 124 – 5)
- If circumstances you to use two anchors, just remember that you could be trapped from quick escape. Do what you can to minimize tangling (All in the Same Boat, p. 136)
- We recommend that every yacht carry at least two anchors of different types and sizes:
- Primary anchor – recommend the CQR Plow…second choice is bruce.
- Second or Storm Anchor – used when the primary does not have dig in, or when two anchors must be set in storm conditions….we believe that this anchor should be a three-piece herreshoff-type..of equal to or larger than the primary anchor.
- Third Anchor – if there is room below for stowage…should be a danforth type that is smaller than the primary, for use as a lunch hook when stopping briefly, or as a stern anchor. (Desirable and Undesirable Characteristics of Offshore Yachts, p. 233)
- A rough guide often used in determining the weight of the primary anchor is that its weight in pounds should be equal the boat’s length in feet. However, another rule applies if the boat is used for cruising and if she has a power winch and the anchor is normally stowed on a bow roller: in that case, the primary anchor can be as large as conveniently handled. (Desirable and Undesirable Characteristics of Offshore Yachts, p. 232)
- …several advantages to having a heavier anchor…will bite in more rapidly than a lighter one, which means that a shorter scope can be used for given conditions…extra weight and strength will minimize anxiety when it comes on to blow. (Desirable and Undesirable Characteristics of Offshore Yachts, p. 232)
- In some areas…it is necessary to anchor with the bow into the swell coming into the harbor rather than into the wind. To align the boat properly, run out a light anchor for the stern. (Desirable and Undesirable Characteristics of Offshore Yachts, p. 235)
- On some boats, the stern anchor and its equipment are permanently rigged, ready for use. This rig can also be helpful when kedging off after the boat has run aground. (Desirable and Undesirable Characteristics of Offshore Yachts, p. 235)
- Bruce – …developed for use in the North Sea oil-rig operations…made of heat-treated cast steel that is galvanized….good holding power in most bottom types; the large semicircular flukes dig well into soft sand and mud and it holds in many rocky conditions. The heavy shank gives a large weight-for-size ratio, which means that when dug in the Bruce holds on shorter scope than some of the other types….conditions where the wind changes directions, even as much as 180 degrees, the Bruce is excellent at following around and not tripping out due to the relationship of the shank to the semicircular flukes…Stowage on a bow roller is ideal for Bruce. Stowage on deck is difficult because there is no satisfactory way to shroud the flukes, and stowage below is cumbersome because the anchor is relatively large. (Desirable and Undesirable Characteristics of Offshore Yachts, p. 232)
- Danforth – When the bottom conditions are right,…anchor is very efficient…in sand it is the most efficient anchor. similarly, in clear mud or in fine gravel…virtue of being light and is easy to retrieve and stow…not as apt to foul the anchor rode in the event of a tide or wind shift…It must reseat itself if the boat’s heading changes substantially…Especially unreliable in heavy weeds, because the flukes act as a rake; the weeds ball up between the flukes and the shank and prevent hte anchor from penetrating the bottom…anchor trips out due to a change of tide or a shift of wind in light-air conditions. If this happens with debris caught between the flukes and shank (can, rock, weed, or other bottom trash), the flukes can point upward and the anchor becomes a fluke…come in “Standard” and “High Tensile” versions – the latter advertised to be substantially stronger for a given weight….Danforth-type lightweight anchors must be well chocked and guarded on all corners. Some metal chocks for Danforths…only hold the crown, flukes, and shank, leaving the stock ends free to snag jib sheets and feet. What’s more, unless the Dansforth’s stock is supported in its own chocks, standing on it is like balancing on a teeter-toter. (Desirable and Undesirable Characteristics of Offshore Yachts, p. 62)
- Plow – It is our judgement the most reliable all-around anchor is the QCR plow, for many reasons….will penetrate to a great depth…not foul the anchor cable when the boat’s heading shifts. If the current or wind shifts, the anchor does not have to reset itself completely since, due to the pivoting action between the plow and the shank, it remains embedded in the bottom as the boat swings…the plow will not ball up with weeds…has a good chance as any of fetching up on a rocky bottom, and a better chance than any other (witht he possibility of the yachtman type) of finding a place to penetrate between the rocks…Made from hot drop forgings of high tensile steel, which makes it very strong…Not very convenient to stow on deck except in a bow roller fitting….more readily stowed below…because it does not have wide flukes or a shank….The best place for a plow is on the bow roller; otherwise, this anchor (whose odd shape can make it quite a nuisance on deck) should be stowed in a special chock, preferably under a dinghy where no one can trip over it. The big yachtsman-type anchor is also best stowed under the dinghy. (Desirable and Undesirable Characteristics of Offshore Yachts, p. 231)
- Navy – …totally unreliable in anything but clear sand. (Desirable and Undesirable Characteristics of Offshore Yachts, p. 232)
- Northill – Holds very well, folds up for easy stowage, and is relatively lightweight….shape of the flukes is such that the protruding fluke will almost certainly foul the rode if the boat swings around the anchor. Constructed of stainless-steel plates, the flukes are sharp and can cut the anchor rode unless chain is used. (Desirable and Undesirable Characteristics of Offshore Yachts, p. 232)
- Yachtsman or Herreshoff – one serious deficiency, the anchor cable is very apt to foul the protruding fluke in the event of a change of tide or a wind shift, in which event the anchor loses its holding power and may become completely dislodged…it should be somewhat heavier than some anchors…it is difficult anchor to bring aboard…..Probably the most reliable anchor on rocky bottom…moderate to light conditions it requires less scope than other anchors…A fine type of anchor of the type referred to as “yachtsman” was developed by the Herreshoff Manufacturing Company years ago…the design, width, and taper of the flukes of a true Herreshoff anchor are such that it is less likely to foul the anchor rode if the boat changes heading than some other yachtsman-type anchors….There is a yachtsman anchor so constructed that it can be disassembled for easy stowage. The shank can be removed from the crown and the stock can be removed from the shank…this collapsible version has much to commend it, for each of its three parts can be stowed separately in convenient spaces…a heavy anchor disassembled into three parts can be brought on deck with ease and assembled there….Yachtsman anchors with dull pointed flukes should be avoided in favor of a sharp design….Some people have improved the ability of the yachtsman type to dig in particularly in hard bottom conditions by having a cylindrical piece of steel with a sharp point welded inside each fluke…requires the anchor be regalvinized…but results in an anchor that is excellent in hard-packed sand….does not reduce the anchor’s holding power in other conditions. (Desirable and Undesirable Characteristics of Offshore Yachts, p. 230 – 1)
- Anchor Roller – An anchor roller is, of course, very desirable in that it allows a plow-type or Bruce anchor to be stowed at the bow and ready, although in bad offshore weather it should be brought below and stored…Be certain the point of the anchor flukes won’t hit the hull when pulled tight on the roller….if you have decided to add a platform for a bowroller and are using teak, don’t bolt directly through the teak to the deck. A better choice is to clamp the inboard end of the sprit or platform to the deck with a metal strap….a convenient anchoring system in which the rode is led back to the cockpit and tripped to run free when the decision is made to lower away….would not be possible without some sort of roller at the bow (Upgrading the Cruising Sailboat, p. 154 – 155)
Anchor Rode
- I recommend all-chain anchor rode. The drawback…is it’s weight, but a cruising boat should be heavy enough to handle this. The extra cost of chain is offset by its longevity, if this chain is properly cared for. …it sometimes requires less scope than does line, it improves holding, and you don’t have to worry about little bits of reef or rock or glass or dinghy propellers or anything else cutting it….Chain always improves holding because its weight keeps it close to the bottom, thus pulling the anchor at an angle more conductive to its digging in. Chain also diminishes the tendency of any boat to sail about an anchor. Chain also settles into sand or mud, acting as an anchor itself. Usually by the time a gust of wind or tidal chain pulls the chain loose from the bottom, the force is spent and the anchor’s hold is less likely to be loosened. (All in the Same Boat, p. 122)
- I leave the chain in the windlass wildcat but still secure it with a heavier nylon rope (heavy enough to hold the boat) attached to the chain with a chain hook and pulled snug. This is then attached to the post or cleat intended to hold the boat. (All in the Same Boat, p. 122)
- We almost always anchor out, and on the U.S. east coast we have done very well with no more than 200 feet of working rode on each anchor. In other areas, such as the Pacific Northwest, you will need more. Remember, you should always be able to deploy at least 5 – 7 times the distance from your roller to the bottom. this is called a “5 to 1” scope. We often use a 10 to 1 in storms – the more chain the better holding. (All in the Same Boat, p. 123)
- Use a reasonable amount of scope. The general rule of thumb is 5 to 7 feet of anchor line per foot of water depth. Of course, this may vary according to the wind, bottom and waves…the safety of you boat depends just as much on the quick retrieval of your anchor as on its quick deployment. Of the many reasons for this, I’ll mention the two most important ones: 1) When the boat upwind drags down on you, the only salvation may be a quick escape…if you don’t get out of the way, the boat may crash into you, sending both of you downwind. Even if the boater doesn’t crash into you, his hook, dragging along the bottom, may snag your anchor or its line…once entangled, neither of you could do much to save yourselves. 2) Your boat may drag…until you get all your hooks clear of the bottom, you will not be in control. you will probably drift downwind and sideways into whatever is in your path. (All in the Same Boat, p. 134)
- Non cruising boats – should carry two anchor cables or rodes, of approximately 300 feet each. Nylon is by far the preferred material because of its strength and stretch, which absorbs the shock loads in a rough sea so that the anchor does not pull out of the bottom. One of these rodes should be on the heavy side – about ¾” in diameter for a 50’ vessel. The second can be substantially lighter for convenience in normal conditions…At both ends of the rodes, there should be eye splices with stainless-steel thimbles to protect the line from the shackles. (Desirable and Undesirable Characteristics of Offshore Yachts, p. 234)
- If you are likely to anchor over coral or in a harbor with broken glass…carry a short (15-20 foot piece of chain) that can be bent onto a nylon anchor rode. The likelihood of cutting a nylon cable on the bottom is not great, but it has happened. (Desirable and Undesirable Characteristics of Offshore Yachts, p. 235)
- Rig two pieces of rubber chafe-guard or some equally effective material to prevent the anchor cables from chafing where they pass over a bow chock or through a hawse pipe. (Desirable and Undesirable Characteristics of Offshore Yachts, p. 235)
- Cruising boats – weight not a consideration, an all chain rode often used successfully and, with proper windlass aboard, is easy to stow. Chain will not chafe or cut, and it provides a beneficial catenary factor so that less scope is needed, compared to nylon…[in heavy winds] there is no stretch and the shock loadings will dislodge any anchor…Hook a chain grab hook, attached to a suitable nylon anchor line, onto the chain forward of the bow and secure the line aft around the largest winch and to a cleat. Slack off the chain and take the strain on the nylon. The extra stretch of nylon allows some stretch in the rode (Figure 15-2. The stretch can be increased by further slackening the nylon line. (Desirable and Undesirable Characteristics of Offshore Yachts, p. 235)
- Catenary – In physics and geometry, the catenary is the curve that an idealised hanging chain or cable assumes when supported at its ends and acted on only by its own weight. The curve is the graph of the hyperbolic cosine function, and has a U-like shape, superficially similar in appearance to a parabola
- Galvanized chain should last for a number of years if its rinsed off periodically with fresh water. Both nylon and chain rodes should be shackled to the anchor, and each shackle should be wired so the pin does not back out. Stainless or galvinized shackles may be used, but be certain that the rated shackle strength is at least as large as the [rode]. (Desirable and Undesirable Characteristics of Offshore Yachts, p. 235)
- …the bitter end [of the rode] should be stoutly tied to a through-bolted padeye below deck. In case of emergency, the rode can be freed by cutting the rope lashing. (Desirable and Undesirable Characteristics of Offshore Yachts, p. 235)
- Rodes should be marked so the crew can determine the amount of scope used. (Desirable and Undesirable Characteristics of Offshore Yachts, p. 235)
- Because we do most of our cruising in regions with a lot of coral, I insist on having an all-chain rode on the primary anchor. In addition to its chafe resistance, chain is also the easiest rode to handle because – when properly set up – it is netirely self stowing. The drawback is it’s weight.
- For the secondary anchor, we have a ⅝”, three strand nylon rode, but with 15 feet of chain at the anchor to hold the shank down when setting the anchor.
Bow Platform
- A properly designed and constructed bow platform is a major component in serious cruising boat anchor handling system. To be effective, it needs to incorporate the following features: (Cruising Handbook, p. 107 – 8 )
- Double bow rollers, so that two anchors can be handled and stowed.
- Sufficient separation between the two rollers to keep a plough type or similar anchor and a fluke type anchor from fouling one another, regardless of which is launched or retrieved first
- Sufficient clearance from the bow of the boat to allow the anchors to hang vertically, rotate their rodes, and swing about without damaging the topsides
- Bow rollers with a minimum diameter of 3 – 4”, with a concave surface to keep the rode in the middle, and constructed of a material that withstands abrasion and severe snubbing loads (bronze is best…)
- The cheek plates installed close enough to the bow rollers (1/4” or less) to prevent a ½” nylon rode under tension from jamming between a roller and a cheek plate
- Angled cheek plates or welded pipe chafe guards on either side of the bow rollers that provide a fairlead, without chafe, onto the bow rollers at any likely shearing angle (the angle the boat forms to its rode as it moves about at anchor)
- An attachment point for a snatch block that provides a fairlead onto the bow roller from any angle (including astern) to facilitate kedging off after running aground (…it is tough to achieve, but will be much appreciated if ever needed)
- A strong pin through the cheek blocks or some other mechanism to stop the rode from jumping off the roller when the boat is pitching up and down in a short, steep chop (in extreme conditions, this pin will be subjected to heavy loads; it must be built to take them)
- A mechanism for securing the anchor when at sea (maybe the same pin as described previously)
- An attachment point for the tack line of an asymmetric spinnaker, so designed that it keeps the sail’s tack clear of the bow pulpit and any navigation lights, and allows a fairlead aft for the tack line
- …many bow platforms incorporated a chain stopper or chain pawl (a ratchet device that allows the chain to be pulled up but not led out until released; These are useful, although by no means essential, particularly if a powered windlass is fitted)
Chain & Deck Pipes
- …look for one that can be closed off tightly….However, a watertight hatch is more easily sealed than even the best chain pipe. (Upgrading the Cruising Sailboat, p. 157)
- Chain pipes can let in a surprising amount of water in heavy weather. They need some kind of reasonably weatherproof cover that will not be dislodged when solid water comes over the foredeck. The caps supplied with most windlasses keep out much of the water. In seriously heavy weather, the chain or rode needs to be disconnected so that the pipe can be plugged with rags or something similar. (Cruising Handbook, p. 113)
Mooring Hardware
- The best bow chocks are the so-called Skene types, which have big channels in which the line is securely contained by large overlapping horns. (Desirable and Undesirable Characteristics of Offshore Yachts, p. 110)
- …they [mooring cleats] are a pain if they are not big enough for the lines they must handle. There should be two of them, not one; even with two cleats you may find yourself in situations – such as raft ups – when you must lead two or more lines to each cleat. (Desirable and Undesirable Characteristics of Offshore Yachts, p. 110)
- Bow chocks, hawse pipes and hawseholes should be constructed so that they have fair, well rounded surfaces to minimize chafing and are strong enough to handle severe loads. There should be two large mooring cleats through-bolted to the deck. All of this gear should be placed so that there will not be any acute angles where anchor cables pass by. (Desirable and Undesirable Characteristics of Offshore Yachts, p. 235)
- Positioning of cleats is important. They should be angled about 15 – 20 degrees from the lead of the halyard or sheet to distribute the load on the bolts holding the cleat to the deck, and to make cleating and uncleating the line easier. Most cleats are are much too small for the size and number of lines the crising sailor will want to use them for. Naval architect Ian Nicolson says that cleats on most boats can be enlarged 40%. (Upgrading the Cruising Sailboat, p. 165)
- Breast cleats mounted on deck amidships are seldom seen on boats, but are of immense help when rafting to another vessel, furnishing a place to cleat off a fender or spring line at the dock, or to attach the rode of an anchor used to keep the boat off the dock. Select the largest cleat feasible for the location, and mount it clear of the stanchions and shrouds. (Upgrading the Cruising Sailboat, p. 165)
- In addition to large cleats in the bow for anchoring and mooring, there should be large cleats on each quarter. Four-bolt cleats are stronger than two-bolt cleats. Be sure to buy good quality…This brings to mind the business of using large thru-bolts and backing plates of plywood, stainless steel or aluminium. There is no excuse for having a flimsy piece of deck gear, because no matter how light the use you intend for it, sooner or later someone will inadvertently test it for you. (Upgrading the Cruising Sailboat, p. 166)
- A note on cleating lines: Many persons seem to overdo it when cleating a line. Perhaps they believe the additional wraps and hitches lessen the changes of the line coming loose. IN fact, one wrap around the base, followed by one figure eight, with the last part tucked under is perfectly secure. Tying a Gordian knot on ever cleat only increases the time required to uncleat the line. And nearly every line on a boat should be capable of being removed instantly. (Upgrading the Cruising Sailboat, p. 166)
- All cleats on the mast (and many elsewhere) need to be large enough to take not only the two turns needed to cleat off a line, but also 9at least on the top end of the cleat) to then comfortably hold another turn that is used to stow the line (as a general rule, the length of a cleat should be at least 16x the iameter of the line to be stowed on it). Too often, the horns are barely long enough; in rough weather, the stowed line comes loose and streams back down a side deck or overboard. (Cruising Handbook, p. 75)
Fenders & Buoys
- A cruising boat needs several good-size fenders. Often, they end up tied to the lifelines, but this is far from ideal. when hit by a breaking wave, they are likely to cause damage. A cockpit locker is best adapted to take them. (Cruising Handbook, p. 102)
- When anchoring over a foul bottom, the anchor should be buoyed to permit a secondary method of retrieval. Run a short but fairly light length of line from the crown of the anchor to a small buoy. If the anchor fouls and will not come up free when you haull on the rode, it will almost always release when you pull up on the trip line at the buoy. (Desirable and Undesirable Characteristics of Offshore Yachts, p. 235)
Windlass
- If there is a boat, a reef, or a shallow area downwind…you have no time to lose. On several occasions, after quickly cranking the anchor and chain back aboard and tring to reset the anchor I was exhausted. I couldn’t crank it in fast enough when it dragged again…I’ve watched many people struggle with a manual windlass this way, and I’ve seen quite a few boats dragged ashore or into other boats because the crew couldn’t get the chain and anchor in fast enough….the entire backup of the windlass – which should be very strong and wide – serves as the attachment point for the anchor rode. (All in the Same Boat, p. 121, 122)
- We wouldn’t have a vertical windlass, and cant imagine why anyone who has done much anchoring would. We prefer one with a horizontal shaft. One side should be able to handle both rope and chain, the other chain only, unless you can afford to have both configurations on both sides. You must be able to progress fro rope to chain as your rode changes. (All in the Same Boat, p. 121)
- Newer windlasses offer chain/rope drums for chain/rope splices. We would not use these because we believe that chain/rope splices chafe easily and that the groove in these wheels is too likely to damage rope. We prefer to transfer the rode from gypsy (rope drum) to wildcat, although this too can be difficult and dangerous. (All in the Same Boat, p. 121 – 2)
- A windlass mounted between the bow roller and forward mooring cleat(s) is a useful piece of gear on any boat, and essential on most boats larger than 30 feet. It can take the strain out of shipping anchor in ordinary conditions, and is one of the best ways to break out an anchor fouled on the bottom. (Upgrading the Cruising Sailboat, p. 156)
- Larry Pardey points out that windlasses with aluminum cast bodies should be avoided in favor of bronze or iron bodies…an aluminum housing in direct contact with stainless steel bolts will corrode and make disassembly difficult. (Upgrading the Cruising Sailboat, p. 157)
- Windlasses come in horizontal and vertical configurations. with both types, effective trouble-free operation depends on establishing a fairlead from the bow roller to the windlass, and ensuring a freefall from the windlass to the anchor locker. The fall must be adequate to keep the line or chain running smoothly off the drum or gypsy (wildcat). With chain, the gypsy must be precisely matched to the rode; to ensure that it is, the chain is best bought from the windlass manufacturer. The windlass needs a properly positioned stripper to pull the line or chain off. (Cruising Handbook, p. 113)
- Although windlasses are not designed to handle snubbing loads, at times it is inevitable that they will. To avoid being torn out of the deck, a windlass needs a very substantial backing block. The deck also may need reinforcing. (Cruising Handbook, p. 112)
- All anchor chain must be calibrated if it is to be used with a windlass. The chain and windlass gypsy need to be matched to each other – either the chain supplier or the windlass manufacturer can assist you with this. (http://www.rocna.com/)
Image Gallery


Comment Form