Lockers & Stowage
Project Logs
February 7th, 2012
Interior locker building has been on halt as I moved to the exterior of the boat. My main focus out there has been deck lockers and the cockpit. I look forward to moving back into the interior and seeing how the rest of the lockers take shape.
December 29, 2011
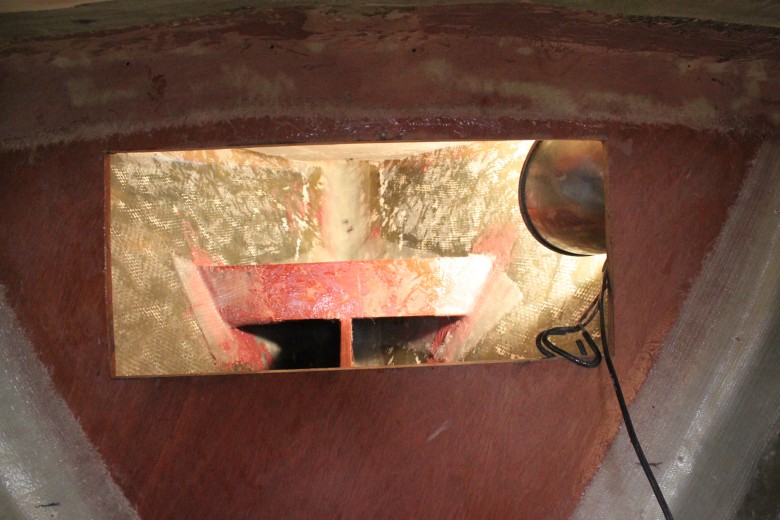
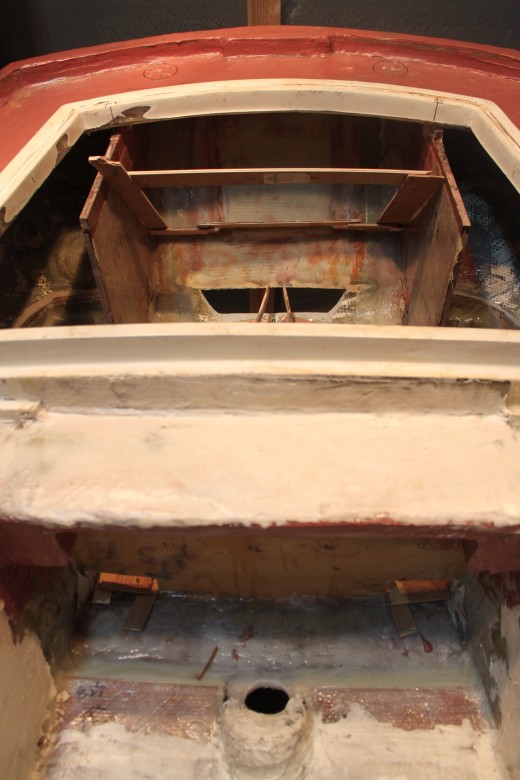
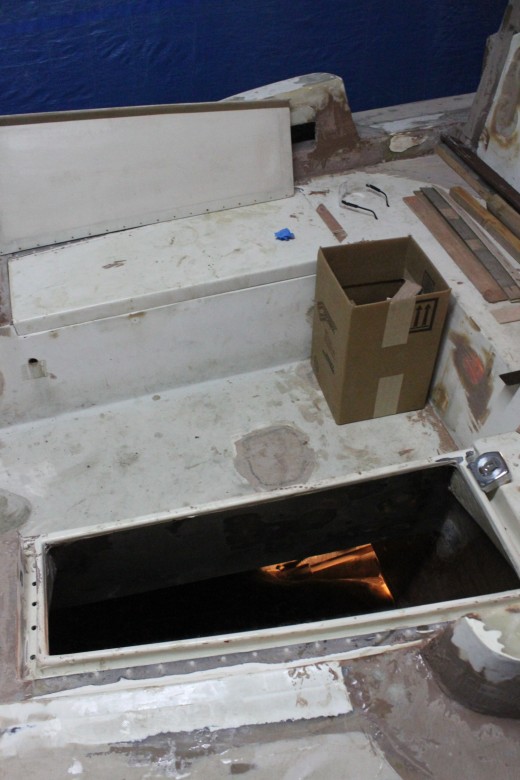
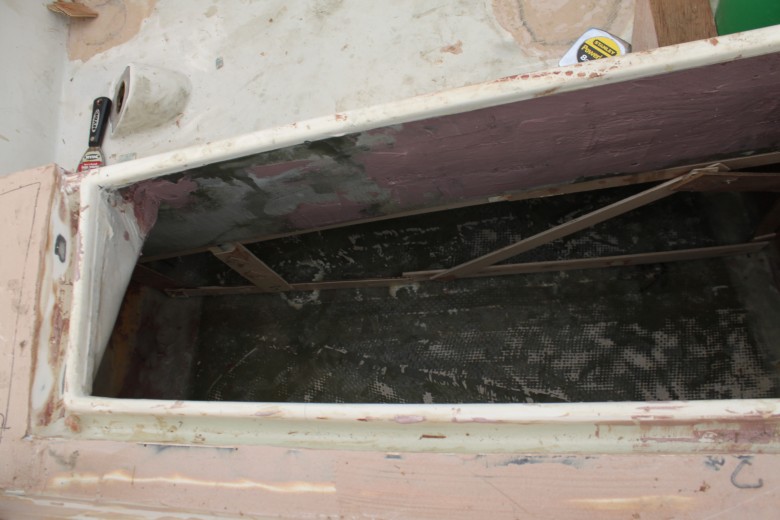
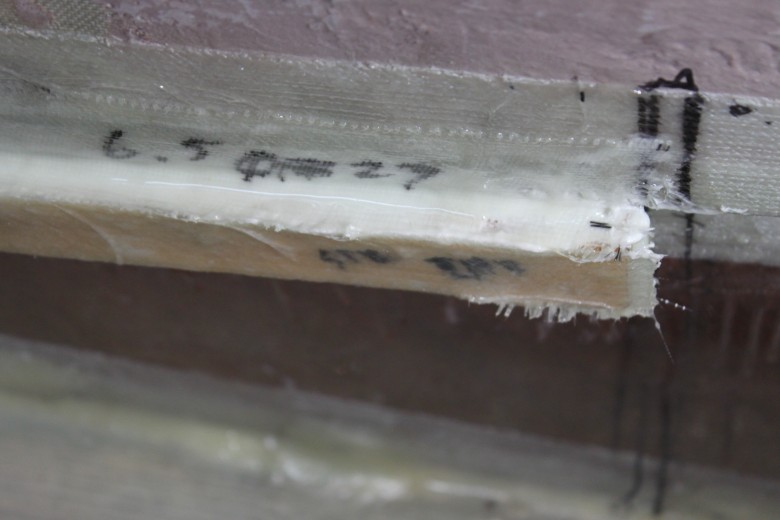
The stern chain locker is complete. The stern chain locker is built into the lazarette and will allow me to easily stow 1 – 2 anchor rodes. Having anchors on the stern is required in some anchoring situations, so I view it as important to have immediate and easy access to the rodes.
Originally, the stern locker was going to be a bit larger to accommodate the cockpit drainage channels draining through it, plus allow bilge pump outlets to drain via this locker and out transom drain holes. However, as the lazarette came together and I found that routing the bilge pump outlets through a stern chain locker wasn’t going to work very well (due to pipe-to-hose connection sizes as well as too long of a run from the pump to the outlet). So, I cut down on the size of the chain locker and now have it draining via a PVC drain into the cockpit drain channels below.
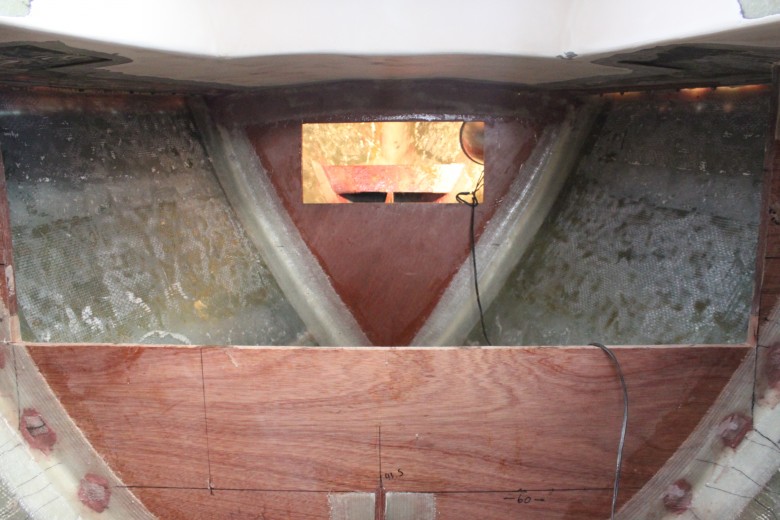
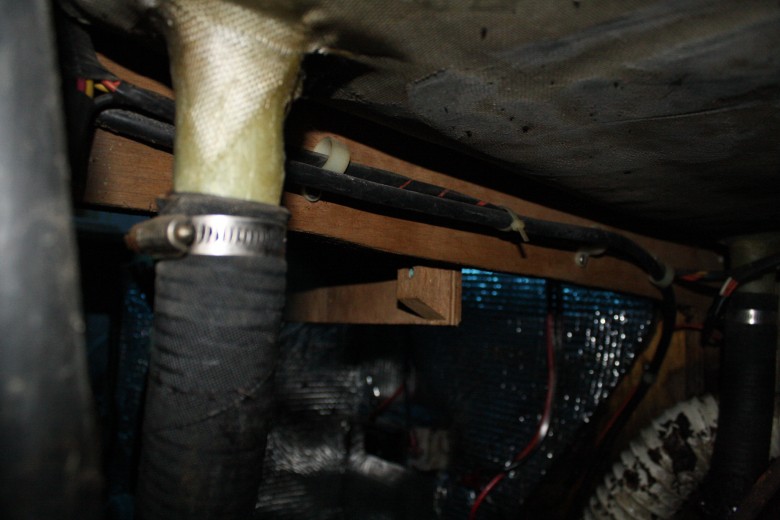
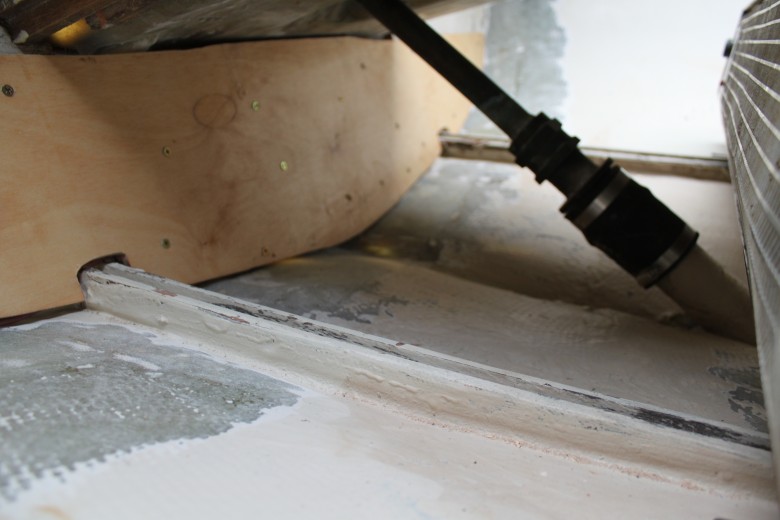
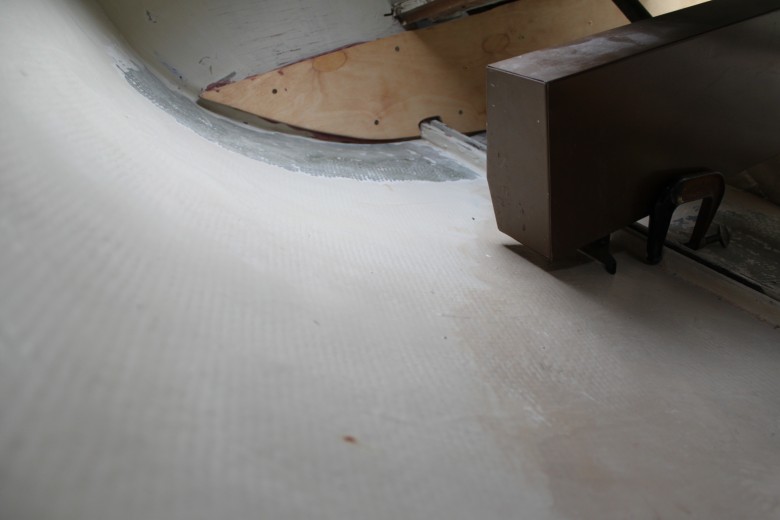
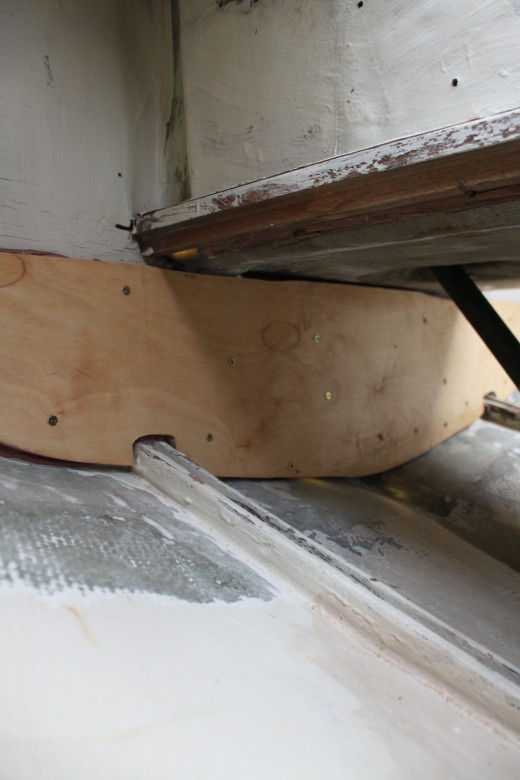
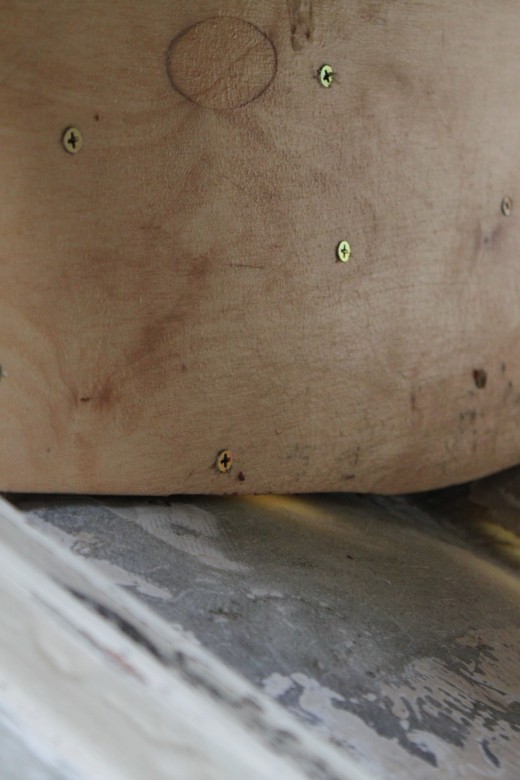
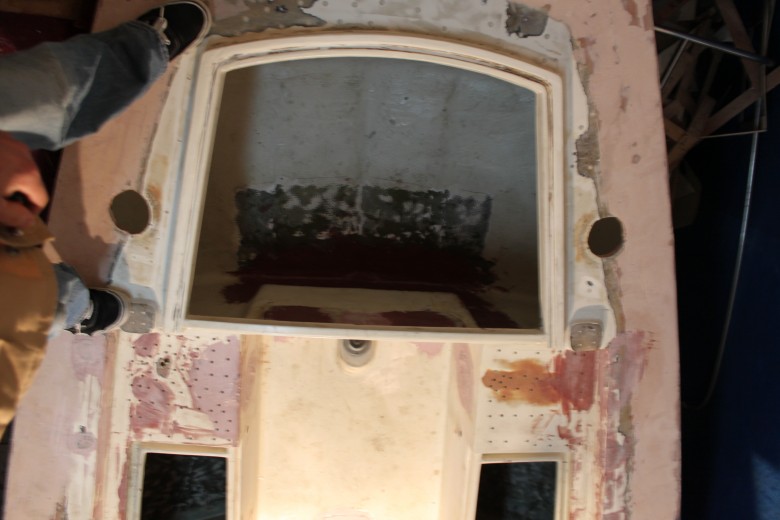
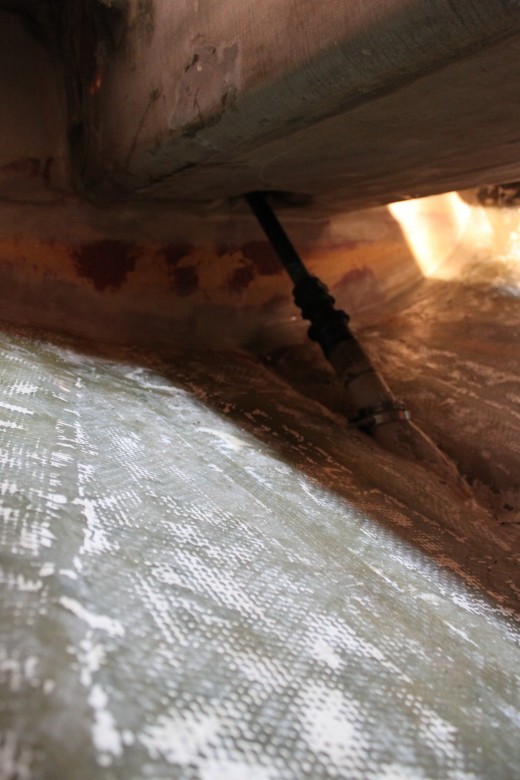
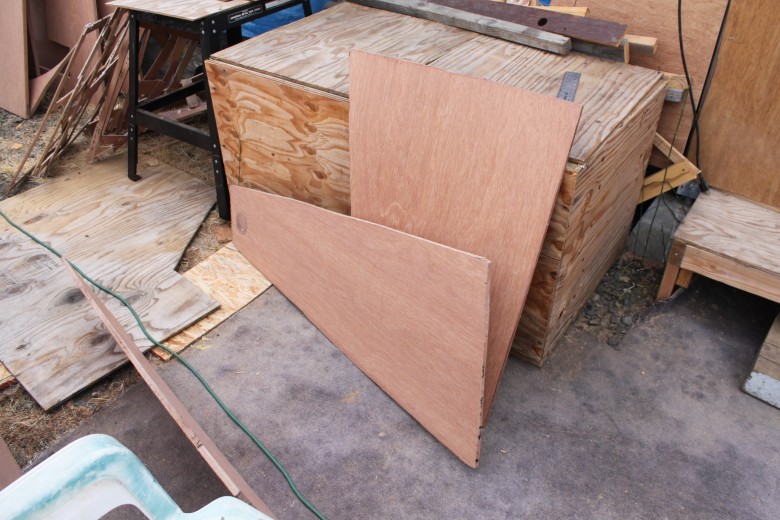
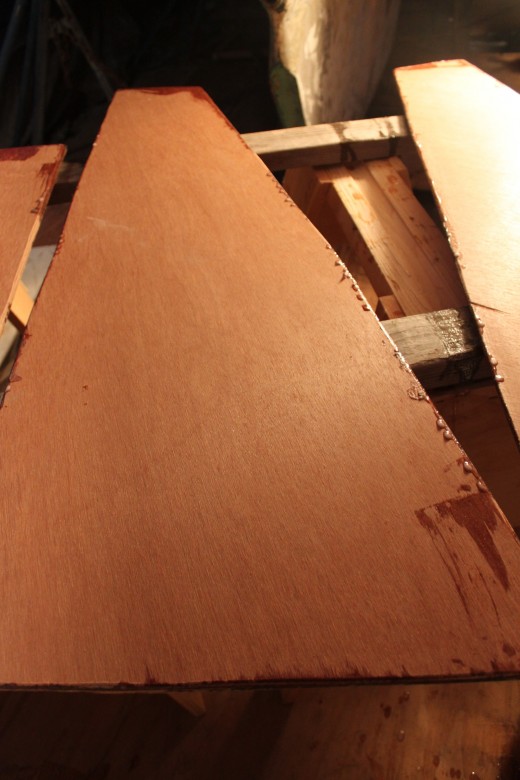
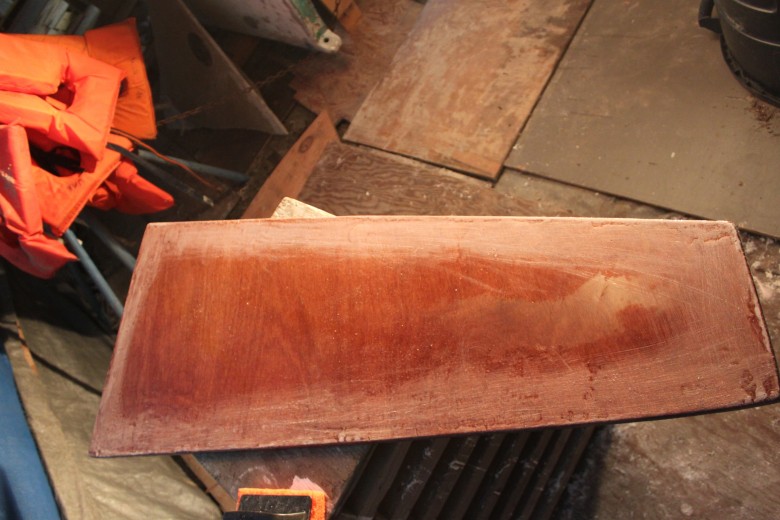
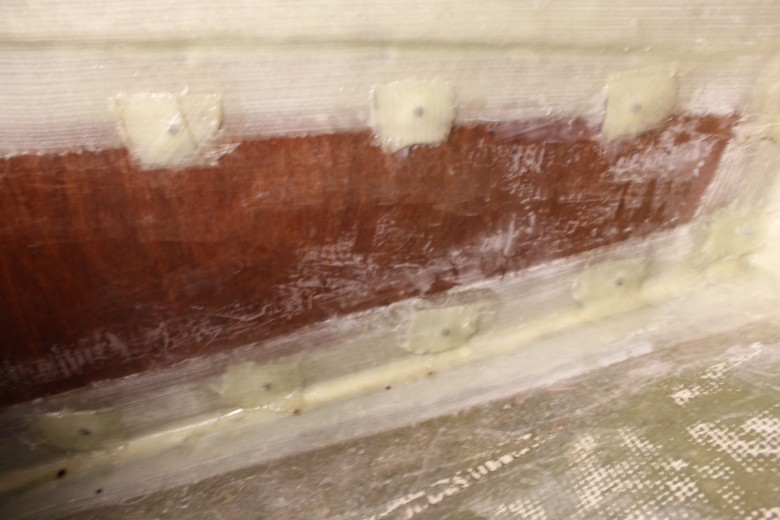
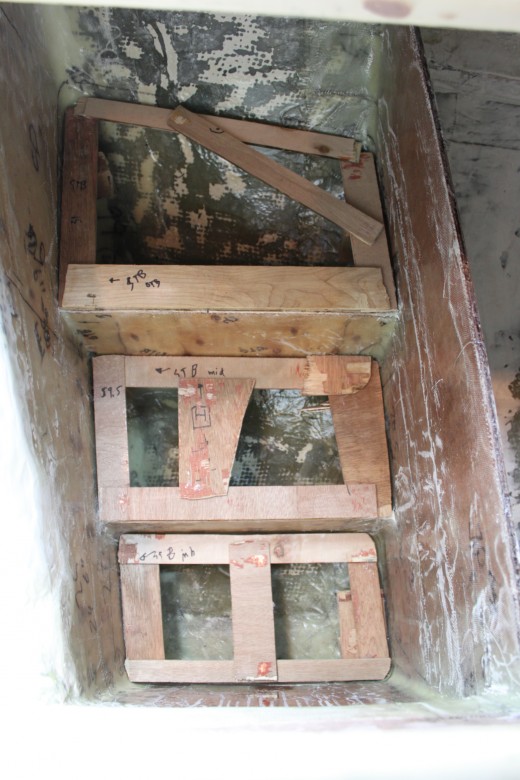
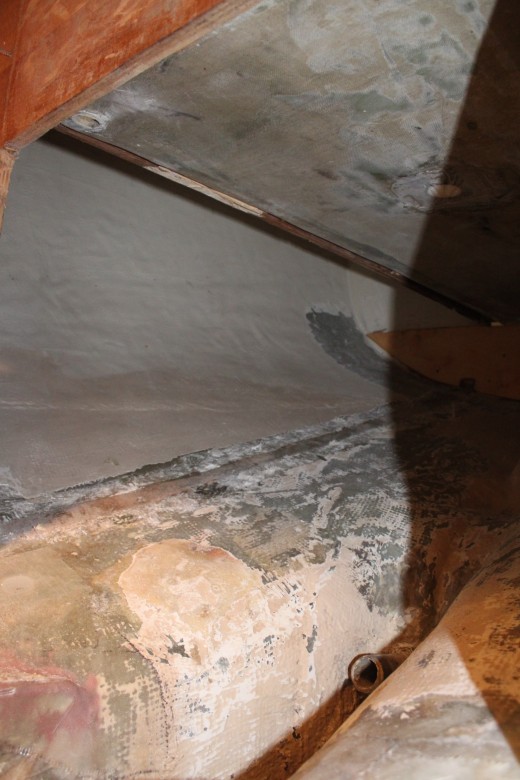
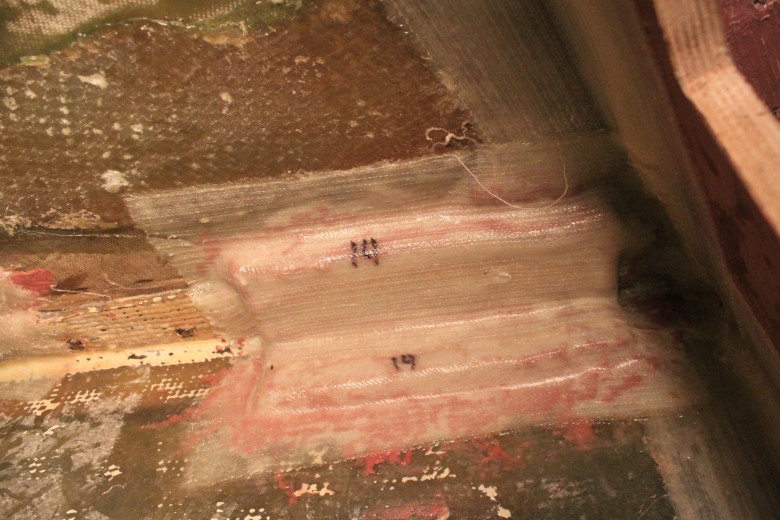
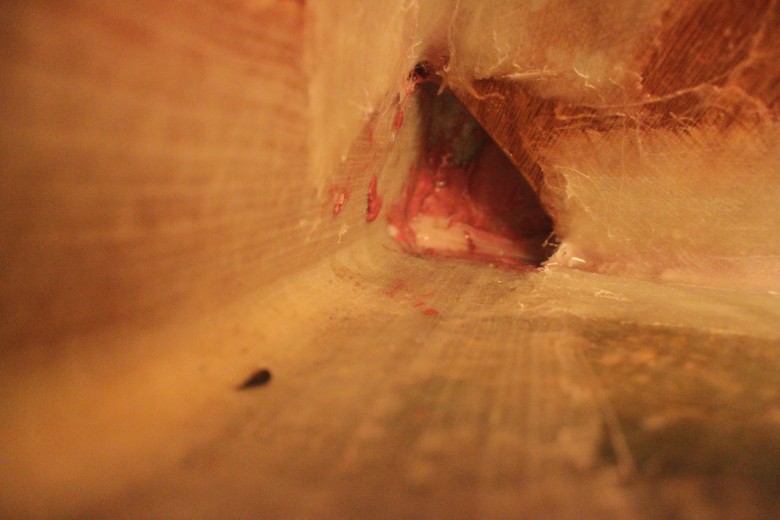
For the stern locker enclosure, I used 1/4″ meranti marine plywood placed between 2, 1/2″ meranti marine plywood pieces. The 1/4″ piece was glassed heavily with 1708 biaxial and then faired smooth so that mold, mildew wouldn’t accumulate and water would drain easily. I’ll be uploading some final images of this chain locker before long, but for now here’s an image of the stern chain locker nearing completion:
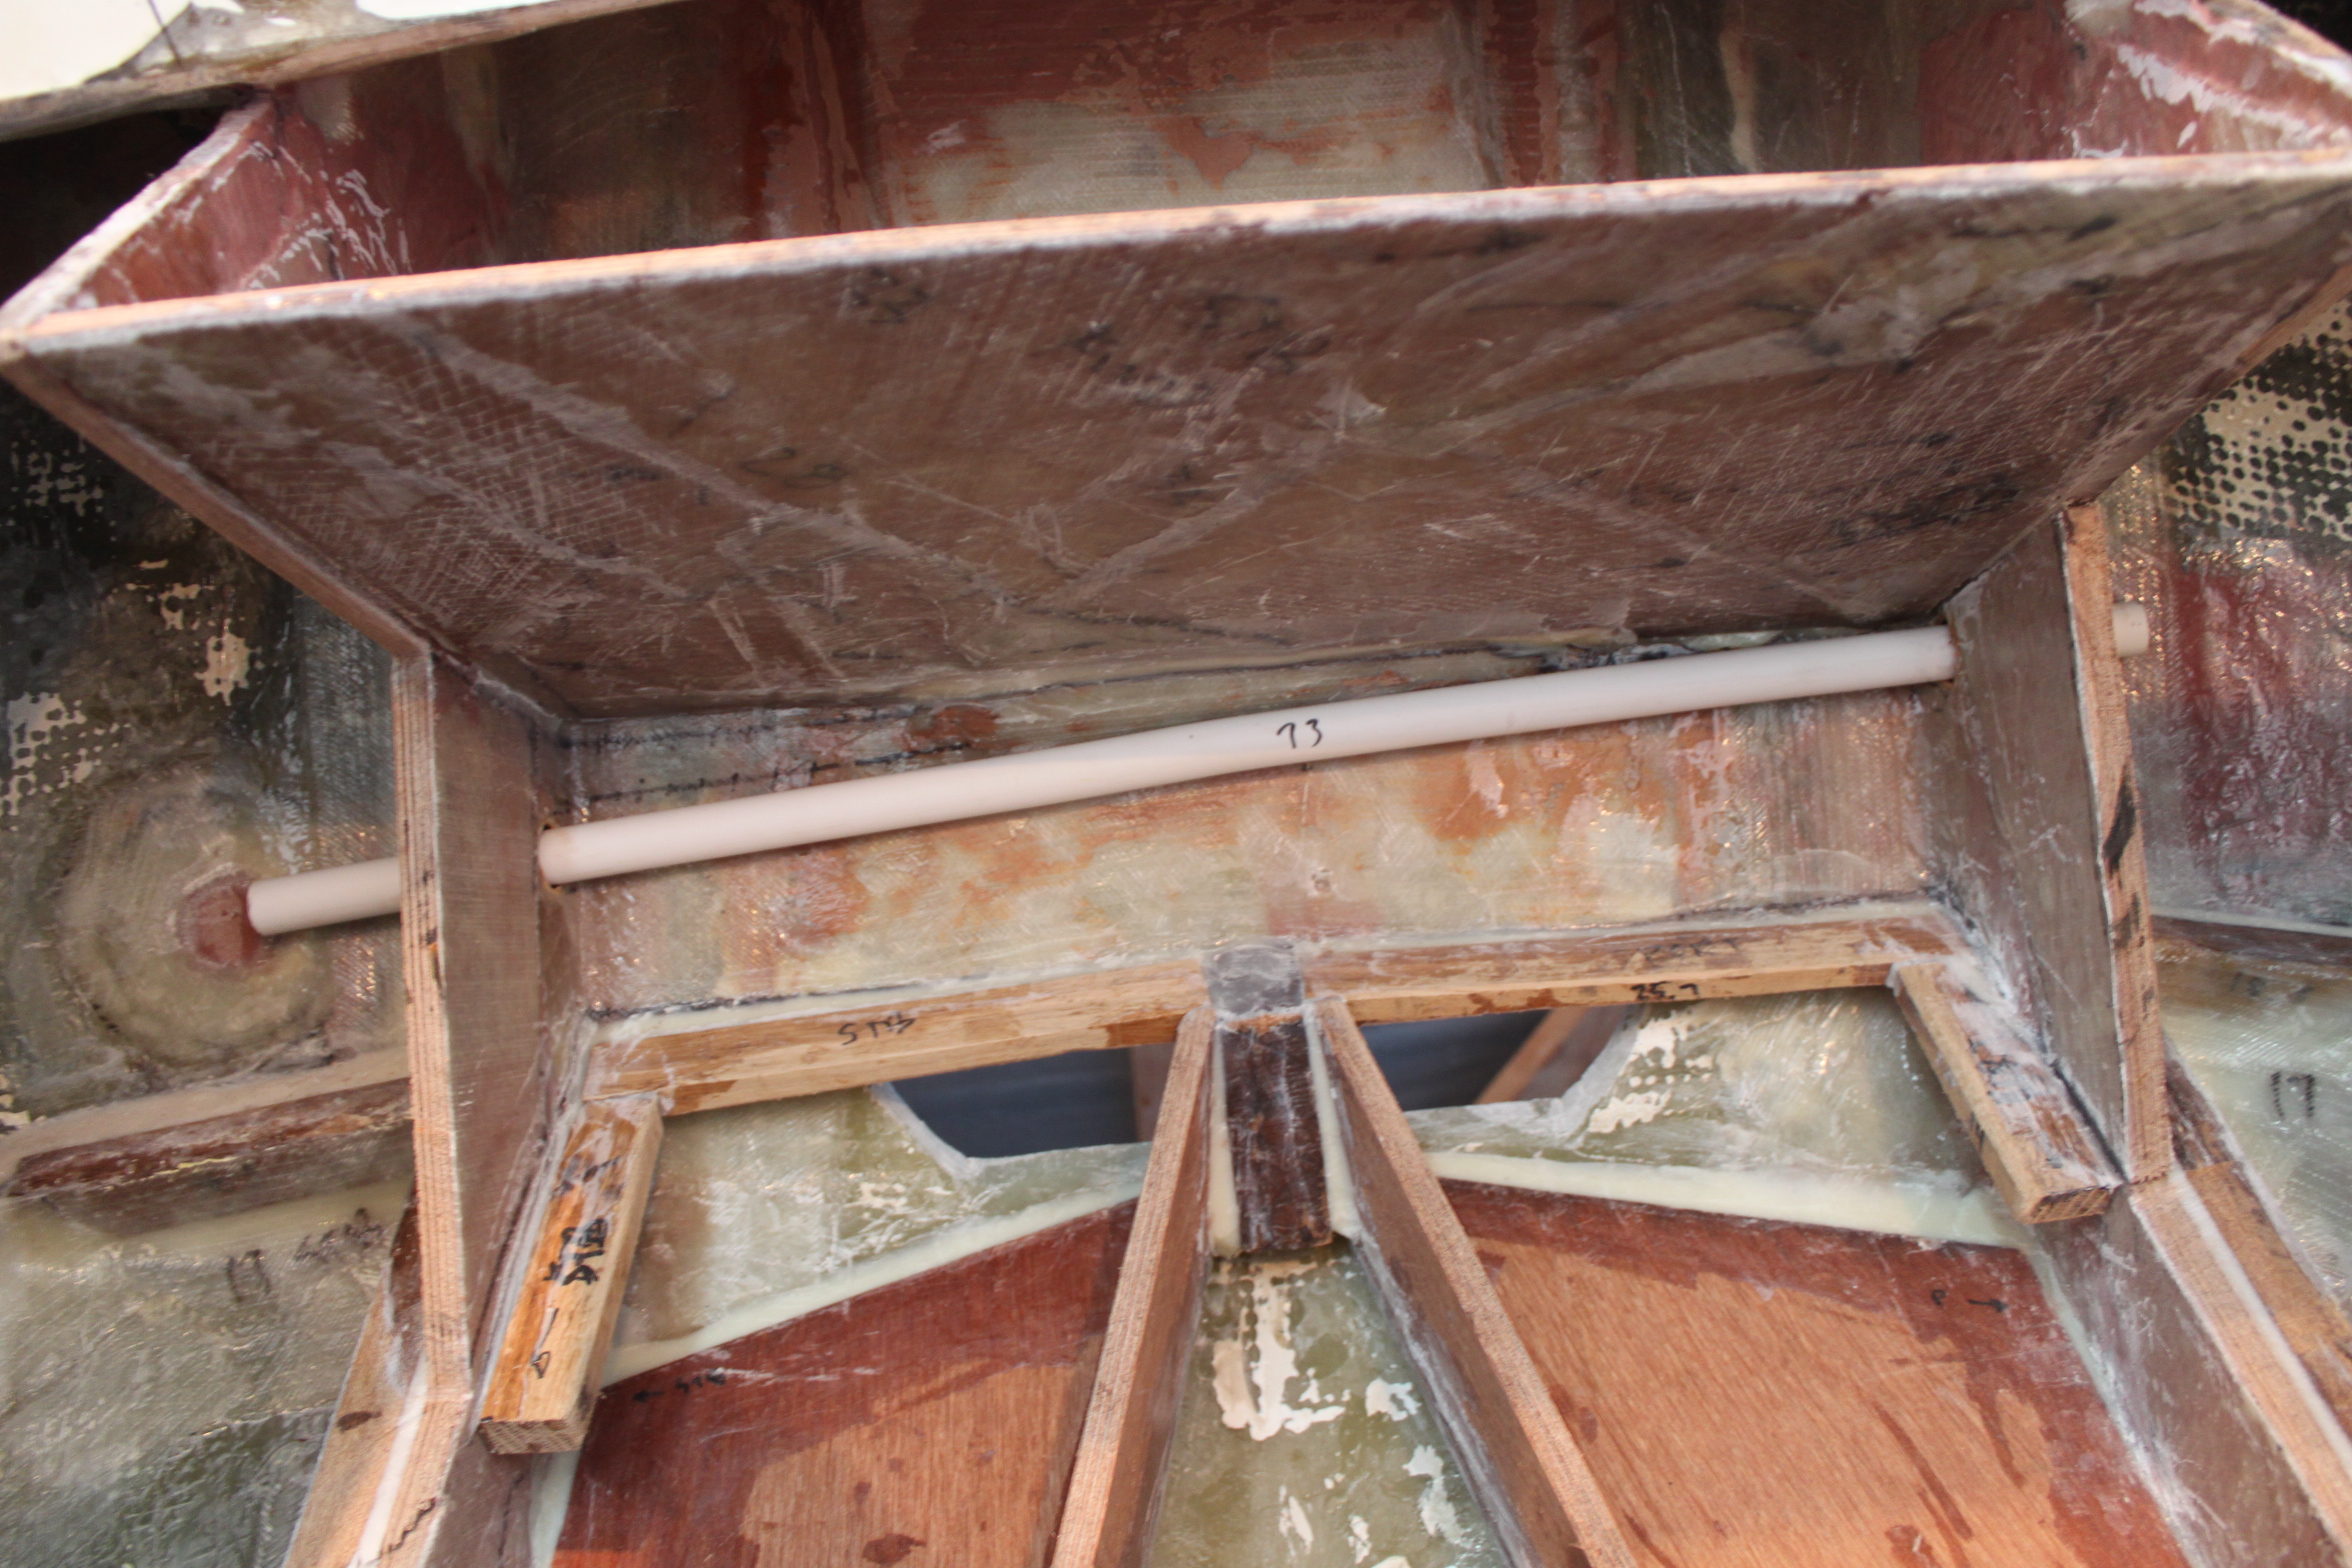
Image showing the chain locker prior to fully glassing in the 1/4″ piece of meranti and the wiring run for solar panels below.
December 27, 2011
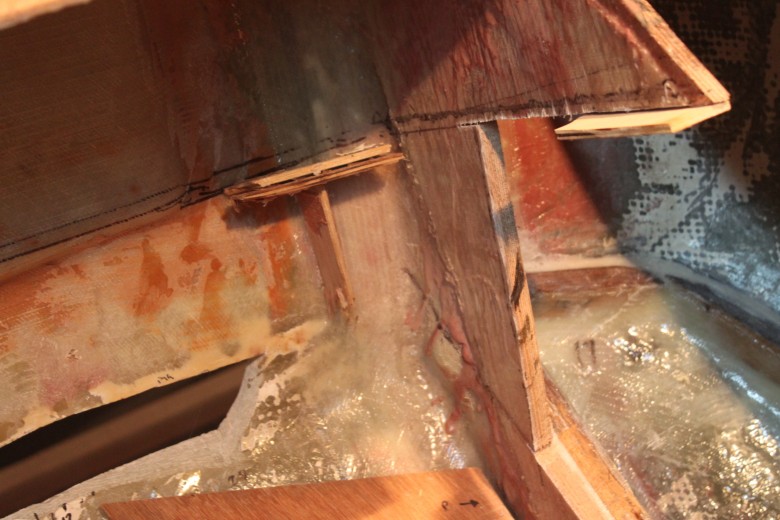
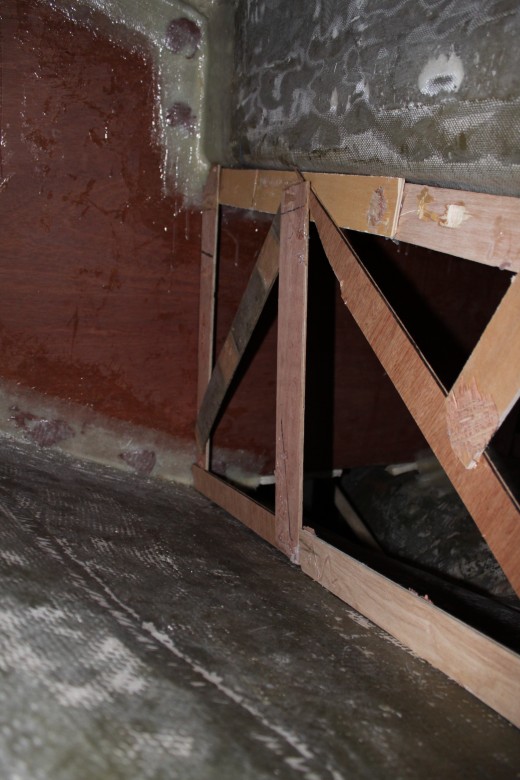
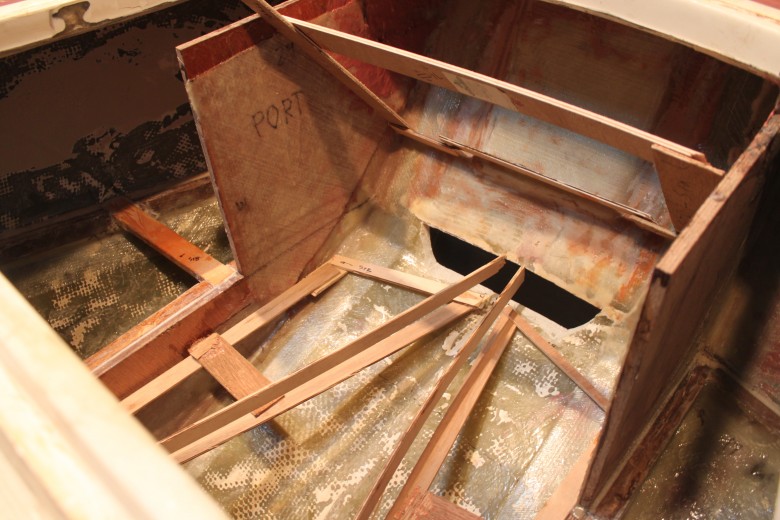
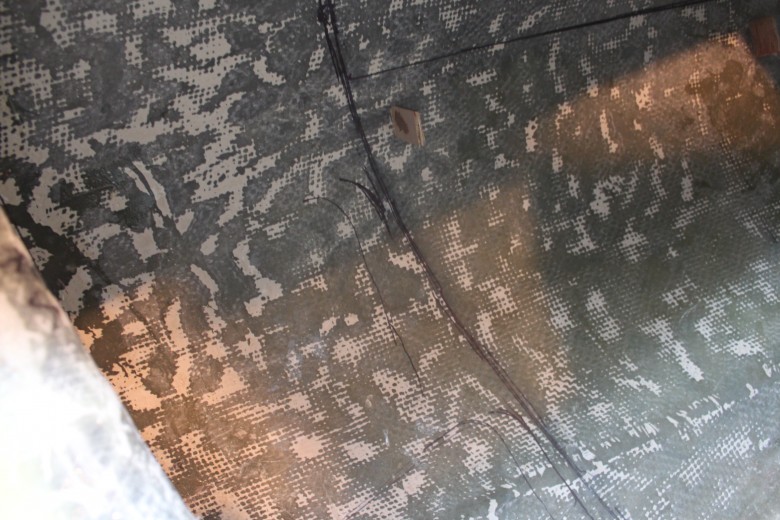
Work continues on both cockpit lockers: the lazarette and sea lockers. The lazarette is essentially complete, but I’m putting the finishing touches on the drain channels before I can glass in the shelves for this locker. The sea lockers have been my main focus for the past week or so. The key projects in these lockers include a wiring run for the solar panels and stern light (created with PVC), engine room ventilation (created with ABS pipe), jerry can stowage, plus stowage for other miscellaneous items (such as paint, epoxy, diving gear, etc.).
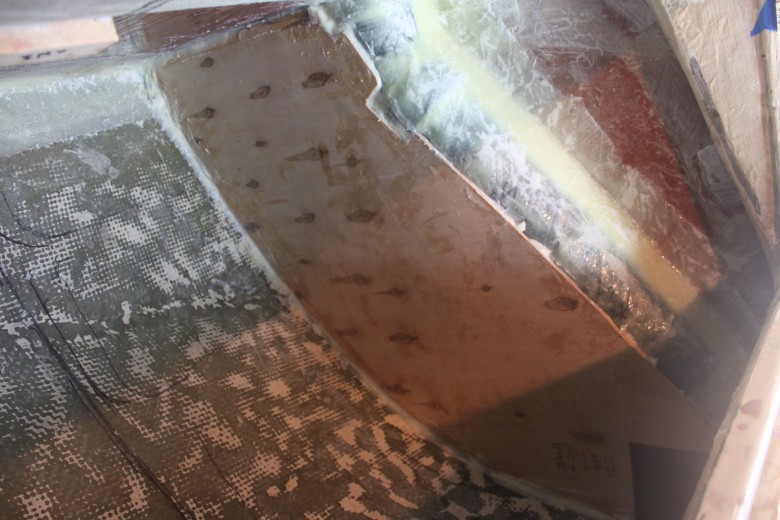
The wiring run and engine room ventilation are covered in other posts (see previous links), so for this page I will be focusing mainly on the stowage I built in these lockers. At this time, I’ve built the shelf supports and initial wall for the jerry can stowage and will be glassing in the final pieces later this week. Once complete, I’ll put together a full run down of how both the lazarette and sea lockers were built.
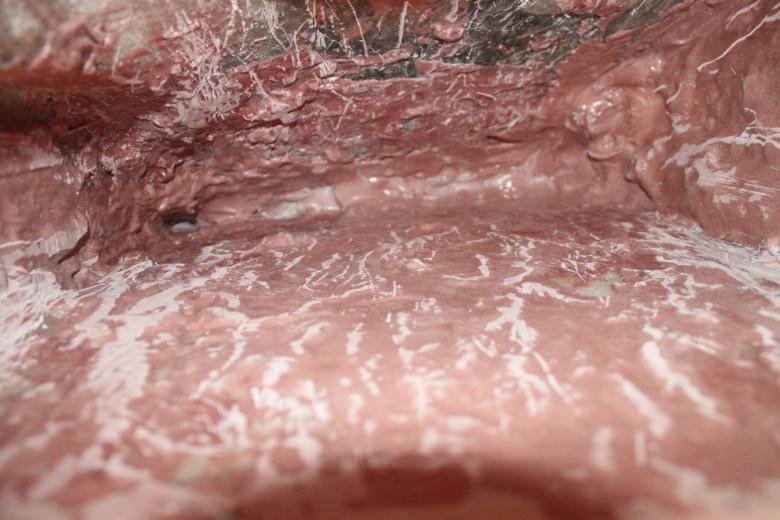
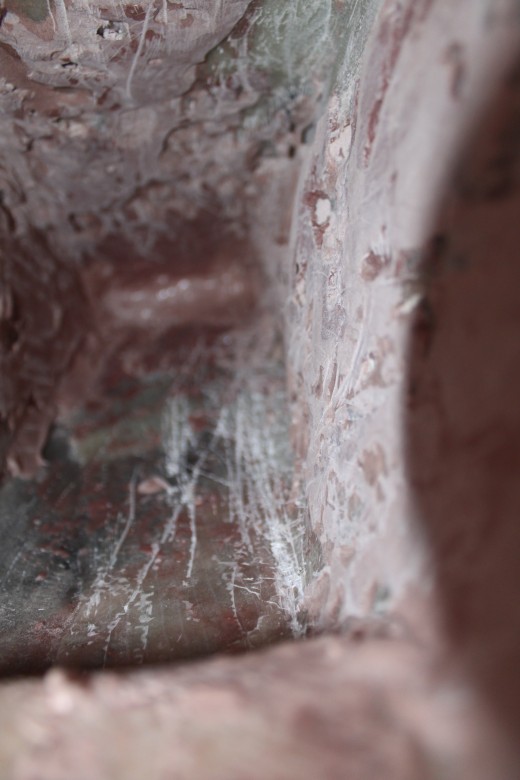
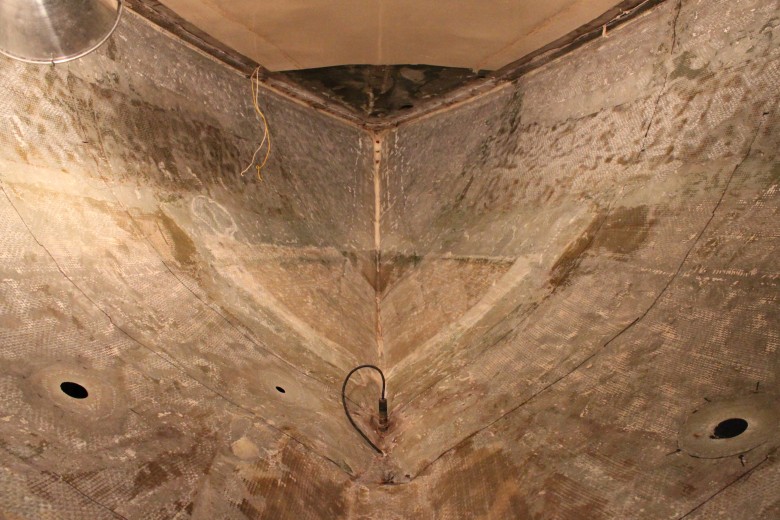
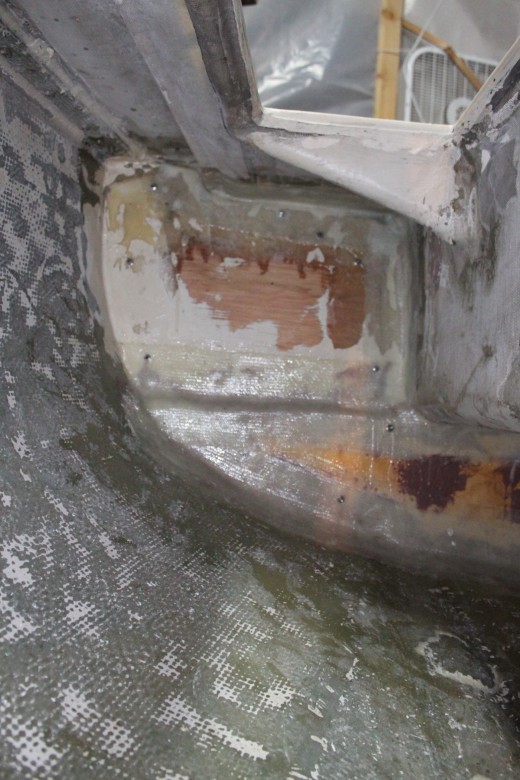
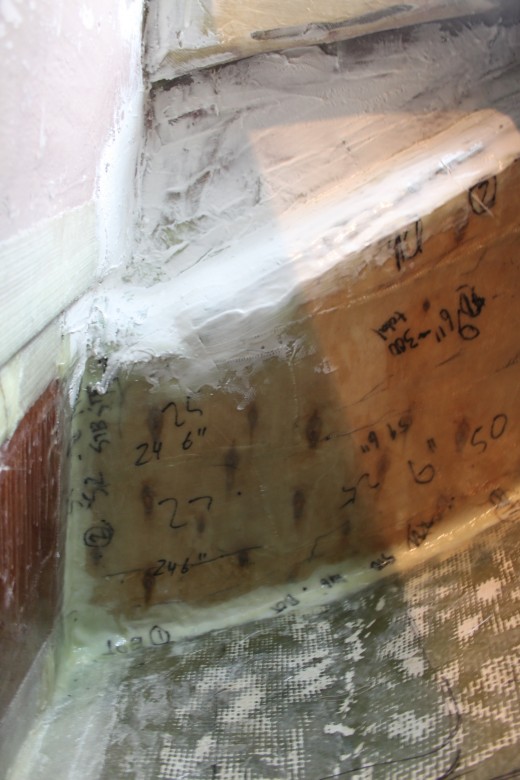
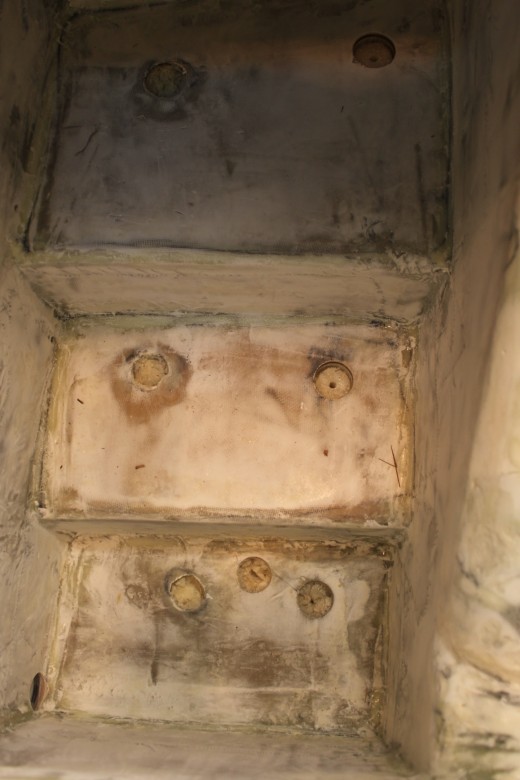
I also faired the chain locker a few weeks ago. By fairing the forward chain locker, I hope to make it very easy to keep clean and free from any mold or mildew that might grow since the locker will often be wet.
October 25, 2011
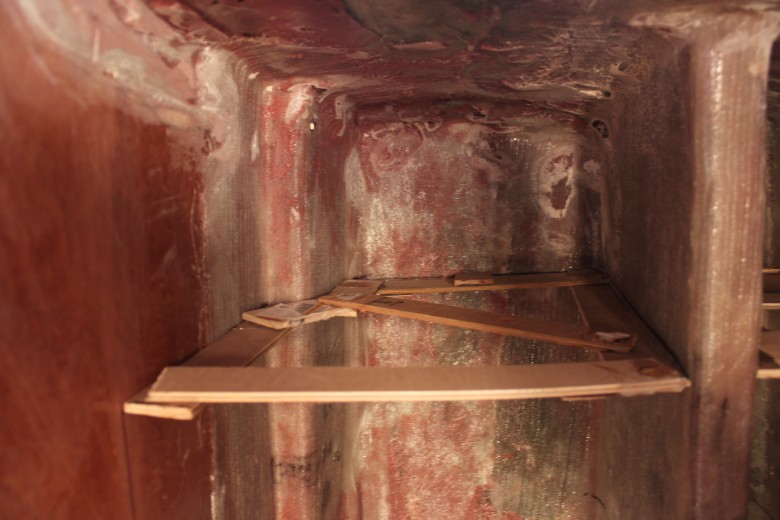
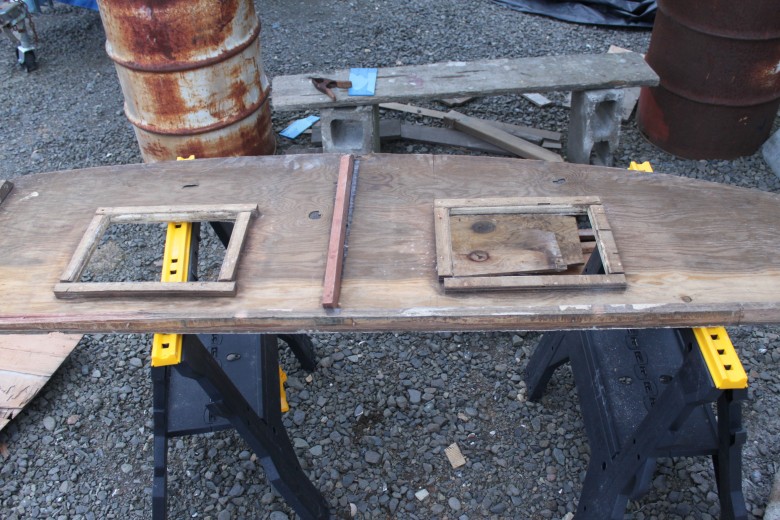
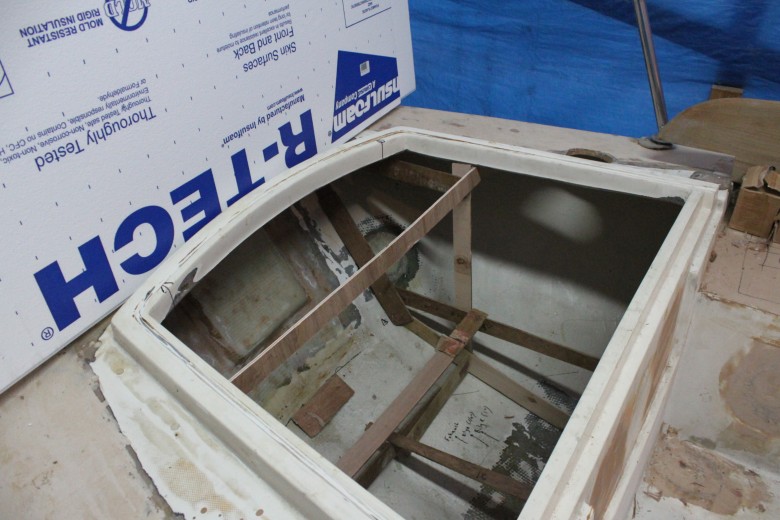
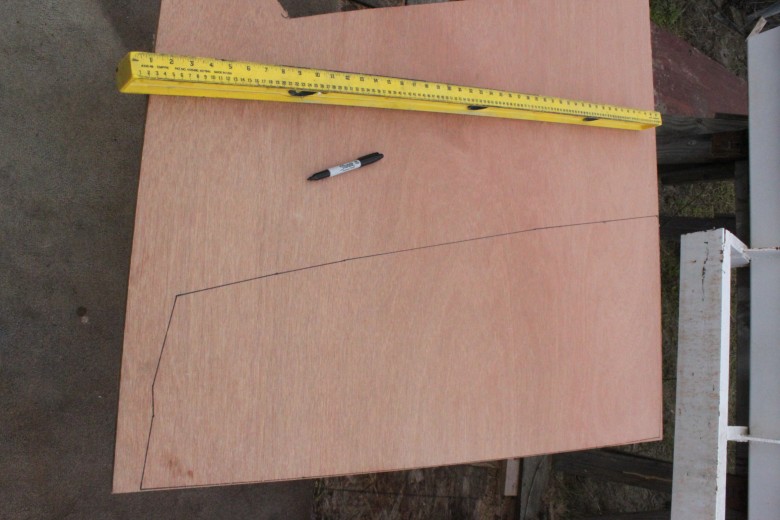
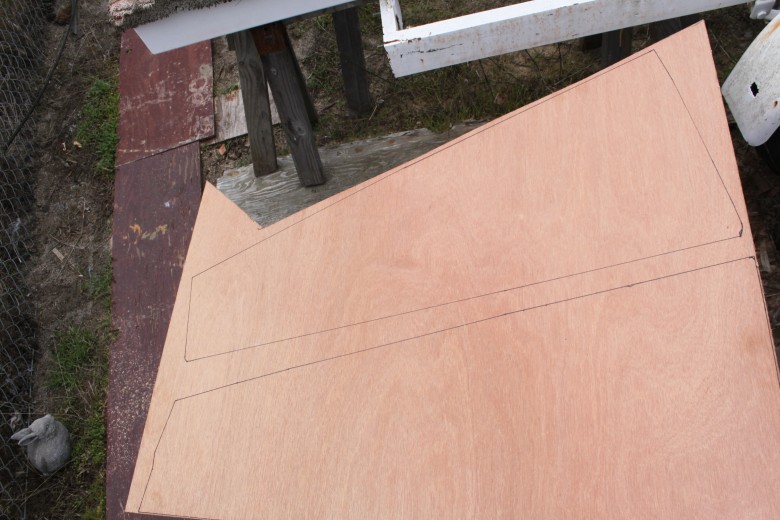
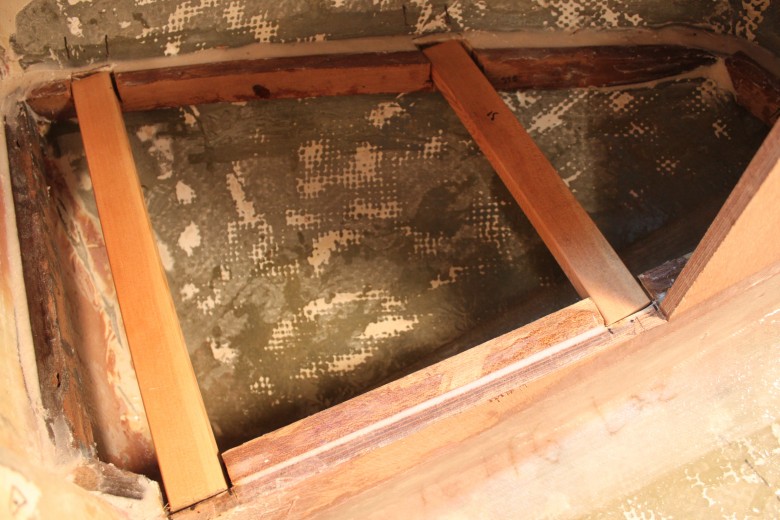
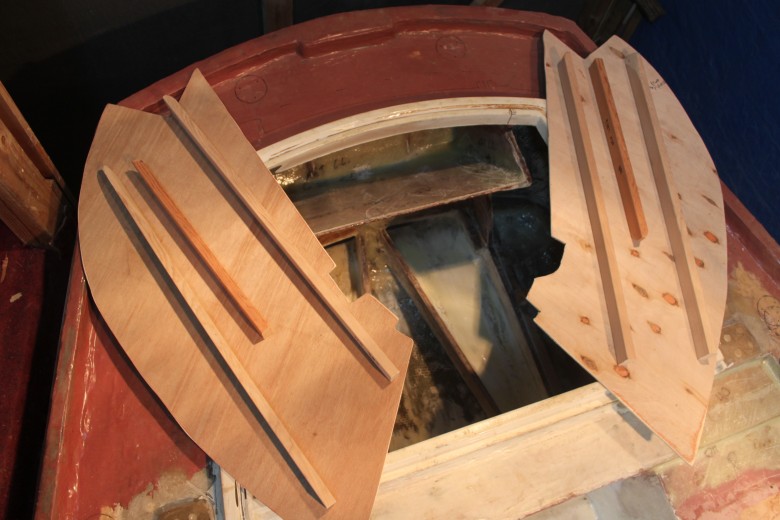
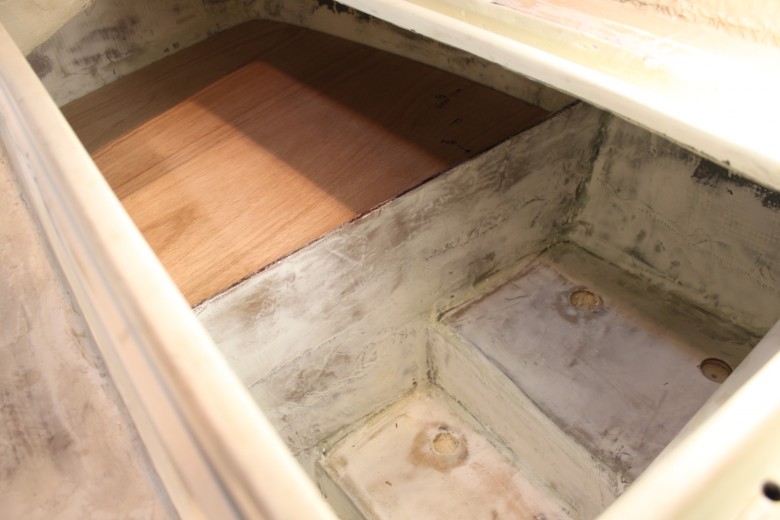
Work progressed in the lazarette locker this past weekend. I decided to install supports for the port and starboard locker soles. Installing the soles also means creating the small lockers that will be below the soles. I then cut the lazarette port and starboard soles out of 1/4″ meranti. I decided to go with this size of wood in order to keep weight down in the aft portion of the boat.
Once the soles were templated, fit and cut, I cut the openings creating lids and access hatches for each of the below sole lockers. I then installed the lid supports, thickened those into place and fiberglassed the entire underside of the soles with some 7 oz. finishing cloth to add a little strength and full waterproofing.
I also took the chance to install the drainage for the lazarette lockers. I used 1/4″ PVC for the starboard and aft lockers and 3/4″ PVC for the center lazarette locker. I fiberglassed the PVC into place on both sides of their bulkheads so that the water would have no where to drain besides the PVC tubes.
September 24, 2011
I’ve finished patching the final two holes in the lazarette. I’ve also cut the lazarette bulkheads which will form the basis for the sail stowage and aft cockpit drainage. Look for this area to be updated soon, because I’ve now shifted my focus from the interior of the boat to the exterior. The reason for this shift is because as the winter draws near, it will be more difficult to keep the deck heated for epoxy work. Hopefully I will be done with the bulk of the work on the exterior of the boat before it gets too cold this winter, but we’ll have to see about that.
June 24, 2011
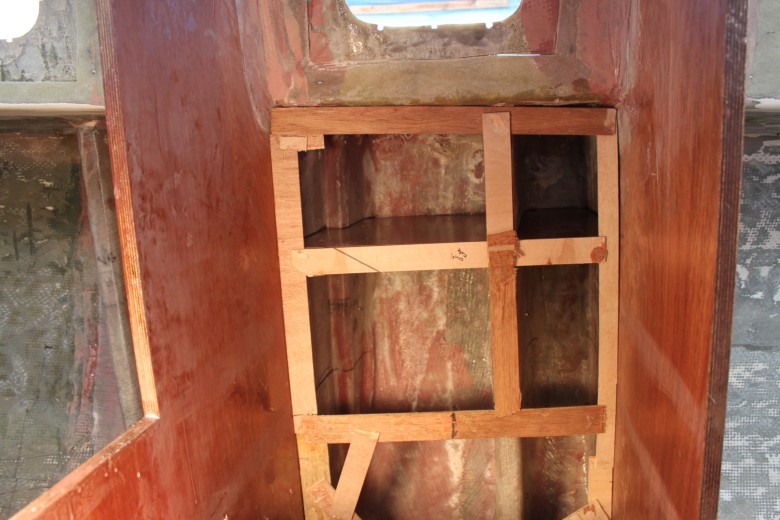
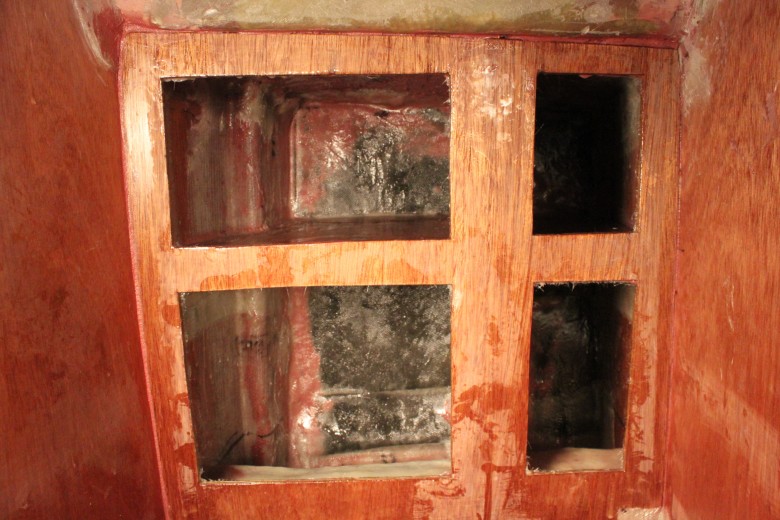
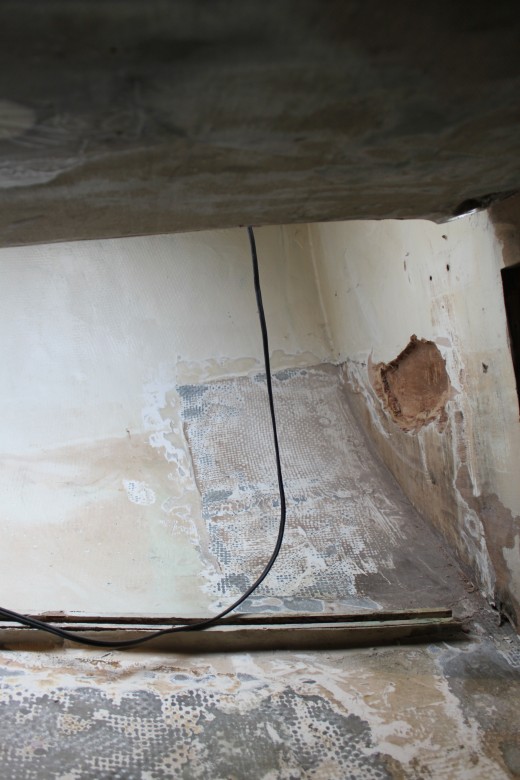
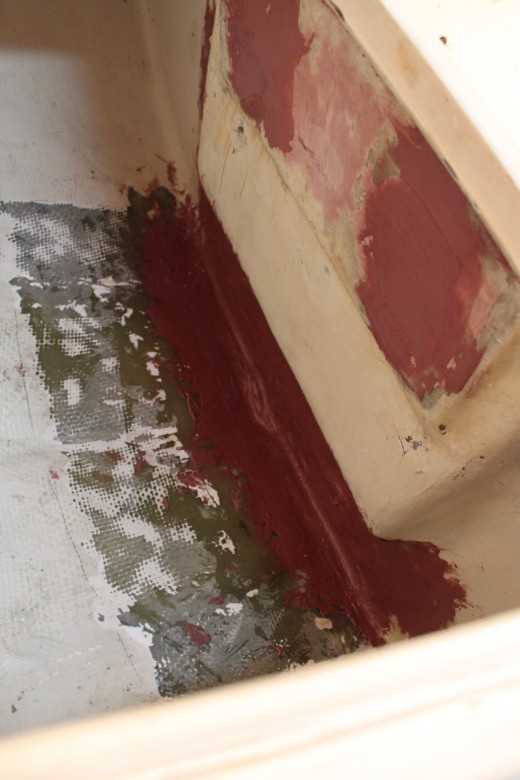
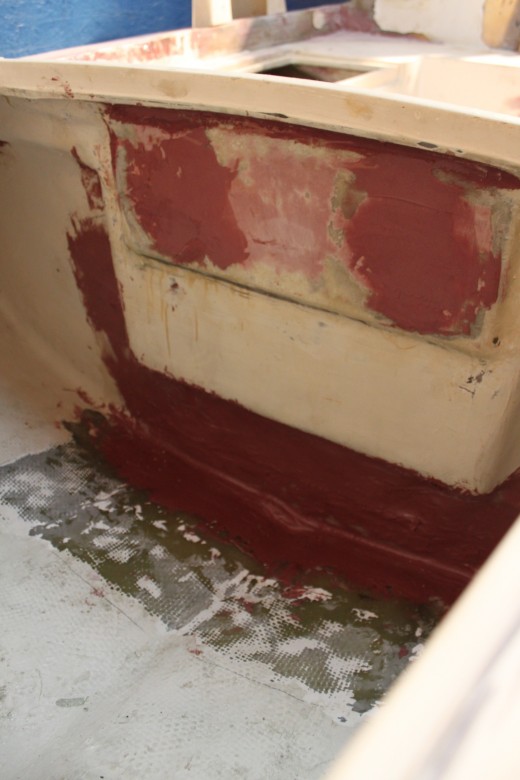
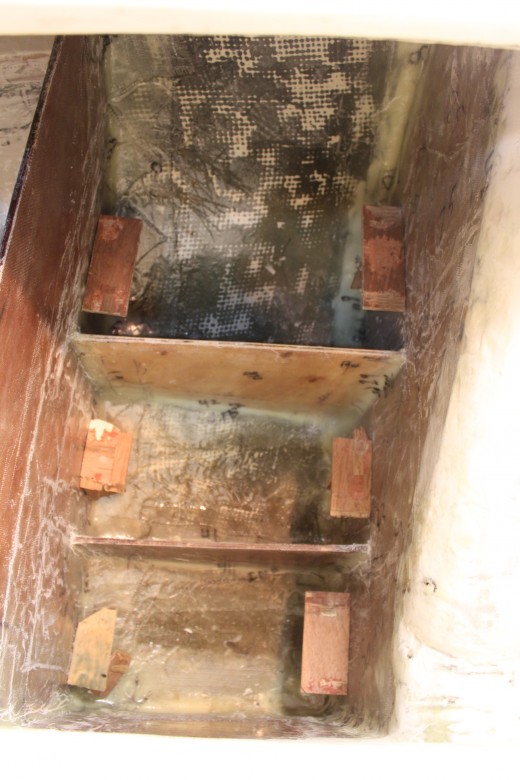
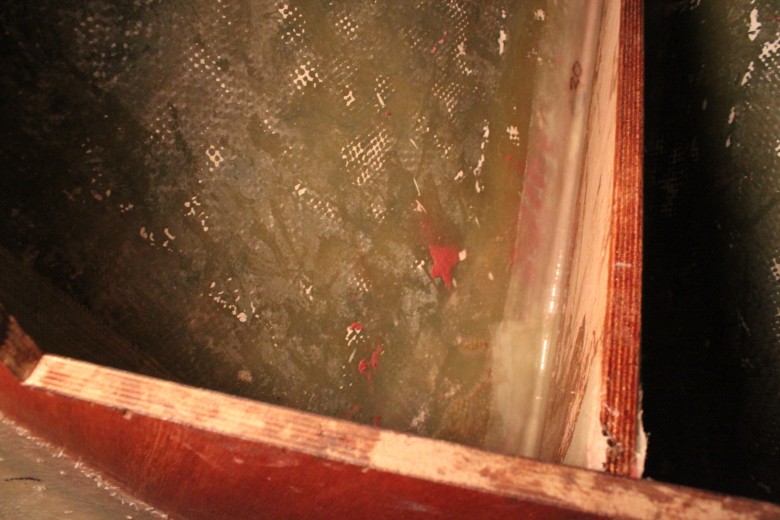
I officially have 4 bins for storage in the boat now; pretty cool! They are behind the icebox and I’m calling them the “wardrobe”. They don’t drain (perhaps a bad decision?) and are very deep. I imagine that I will be stowing vacuum sealed winter clothes in the lowest parts of the lockers. You can see a few photos of how I worked to fair the lockers. The photos I just uploaded (IMG_8386, _8387, _8324, _8325) are all showing the initial layup I did. Since that time, I’ve sanded, scraped and re-faired these lockers a number of times. That being said, my access to the very lowest corners is quite dodgy, so I’m doing my best to make the interior of these lockers as smooth as possible, but since no one will see the inside of these lockers I shouldn’t be too-too worried. I just want to make sure there’s no sharp edges or pockets were dirt and grime might collect.
May 2, 2011
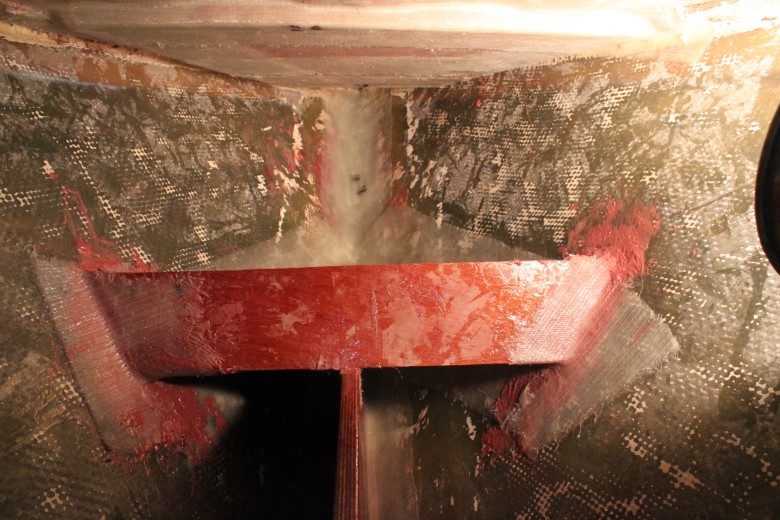
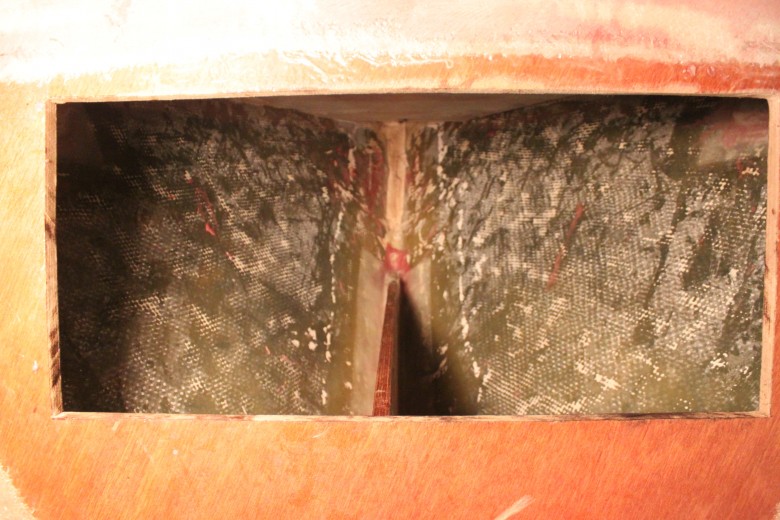
I was able to finally begin construction on the boat again with the research phase complete; it felt great! At this point, the major construction is complete in this area. Here’s where I’m at currently:
- Cut the opening to the chain locker revealing the kind of access I’ll have to the forward chain locker
- Heavily glassed in the area where the forestay will be secured
- Glassed in 3 blocks: one large block for the bowsprit, plus two L-shaped blocks for the stanchions and whisker stays for the bowsprit.
- Installed the splitter bulkhead which gives me stowage for 2 different anchor rodes; one on either side of the bulkhead
- Installed a shelf w/ lip that will serve as stowage in the forward most point of the bow.
Working in this area proved to be quite difficulty as the hull has such a steep slope, making positioning quite difficult. Further, this area holds heat well so the epoxy was really cooking while I was working, meaning that I had to work quickly. Overall, I’m happy with the current state of things and I’ll need to come back to do the next steps of the project in the future.
Research
Lockers
- While cavernous, undifferentiated lockers may seem to offer a lot of volume, much of it goes unused. If the locker is to leeward, everything seems to end up in a heap on the outboard bottom corner. You can be certain that what you need is at the bottom of the pile If the locker is to windward, as soon as you open the door to behind the search everything spills out…as easily as things fall out, they re-stow with difficulty; shove a pair of pants or a can of beans back uphill, and you’ll only jar loose a sweater or a box of pancake mix that has already been stowed. (Desirable and Undesirable Characteristics of Offshore Yachts, p. 139)
- Two or three small lockers are superior to one enormous one. If there is no choice, you can improve the caverns by breaking them up with shelves that have adequate keeper bars or other restraints, with small bins, or with cloth stowage bags hanging on hooks. It may also help to add doors to provide easier access to the otherwise useless space too far outboard and down deep. If all else fails, block off the unusable outboard portion altogether rather than lose your clothes, food, or tools in it. (Desirable and Undesirable Characteristics of Offshore Yachts, p. 139)
- The Nor’Sea 27 has over 30 lockers to stash gear and supplies (The Modern Cruising Sailboat, p. 290)
- All cabinets should be shallow, or as partitioned as possible to avoid the need of lengthy searches. Compartmentalization is most desirable to prevent both spillage and the nerve wracking noise that cans and things can make as they roll freely…Most stowage spaces should be top loading Not only do top loading spaces hold more items per equal volume, they prevent their contents from escaping when the boat is heeling or rolling. Front loading spaces require a carefully constructed door, whereas the tops of top loading spaces can be made of rough plywood since they are usually covered by cushions. …front loading storage, make the access hole as small as possible so that the walls surrounding the hole can act as baffles for the stored goods. On the other hand, consider what you will be stowing where and be sure to allow adequate enough hole to get the gear inside. Most gear in a boat tends to be small. One extra large storage space should be left for awkwardly large items. But apart from that, the many compartments of old traditional boats seem an excellent idea. With this type of storage, one need not rummage through a mountain of goods to get to the tiny item that one is seeking….be sure to plan it all before you start building. (From a Bare Hull, p. 153)
- Areas under the deck and outboard of bunks are almost always the best places to build bookshelves, instrument boxes, can storage, etc. Drawers can be fitted under bunks…nets can be strung underneath the deck… (Upgrading the Cruising Sailboat, p. 58)
- Drawers and cabinets are better stowage areas than the bins under bunks, which are usually unpartitioned and poorly ventilated. These spaces can be converted to drawer storage by cutting openings in the facing of bunk sides and constructing runners and drawers. (Upgrading the Cruising Sailboat, p. 58)
- Shield the hull sides from damage by heavy gear stowed in the bilge or in the forepeak. Fitted on the overhead, they protect your head from protruding deck beams. Unlike a sealed tongue-and-groove overhead, they allow easy inspection of hardware fittings and the hull-to-deck joint. And, if attached with screws, the strips are easily removed for repair, refinishing, or to attach hardware to the hull or deck. Furthermore, this arrangement looks nautical and encourages thorough circulation of air, so vital to the long-term health of plank-on-frame hulls. The strips add minimal strength (at least the way they are usually built), although they can stiffen smaller hulls considerably if you use large fastenings that screw into frames. (Upgrade Your Small Sailboat for Cruising)
- The space between the…strips is important to let the hull breathe and because hulls do twist under stress, it will keep the boards from buckling. Covering the insides of a hull to make it look better presents a dilemma for the offshore sailor. If the hull cracks or is holed, it is vital to be able to get to that spot in order to effect some sort of repair (Upgrading the Cruising Sailboat, p. 77)
- Hanging Locker I – Build dividers and shelves to maximize storage space. Ditch the hanging locker: shelves are more efficient
- Hanging Locker II – For most boating, the value of the hanging locker is suspect. It wastes spaces; hanging clothes are not compactly stowed, and there is generally a large amount of unused space in the top and bottom of the locker. It is hard on your clothes; hanging clothes in a boat crashing to windward or rolling downwind is not unlike storing them in a tumble dryer. And if you are hanging your clothes to keep them from winkling, take a look inside the locker next time the boat is heeled; they pile themselves on the hull or the locker door and wrinkle anyway. The best use for a hanging locker is to convert it to a bureau. Your clothes will do better folded or rolled and stowed in a drawer, and drawers allow for efficient onboard stowage of hundreds of other items as well. The next best thing is to build shelves in the locker. (This Old Boat, p. 219)
- Hanging Locker III -Your boat should have at least one good hanging locker. Hanging lockers are important because you’re bound to have some clothing items that have to be hung….should have doors big enough to take a full suit of clothes without your having to ball them up and they should be wide enough at the bottom so that the hanging clothes don’t get scrunched up, because the hull curves in at the bottom. Hanging lockers must also have good ventilation…remember that your clothes will move as the boat moves. You will therefore want to stuff them to some extent to keep them from chafing and fraying. Make sure you have a conveniently located, well-designed wet locker for your foul-weather gear and boots. The items should be stored near the companionway. (All in the Same Boat, p. 87)
- Clothes & Foul Weather Locker – Shore clothes should have their own locker so they are not wrinkled or dampened. The hangers should be high enough so that pants and skirts are well above the level of any bilge water. This locker should be louvered, for good ventilation….Foul weather suits are toublesome to stow in a hanging locker. If they have been dampened by salt water, they hardly ever dry. They are hard to hang up…a better solution…each crew member has his or her own labeled cubby for foul-weather gear and boots.
- Foul Weather Gear Locker – …a full length, self-draining locker that is large enough to hold four sets of foul-weather gear (hanging up, not stuffed) with our sea boots; there are also hooks for harnesses. Behind the foul-weather clothing, we have a couple of shelves, one of which holds six life jackets and the other an abandon-ship bag. (Cruising Handbook, p. 134)
- Locker doors need to be large enough to allow full access to the locker, which means that shelves must all be fiddled to stop things from falling out when the doors are opened. The shelves should be divided by fiddle rails to reduce the size of individual spaces. This minimizes the distance that objects can slide when the boat is rolling around and the locker is half empty.
- My theory is compartmented areas for accessible stowage for frequently used items or classes of items (daily use tools, first aid, sail repair, sewing, stationary, toilet articles, cameras and film, charts, signaling equipment, navigation books, etc.) Each stowage compartment has its items and no others….we have switcehd drawers and compartments around so that the most used items are the most accessible.
- The more storage space you have the better….to determine the best possible use of the two basic types of storage space: bulk space and special-purpose space. Bulk spaces include the areas under the bunks and cabin soles and in the lazarettes. Special purpose spaces include drawers and hanging lockers. Access to bulk storage is a major concern because it can limit the times when you’ll use that space (e.g., when your friend is sleeping if it’s under the bunk) and what you can put in it. No matter what the size of the space, if the equipment won’t go into the opening, you can’t put it there…you won’t want to store grain or electric motors in a space against the hull that will be sweating and moist…you won’t want to store engine parts that are susceptible to rust near the bilge. You want to put linen in anything but a very dry place. (All in the Same Boat, p. 83)
- Bulk spaces seem to have more value per cubic foot than special purpose spaces, such as drawers and racks….its just that these [special purpose] spaces should not eliminate too many bulk spaces. You can put anything you want in bulk spaces; they are much more versatile. You may have to segregate items you would normally put together, but that’s a small problem if the bulk space accommodates your stuff….The worst problem with bulk storage space is remembering what is there and finding it amidst all the other items… Yet another aspect of bulk storage is timing…you don’t want your hors d’oeurve bin to be under the locker where your guests sit… (All in the Same Boat, p. 83 – 5)
Lockers – Bin, Door, Drawer & Shelf
- We don’t like too many of those pretty drawers, because the framework for them takes up a lot of otherwise usable space. Some of them can make quite an improvement in the your quality of life, however. Not only do they generally keep items dry, they are convenient. They are the best answer for folded clothes, which is most of what you will be wearing… (All in the Same Boat, p. 87)
- Each [crew member] should have at least two good size drawers in or near the sleeping area… (All in the Same Boat, p. 85)
- Bins are a great compromise between bulk space and drawers. They allow easy access without pulling things apart, but they don’t require all the framework. They can appear attractive from the outside with a teak hinged door, but inside they can be cavernous as the hull allows. Obviously you don’t want a bin that extends beyond your reach. An enclosed bin can accomplish much of the function of a drawer, but provide more space. It keeps stored items off the hull or deck. (All in the Same Boat, p. 87)
- …on only a few boats can you find several small drawers and lockers for specialized stowage of equipment. On most boats, builders seem to think it sufficient to provide relatively few large stowage spaces….Perhaps the cost of adding more drawers ins a concern, but the return in greater convenience is certainly worth it. (Desirable and Undesirable Characteristics of Offshore Yachts, p. 139)
- …drawer fronts without finger holes let the air inside stagnate and mildew accumulate. Even with finger holes, drawers stuffed with clothing trap air. Consider enlarging the hole or installing a building vent or two in the facing of the drawer. (Upgrading the Cruising Sailboat, p. 77)
- …typically held shut by machining an indent into the base of the drawer that fits over a raised rail in the supporting framework. To open the drawer, it is lifted and pulled out….G forces can sometimes lift the drawer. If it is on the windward side, it may fly open and dump itself and contents on the cabin sole. Because of this, drawers opening in an athwartships direction should have backup barrel bolts or some other means of locking them shut. Accidents are less likely to happen with drawers opening in a fore and aft direction; on these drawers, no additional hardware is necessary (Cruising Handbook, p. 120 – 1)
- Many drawers also have finger holes to open them. These are not as bad as on cabinet doors, nevertheless, proper drawer pulls are much nicer. Wider drawers are likely to have two drawer pulls, one on each side. Unfortunately, this often means that two hands are needed to open the drawer, which makes it difficult to open in rough weather when it is necessary to hang onto the boat with one hand. It is preferable to have a single drawer pull in the center of the drawer. (Cruising Handbook, p. 121)
- Cutting Shelves – Measuring beings with drawing a line on one side of the locker to approximate the location of the one edge of the shelf. Somehow you have to cut the shelf to the curvature of the hull, but because this shelf does not reach the front of the locker, you can just cut it square and then trim it to fit. So you need measurements for the shelf. First you need to measure between the sides of the locker. Measure across where the front of the shelf will be…you also need a depth dimension. Measure from the point where you want the front of the shelf to the hull along the line you have drawn. If the hull has a pronounced curvature, be sure to measure the deepest side of the locker of the finished shelf will be slightly shorter than you expect. (This Old Boat)
- Cleats – nothing more than a length of wood with a small, square cross section – ideally 3/4″ x 3/4″. You can buy square molding for this use, but a less expensive route is to rig 3/4″ strips off a length of a clear fir “1-by”….You might drill and screw the cleats in place, but gluing them will be much stronger…If the cleats protrude beyond the shelf, reposition them so they are slightly recessed. Also pencil a small arrow on each cleat pointing toward the top so you cannot get confused when you glue them in place. Now remove both cleats and coat them in the outlined areas on the locker sides with the glue of your choice. Nail the cleats back in place, this time driving the finishing nails home. Add additional nails as necessary to hold the cleat tightly against the side pane. (This Old Boat, p. 220, 224 – 5)
- If you want to mount the shelf permanently, coat the top of the cleats and the underside of the shelf with epoxy and tack the shelf in place with finishing nails. you can skip the nails of you can find an alternative way to press the shelf onto the cleats. C-clamps will do the job at the front of the shelf, but there is no way to get a clamp on the back. Measure from the top of the shelf (near the rear) to the top of the locker, and cut a couple of pieces of cleat stock slightly longer than this measurement. Place the lower ends of these pieces n the shelf directly above the cleats, and wedge the upper ends against the top of the locker. (This Old Boat, p. 225)
- It is rarely necessary or even desirable to attach a shelf to the hull. If you are only after rear support, a short cleat in the center will generally be adequate. Do not attach the shelf to the cleat. It is sometimes imperative and almost always a good idea to make shelves removable – you might buy a larger pot. The common way is to screw the shelf to the cleats rather than gluing it. Two screws to a side are typically adequate. Select a pilot drill by comparing it to the screws you are using. It should be approximately the same size as the screw’s root diameter- the diameter of the threads were ground away. 1″ #8 flathead screws are a good choice. A #8 screw calls for a #48 pilot drill (3/32″ bit). For #8 screws the shank hole should be 5/32″. (This Old Boat, p. 225)
- Countersink the shank holes from the top. Make sure the entire head of each screw will be below the surface of the shelf. Ideally you want the top of a flathead screw to be exactly flush with the surface of the wood…you can check if the countersink is correct by touching the inverted screw to the hole…when the diameter of the countersink is the same as the diameter of the head, (This Old Boat, p. 225)
- (More information on building lockers and shelves can be found continued in 3rd paragraph from bottom of (This Old Boat p. 225)
- If you have shelves in any of your storage areas, be sure that they have searails of adequate height (about 2”) or everything is guaranteed to spill in your lap when you open the door on an unfavorable heel. (From a Bare Hull, p. 153)
- The simplest way of attaching two pieces of plywood that come together at an angle is to use cleat stock made of mahogany or another wood that will hold screws well and will not split. To this cleat stock both pieces of plywood will be glued and screwed. A good size to use is ¾” square, for then you can rip it from ¾” random length stock. (From a Bare Hull, p. 153)
- Shelf – almost any locker on a boat can benefit from a shelf. Dividing the lockers in the galley will allow you to get to the stockpot without removing every other pan and skillet. A shelf i the head cabinet will keep paper products away from the potential dampness of the hull. A shelf in the cockpit locker will provide a flat surface for surface for storage boxes and jerry jugs. A shelf on one side of the lazarette will provide convenient stowage for small cans of paint, oil, polish and other items. (This Old Boat, p. 219)
- Shelf Design – Have you given adequate that about what will be kept in the locker?…will the space between the new shelf and the bottom of the cabinet opening be wide enough to admit the stockpot? Can you remove the saucepan stowed inside the stockpot without removing the pot? That requires at least the combined height of both between the bottom of the locker and the underside of the shelf. With the shelf in place, will you be able to see what is in the locker? Will you be able to actually reach the back of the shelf? Try holding a board across the center of the opening to see how far you can reach. Does anyone aboard have shorter arms? If you open the cabinet on the wrong tack, is everything on the shelf going to end up on the cabin sole? How heavy are the items you will store on the shelf? Would ventilation be beneficial? Does the shelf need to be removable for access to plumbing, wiring, or hardware? We could go on and on. The basic premise is to determine exactly how the shelf will be used and then decide on its design, not the other way around. (This Old Boat, p. 220)
- Deep, Tall or Half? – Large shelves make storing large pots more difficult and retrieving small items that migrate to the rear of the shelf nearly impossible. Mounting the shelf higher resolves the first problem, but makes the second one even worse. A shelf that extends from the back of the locker only halfway to the front solves both problems but if you think about it a little more, you realize that the first time this locker is on the weather side in a decent breeze or the boat rolls of a steep wave, the half shelf will dump its contents into the bottom of the locker. (This Old Boat, p. 220)
- Fiddles on Shelves – ..if the fiddle is high enough to be effective, it will make seeing the contents of the shelf difficult…narrowing the access to the shelf may limit what can be stored on it…the attached fiddle adds complexity to the project. (This Old Boat, p. 220)
- Angle Shelves – mount the shelf with about a 20-degree downward slant toward the rear. With such a slant, even a 30-degree heel is not likely to spill the contents of the shelf. (This Old Boat, p. 220)
- Shelf Weight – If adding dozens of shelves…weight becomes a major consideration…3/8″ plywood will be adequate for shelves, but the better stability and greater rigidity provided by the five-ply construction of 1/2″ plywood make it a better choice most of the time. (This Old Boat, p. 220)
- Bookshelves – …we carry about 240 books, both large and small volumes. Some are sailing books, some for navigation, and others for leisure and special-interest reading We have six-foot fore-and-aft shelves above the settee on the port side, a dozen navigation books on a shelf above the quarter berth, and an athwartship shelf for large books above the forward seat of the cabin table. In addition, we have a six-foot bookshelf above and long each side of the forepeak berths. The bookshelves should have 1 ¾” fiddles (the books are heavy), we tie strong string (stretched between small brass screw eyes) along the front of each bookshelf at the top of to keep the books in place at sea. The motion is most violent in the forepeak, and these books need to be tied in securely. (After 50,000 Miles, p. 291)
- Bookshelves II – The saloon also includes one or more book cases which should provide secure stowage for books up to 11 inches high and 8 ½” deep, which is the largest standard US book size. Most books, especially paperbacks, fit into a 9”H x 6”D shelf….To restrain books, there should be a low fiddle at the base of each shelf (if it is too high, the books may jam on the shelf or overhead above before they come out). this is all that is needed on athwartship bookshelves. Bookshelves installed fore and aft usually along the sides of the saloon) need an additional restraint about halfway up the books. we have used shock (bungee) cord and removable wooden battens. Both work well, although the shock cord can only be run over relatively short spans (up to 2’) – beyond this, when pounding to windward, the weight of the books on the windward side can overwhelm it and then they all fly out. The advantage of shock cord is that can be held down to extract a book, whereas the batten must be taken out.
- Bookshelves III – Ideally, there is also a small bookcase either in the navigation station or immediately adjacent to it for tide tables, light lists, cruising guides, and sight reduction tables if sextant navigation is practiced. If the bookshelf is aligned athwartships, an upper fiddle (in the middle of the books) will not be required, which makes it easier to get the books in and out; however if it is aligned fore and aft, the fiddle is necessary. (Cruising Handbook, p. 133 – 4)
Lockers – Deck
- It’s no fun trying to live with sailbags, dry or wet. Allow for plenty of stowage space in cockpit lockers or sail bins forward. (Desirable and Undesirable Characteristics of Offshore Yachts, p. 194)
- Seat lockers should have deep gutters molded in to allow water to run off. These should be deep enough so they won’t overflow into the locker when a wave breaks. If the gutters aren’t deep enough, glue a rubber gasket around the inside perimeter of the lid and install a lever action type lock that compresses the gasket lid tightly. (Upgrading the Cruising Sailboat, p. 179)
- A method of locking the lid should also be arranged, using locks and hasps or other secure locking mechanism. (Desirable and Undesirable Characteristics of Offshore Yachts)
- Stowage in the cockpit is needed for tools, winch handles, flashlights, and tails of sheets and halyards…cloth sacks secured to the sides of the cockpit, small lockers in backrests, and winch-handle holders can be extremely valuable. (Desirable and Undesirable Characteristics of Offshore Yachts, p. 125)
- Deck Locker Design – An older aft-cockpit boat generally has one or two relatively massive lockers under the side seats…and a lazarette locker. Together, these lockers provide more than enough stowage for most cruisers…Whatever lockers there are should have gasketed, watertight lids. The lids need hinges and clamps designed to take the worst the sea can throw at them, installed in which a way that they will not snag lines and bodies. Locker lids are often quite heavy, so it is important to have some means of holding them open (e.g., a gas-filled strut) so they don’t crash down when someone is digging around inside for a buried piece of equipment…Just in case a lid gets ripped off and the locker floods, lockers should be more or less watertight to the interior of the boat….If a locker is sealed, it will need a drain which – if at all possible – should lead back out into the cockpit or overboard rather than into the bilge. This is not possible with deep lockers…The typical oversized pit is best broken up into smaller spaces by the addition of shelves and dividers….Mesh-type bags with saltwater-resistant zippers (the kind used to stow snorkeling and diving gear) are handy for maintaining control over locker contents. (Cruising Handbook, p. 100 – 101)
- Anchor Rode Locker I – Chain is heavy…it needs to be stowed as low and as far aft as possible...it does not slide down an inclined surface too well, so the chain pipe should not angle back more than 30 degrees….Left to it’s own devices, chain forms a relatively narrow, cone-shaped mound. Without sufficient height in its locker, it builds up until it plugs the chain pipe or underside of the deck and jams the windlass…The primary anchor locker design criterion…is something that is relatively tall, narrow, and straight-sided, without any corners or angles that can trap the chain. This is in contrast to the typical anchor locker formed by bulkheading off the bow of the boat, creating a V-shaped space that gets wider the higher you go up and keeps the chain high and far forward…A better approach to chain stowage is to establish a locker farther aft and lower in the boat, with a sealed chain pipe leading down to it. This way, any water goes straight to the chain locker…In addition, there is a decent vertical drop from the windlass, which helps strip the chain off the gypsy… On cruising boats in 35 – 40’ range, the locker should be large enough to take at least 150’ of ⅜” BBB chain; it will need a generous access hatch in its top at some suitable location…All chain lockers need a decent sized drain down to the bilge (a 3 – 4” PVC pope cut in half and bonded in to the bottom of the boat works well), with access from both ends so that blockages can be cleared…The locker also needs a strong point, with a large U-bolt to which the bitter end (the end that is supposed ot stay on the boat) of the rode can be fastened. Chain rodes should be attached with a length of rope long enough to allow the end of the chain to come up on deck, this way the rode can be cut loose if the anchor has to be abandoned in a hurry. (Cruising Handbook, p. 112)
- Anchor Rode Locker II – Chain…should be led aft, perhaps under the forward berths. But don’t impede its deployment with a poorly thought out installation; on many boats, chain towage in the forepeak may be the best you can do. A strong plywood compartment reinforced with fiberglas, with limber holes drilled for drainage, and fed chain by a wood trough, will keep this potentially unruly serpent tamed. Hal Roth says tall, narrow storage is better than wide, flat compartments, and, as chain is smelly, wash it down as it comes aboard. (Upgrading the Cruising Sailboat, p. 157)
- Anchor Rode Locker Drainage – …a poster suggests draining the anchor locker itself – As long as the floor of the locker is above waterline, the top is above it too and when the drain is above waterline too, I can’t see a problem. Just put a plastic valve or seacock on for longer/rougher passages but I don’t think water will come in there. Put one of those scoop-strainers on backwards so that it actually creates a vacuum! There’s nice stainless steel thingies that work too; they are used for cabling… cable shells? (http://www.cruisersforum.com/forums/f115/chain-locker-drain-into-greywater-tank-24648.html)
- Anchor Well – This makes for a tidy installation, in which the anchor and rode are completely sealed from the boat’s interior, with the anchor-locker bulkhead forming a watertight bulkhead. There’s no problem with water flooding down a chain pipe, and any mud on the rode goes out the locker drain rather than through the anchor locker into the bilge…Even with larger wells and stronger rollers, an anchor well has drawbacks. It is very difficult to handle anchors without getting into a tangle…If it is sturdily constructed, the lid to the well will be quite heavy. When open it will be vulnerable to getting fouled or even torn off if solid water is coming over the bow….the drains to an anchor well are often close to the waterline, causing water to jet into the locker every time the boa dives into a wave….Given the small and inadequate size of most anchor-locker drains, it takes little effort to plug the drains, at which time the well will fill with water.
Lockers – Hardware
- All locker-access hatches within the boat should be locked in place to prevent them from flying off in a knockdown. In particular, hatches in cabin soles tend to be heavy and are potentially quite dangerous…In addition to the sole hatches, there are numerous locker lids beneath and behind settee berths and in other locations….On ocean going yachts, they too should be locked in place. (Cruising Handbook, p. 121)
- Cabinet doors commonly have finger latches – the kind of spring-loaded catch accessed through a hole in the door. I positively hate these. What happens if your boat makes a sudden lurch just as you poke your finer through the hole to open the door?…Much preferred are button latches (although these need to be spring-loaded to prevent them from vibrating open) or any other type of latch that is operated outside the door (e.g., push-button latches). (Cruising Handbook, p. 120)
- Cabinet doors should be hinged from the side or base, never from the top (on one tack or the other, the contents will spill out whenever the door is opened). (Cruising Handbook, p. 120)
Stowage
- Even space under the food cabinets are utilized. In this ‘cubby’ (space below locker has a cubby), the bottom is lined with drydek to keep things dry and small pencil boxes keep items in order…We found the small DVD storage boxes to be just the right size for our cabinets. They keep things organized and in place. Pretty much everything is in zip-lock bags for moisture protection…We installed shelves (with small fiddles) in a few cabinets to maximize usable space…The space under and behind this drawer store filters and other small parts held in pencil boxes…Bandaids and aspirin are in the medicine cabinet. Here, specialty medical kits and drugs are sorted and kept in ‘shaving kit’ bags (http://www.sailvictoriarose.com/Storage_Options.html)
- As a rule, no matter where a storage space is, unless it’s in one of those places that you inspect all the time, such as the bedroom drawer, it will get wet or moist. This is particularly true when you take your boat to cooler climates. (All in the Same Boat, p. 84)
- All boats carry tools, cleaning compounds, and lubricants; food and eating utensils; pots, paper goods, and much more to meet the many human and sailing requirements.
- Consider your needs carefully, study the space available, and make sketches and alternatives. Think through each step…Try to picture each piece, how will you measure it, how will it be supported? For example, will there be enough room to use a screwdriver between it and the adjacent surface? (Upgrading the Cruising Sailboat, p. 58)
- If we have a big hole, we try to put like more related items inside. For example, a big hole forward may have extra rope and ground tackle. Another big and rather dry hole might have grain and food stuffs. A smaller hole, also dry, might contain plastic boxes with delicate engine and sewing machine parts. (All in the Same Boat, p. 85)
- We label the outsides of all containers, even plastic bags. (All in the Same Boat, p. 84)
- We try to keep a list of stored mechanical items on a simple computer database…our database tells us how much we have, where it is stored, where we last got it, the price and part number, and other information. We devised a list of abbreviations for different storage places….This database will also let you know when to resupply. Many items, such as epoxy, glue, food, batteries..have a short shelf life. Once they have expired, they just take up valuable space and could be harmful or ineffective when you try to use them…if you don’t have a computer, make a hand written list and keep it in a safe place known to all crew members. (All in the Same Boat, p. 85)
- Avoid buying items with a known shelf life unless the expiration date is on them. If you can’t find ones with expiration dates, write the date of purchase on the container and use the oldest containers first. Glue, resin, and sealants are examples. Bottled and canned good will probably lose their labels in the moisture (besides cockroaches love the glue that’s used to stick them on), so it’s a good idea to remove labels anyway and write contents, expiration date, and other relevant information on the container with water proof ink. (All in the Same Boat, p. 86)
- Develop an written inventory system so we can remember where we put the spare VHF antenna (http://www.sailvictoriarose.com/Storage_Options.html)
- What is “enough of them” [clothes] will depend on the size and type of boat, the size of your [crew], and your preferences. (All in the Same Boat, p. 84)
- Items you use regularly or in emergencies should be stored where they can be easily and quickly obtained…these may include spare anchors and anchor rode, spare fuel and water hoses, fuel pumps, impellers, tools, flashlights (these should be everywhere), duct tape, volt-ohm meter, knives, snacks during passages, and so on. Use the hard-to-reach spaces for items that are seldom used and never needed in a crisis. For us, these items include extra stores of rope and chain, canned and glass-jar goods, wood and metal scraps, extra hoses for water and engine plumbing, and even some durable parts such as a spare heat exchanger. (All in the Same Boat, p. 85)
- Toilet Paper – You’ll want the toilet paper stored with reaching distance of the head (in plastic bags) (All in the Same Boat, p. 85)
- Shoes are always a problem to store, so it’s best to limit the number you bring aboard. They are prone to mildew and tend to bring sand or dirt aboard….have everyone remove their shoes as they come aboard (or even beforehand) or limit everyone to one pair. We try to…allow a limit of one pair of flip-flops, deck shoes, running shoes, and dress shoes per person. Each person will need one pair of good pair of shoes for long hikes ashore. Avoid black soles that mar the deck. (All in the Same Boat, p. 88)
- We keep a good supply of heavy-duty garbage bags aboard for light, softer items. They’re also good for storing our heavy-duty until we can get to a place that can take it. Heavy-duty kitchen storage bags with sealing tops such as the Ziploc brand make great containers, even for small engine parts. You can see what’s inside, and you can seal out moisture. They will eventually crack and tear, but you need to inspect all stored items periodically anyway…If you store items in plastic bags or containers, take care that they aren’t flush against a sweating hull. They condensation can transfer into the inside of the bag…When you are sealing Ziploc bags, seal them on days of low humidity if possible….[You can also keep a small amount of products that soak up moisture in small bags for specific pieces. (All in the Same Boat, p. 84)
- We store grain in collapsible plastic water jugs found in camping supply stores. (All in the Same Boat, p. 84)
- Treat any engine parts with a liberal coating of rust-preventative oil before storing, and take all parts out occasionally for inspection and re-oiling. Normally, the oil should go inside the part as well as outside. A good spray like CRC 6-56 will usually seep into crevices. I have dipped parts into a bucket of clean lube oil and rotated them when I felt that spray wouldn’t permeate well enough. (All in the Same Boat, p. 86)
- Some parts like diesel injectors, should be wrapped in oily cloth or similar material. Injectors are also a good example of mechanical parts that must be serviced occasionally, even when in storage. Sometimes the fuel that has been used to test the injector will turn into a varnish-like substance…and plug the atomizer. (All in the Same Boat, p. 86)
- Store all documents in a moisture-resistant box(es) or, at least, in drawers in a well-ventilated part of the boat. Uncovered envelope seas and any uncovered gummed labels will stick together because of the moisture and heat. To prevent this, insert a sliver of waxed paper between any gummed surface and its mating surface. Store these materials in a sealed ziptop bag. Any airtight container could develop moisture inside as the temperature changes. Check records regularly. (All in the Same Boat, p. 87)
- When storing many items, remove excess packaging (remove toothpaste tubes from the boxes, for example) so that you don’t have a lot ofcardboard around. It gets wet from condensation and takes up space…ziploc bags are great for bunching together loose items. Keep this in mind when buying things…plastic containers store better than glass and tin. Individually wrapped perishable food, while perhaps more expensive, may last much longer. (All in the Same Boat, p. 89)
- Rolls of paper towels…can be stowed…in waterproof containers, where they are packed with salt for long keeping. (Desirable and Undesirable Characteristics of Offshore Yachts, p. 140)
- Trash – Get rid of as much packaging before it comes on board…we never try to bring glass on board. Glass is a no-no if it can be avoided. When it cannot I put the bottle into an athletic sock so that it cannot rattle and crash/break when the boat moves. Wine bottles are put into the straight “tube socks” and then they can be stacked or placed up against each other without any problems…I used to toss glass bottles overboard when the seas were calm and use the bottles for target practice. I always figured that it didn’t matter if I missed, they’d sink soon enough anyway…Plastic always goes back to shore, everything else is over the side in deep water….we wash the plastic and cut it into small pieces for disposal later ashore. We are down to generating about a 1/2 cubic foot / week using the above mentioned techniques (http://www.cruisersforum.com/forums/f91/garbage-44525.html)
- Always carry a good supply of burn cream like Silvadene to treat burns until professional medical care can be obtained (Upgrading the Cruising Sailboat, p. 229)
- Sail Stowage I – …sails can be stowed either forward of the mast or aft alongside the cockpit….few boats have sail lockers anymore, this means that sails must often be stowed under the v-berth, which is not a good trade-off since you must tear the forward cabin apart and disrupt sleepers whenever you need a new sail. A good alternative is to flake jibs in long, compact, sausage-shaped bags, which can be lashed to the cabin top or in the windward waterway besides the cockpit. (Desirable and Undesirable Characteristics of Offshore Yachts, p. 141)
- Sail Stowage II – If you are fortunate enough to have a good old-fashioned sail locker either under the cockpit or forward, find some way to keep the sails from shifting to leeward and piling up on each other in a confusing heap. Bins, partitions, or a simple system of hooks and restraining lines all work well….Sheets and other lines should be hung on hooks so that they stay coiled and are free to dry. One refinement is to restrain the lower reaches of the coils with lanyards to prevent annoying banging against the hull. (Desirable and Undesirable Characteristics of Offshore Yachts, p. 142)
- Safety Gear I – There is a degree of comfort in storing life jackets near the cockpit, such as in a seat locker, but there’s no reason why they can’t be stored just as safely down below in a readily accessible place. (Upgrading the Cruising Sailboat, p. 181)
- Safety Gear II – Extra survival gear should be stored in a place where you can get it instantly as you are leaving, but where it is also safe. This might be just inside the companionway. (All in the Same Boat, p. 89)
- Spares I – For your diesel have at least several spare belts, a spare oil cooler, spare injectors, either a set of injector high-pressure pipes or one pipe that is long enough and can be bent to replace any pipe (and a pipe-bending tool to bend it without any crimps), a fuel lift pump. a raw-water pump, 3 additional impellars, a freshwater circulating pump, an alternator, alternator adjusting brackets (get some from an old junkyard), a starter or starter solenoid with spare brushes and bearings, hose mending material and a set of spare hose lengths, aeroquip or similar pressure hose with an assortment of fittings and tools necessary to install them on the hose(the house would normally be used for lubricating-oil or transmission-oil runs, but should be rated for highest pressure used in your boat so you can make up whatever you need), a shaft-key stock…enough oil filters and enough oil for several changes…have a head and the entire “top end” set…bring lots of gaskets for your raw-water pump (preformed gaskets are cheap and easier and quicker to use)…Be prepared to fix your steering cable and steering system….extra pulleys and blocks can save the day not only in engine-room maters, but also with the sailing rig….carry at least three rolls of good-quality duct tape…Have a spool of waxed twine to fit your stuffing box…a spare propeller (and prop puller), shaft, and cutlass bearing…the ability to make do with some sort of fabrication may save the day…keep on hand several pieces of mild and stainless steel bolt stock, flat pieces of mild steel (bought from the hardware store as large hinges), assorted pieces of aluminum flat stock, and whatever pieces of wood I can fit into whatever corners I can find…Bring along old bicycle tubes…you can cut gaskets and repair valves (as in water pumps_ and leaking hoses. you can work aluminum almost as easily as wood, and make all sorts of brackets, covers, etc. from it. We also bring a large supply of J-B Weld, which makes great repairs to metal and wood….I carry lots of epoxy and fiberglass. Be sure that any epoxy or similar material you use has not exceeded its shelf life…I regularly renew our supply of underwater epoxy and hull-repair kits….I also carry a sheet of thin scrap plywood (1/8”) and large supply of sealant that will cure underwater. If your boat is seriously holed, you may be able to affect a relatively secure temporary repair by cutting the plywood to form, smearing it with sealant where it will mate with the good part of the hull, and screwing it on the underwater or with the boat healed or temporarily tried. (All in the Same Boat, p. 248 – 250)
- Spares II – Pulley blocks, winch handles, shackles, spare line, tape, sail-repair tools and cloth…Oil, grease, teak cleanser…can be stowed on a low shelf in a metal or plastic tray with 2” sides. Wedge the cans tightly with rags…Bolts, nuts, washers, cotter pins, small shackles, light bulbs, fuses, small electrical spares…best stowed in transparent twist-top jars. Large engine spares, such as pumps and injectors, can be carefully sealed in clearly marked plastic bags. Stow them in the bilge, using restraints to keep them from rolling around. (Desirable and Undesirable Characteristics of Offshore Yachts, p. 142)
- Anchor Rode Spares – I carry an additional 50 feet of ½” chain and 200 feet of 1” nylon rode for storm anchoring, in addition to several 200’ coils of ¾” nylon and various shackles. Old carpeting stored in a tub, serves as chafing gear. In a storm, you can cut through carpet with amazing speed If possible, you must keep watch and replace it as soon as needed, if possible….Chain hooks are cheap. Always have several rigged to snubbers and ready to go. When one breaks in a storm, hook on another just below the roller and let out the necessary chain. (All in the Same Boat, p. 123)
- Spares III – …a length of wire slightly longer than the longest stay should be carried in resrve with a means of fastening terminal fittings…Carry enough line to replace every halyard and sheet at least once….I also carry a spare [VHF] cable and a short hand-held antenna…for emergency use. (Upgrading the Cruising Sailboat, p. 200, 211, 268)
- Spares IV – For a full list of spare parts as well as medical supplies, see Desirable and Undesirable Characteristics of Offshore Yachts, p. 290+
- ….various blanking plugs should be carried for windows and portholes…We carry pieces of plywood with a bolt through the center that holds a clamping piece a little shorter than the longer dimensions of the glass. (Cruising Handbook, p. 94)
- Standing Rigging Spares – Before heading off on a long trip, swage a terminal on the end of a length of spare wire long enough to replace any piece of standing rigging on the boat….Take along Norseman-type fittings for the other ends, plus wire cutters and a hacksaw to trim off the excess wire…About 50’ of wire should be carried aboard for use as emergency antenna should the boat be dismasted. (Desirable and Undesirable Characteristics of Offshore Yachts, p. 169, 227)
- Deciding What to Stow – When helping to decide what to carry, it helps to remember the following criteria: essential versus nonessential, likely to fail or be needed versus not likely to fail or be needed, difficult to get versus easy to get, light, small, and cheap versus heavy, large, and expensive. Something that scores 4/4 or ¾ should probably be onboard…Parts that hit 3 or 4 out of 4 include the following: (Cruising Handbook, p. 236)
- all engine and alternator belts
- raw-water pump impeller
- zinc pencil anodes
- fuel and oil filers (with the wrenches necessary to get them on and off) and engine and transmission oil
- pressure switch for the freshwater pump
- spare winch handle or two
- springs and awls for the winches
- electrical cables, terminals, heat shrink and tools
- good quality digital multimeter with a clamp-on DC ammeter
- light bulbs and fuses
- basic mechanic’s toolkit
- collection of stainless steel fasteners
- collection of hose clamps
- collection of shackles, snap shackles, and snatch blocks
- various lubricants and corrosion inhibitors (Vaseline, Tef-Gel, Boeshield, and teflon-based grease)
- Tube (or more) of bedding compound (3M’s 5200, polysulfide, or silicone)
- some odds and ends of plywood and fiberglass cloth, with two-part epoxy glue
- basic sail repair kit
- a bosun’s chair
- duct tape ,plastic electrical tape and Teflon tape
- repair kit for an inflatable dinghy
- a spare halyard and sheet, long enough to replace the longest halyard and sheet onboard
- spare alternator and voltage regulator (essential and hard to get, but not likely to fail and not particularly cheap; nevertheless, so vital to the functioning of a modern boat that spares should always be carried)
- length of wire rope together with fittings (Norseman or Sta-Lok) that enable the longest stay or shroud on the boat to be replaced
- cable cutters robust enough to enable the rig to be cut away in a hurry if necessary
- Spare Lamp Parts – It pays to carry six or eight spare cabin lamp chimney’s at all times. They are the same as the internal chimney’s for the navigation lamps. The chimneys store easily, wrapped in newspaper and arranged among our leas-used linens. Four spare burners with wicks for both the cabin lamps and navigation lights complete our spare parts inventory. We’ve had difficulties getting these parts in some foreign countries, but usually we’ve been able to run up reasonable substitutes for wicks or chimney’s. (The Self-Sufficient Sailor, p. 192)
- Stowing Pots & Pans – I see little need for storing all your pots and pans in cupboards. Copper bottomed stainless steel pas are extremely function and their either tarnished or polished bottoms are usually pleasing. They can be hung onto a bulkhead and set into little gallows. They will then become completely rattle-free and can be left exposed without the need for a door which would only create a more confined feeling in the galley. If they are hung a few inches above the counter the space below them can be utilized for food preparation. (From a Bare Hull, p. 144)
- Stowing Food I – Most food is light enough to be stored in overhead lockers above the galley, although canned foods are best put low…doors on overhead lockers may be sliding or hinged at the bottom to prevent goods from falling out when the door is opened…they [doors] should be strong and have automatic locks…Some cabinets should be set aside specifically for soft goods like breadstuffs and cereal and for soaps, cleansers, and other items that might affect the taste of food…One good trick is to fasten a labeled string to each item before stowing it. Instead of feeling around for cheese down at the bottom of a cold fridge, simply pull the string labeled “cheese”. (Desirable and Undesirable Characteristics of Offshore Yachts, p. 140)
- Galley Stowage I – Utensils that are lightweight and dull-edged can be kept near the counter in just about any drawer with a good automatic latch….heavy pots and pans and sharp knives require special attention. Pots and frying pans should be kept under the stove or in a low, secure locker (a set of space-saving, rust proof, nesting stainless-steel pots is an excellent investment). Most cutting and paring knives deserve their own drawer – preferably fairly low and with a secure latch so they won’t be heaved across the cabin when the boat rolls sharply. Except in rough weather, you can stow the cook’s favorite essential all-purpose cutting knife in a tight-fitting sheath secured to the counter….plates, cups, bowls, cutting boards and other relatively bulky or fragile objects that are constantly in demand. While they must be secure, they must also be accessible. They may require a special overhead locker with built-in racks made of dowels, which should be off to the side of the stove so you needn’t reach through the steam from the tea kettle to get to them…Storage space is also needed for potholders and dish towels, plastic storage bags, trash bags, cling wrap, and aluminum foil, as well as for cleaning supplies…Mounting space is needed for a paper-towel holder and a fire extinguisher. (Desirable and Undesirable Characteristics of Offshore Yachts, p. 139 – 140)
- Stowing Dishware – …we also had a self draining cutlery box that worked well. Another way to store dishware is to mark out the diameters of all the plates and bowls on the base of a locker, drill a series of holes and push in pegs. If plates of a different size are substituted later, it is easy enough to drill another set of holes and move the pegs. Whatever arrangement is used, thought must be given to getting the dishware in and out as easily as possible – you will do it half a dozen times a day. Cups and mugs are best stowed on hooks in a convenient location. (Cruising Handbook, p. 138)
- Stowing Glass Jars – we fabricate more or less bulletproof stowage for glass jars by cutting up 4 – 6” lengths of schedule20 PC sewer vent pipe, standing the pieces on end, and gluing them together edge to edge using PVC pipe cement. This forms honeycombs of various sizes to fit in the locker. (Cruising Handbook, p. 139 – 40)
- Grab Box – it is useful to have a “grab box” fastened at the back of a countertop for larger utensils, a corkscrew and bottle opener, a can opener, maybe a flat cheese grater, and miscellaneous junk such as old wine-bottle corks. (Cruising Handbook, p. 142)
- Galley Stowage Questions – Is there stowage for: potholders and dish towels? plastic storage bags? trash bags? aluminum foil, cling wrap, etc.? Cleaning supplies? Paper towels?….Is there stowage for: Vegetables? Fruit? 6 ½ cubic feet of canned and packaged goods (four people for one week)? (Cruising Handbook, p. 267)
- Stowing Food II – Be alert to possible temperature extremes when you store food and other heat-sensitive items…. In the hot sun the areas right under the deck may also be very warm. (All in the Same Boat, p. 84)
- Stowing Food III – Anytime you see any breach, bulging, or other even slightly unusual thing about any food product, throw it away. Tomato products should never be kept for longer than a year, and most canned fruits have so much acid in them that they will disintegrate after a year. Never take chances with this. Food poisoning is bad enough ashore, three blocks from the hospital… (All in the Same Boat, p. 86)
- Stowing Food IV – We grow whatever we can aboard including sprouts and herbs….we carry approximately 100 pounds of wheat and large amounts of beans and other grains such as sesame and sunflower seeds, rye, corn and rolled oats (for oatmeal). Wheat will keep much longer than flour. We make our bread from the grain we grind…we make granola from our store of grains and dried fruits…We use only powdered milk. It is fat free, keeps for a long time and is inexpensive. We make yogurt regularly….is a great space and weight saver compared to long-life milk; it tastes just like real skim milk when refrigerated…We usually have nine to 12 months of basic food supply aboard. This gives us freedom and cut costs…Look for alternatives to canned foods. Canned foods are heavy and have a limited life in a marine environment. Dried vegetables and fruits are tasty and can be reconstituted quickly and as needed. Dry soup mixes are good and easy to prepare, as are pasta mixes and beans and rice mixtures….When we do purchase cans for long-term storage, we remove the label and pu the date and contents on each side with an indelible hmarker. We try to store them where they will not be exposed to heavy moisture, and we put the newest ones in the back or bottom of the stowage area so the oldest ones will get used first….Even aluminum cans will disintegrate quickly if they are exposed to salt water. (All in the Same Boat, p. 252, 259)
- Stowing Food V – Some bulk food, packaged grains, cereals and pasta can come to you with bugs, or eggs that might hatch months later in the middle of a tropical paradise. They are usually some form of weevil that can quickly infest your entire supply of grains and beans…it helps to put all your food that might be susceptible to weevils into a freezer overnight as soon as you purchase it…Everything should be packaged as airtight as possible and in as heavy container as you can find. Good choices include Tupperware, re-closeable 2 to 5 gallon buckets, plastic restaurant supply containers, collapsible water jugs, or even glass (if you have a secure place to put it in). The larger your container, the more food that will go bad at once time, so you may be better off with several small containers spread out around the boat rather than one large one for important staples like rice…Weevils excel at eating through plastic bags and cardboard containers…Some cruisers swear by putting bay leaves into bulk storage containers to fight off weevils.
- Trash Can I – A secure trash bin of reasonable size should be immediately accessible to the cook. Many small boats lack this critical feature. (The Modern Cruising Sailboat, p. 223)
- Trash Can II – …carry a large plastic basket in the galley, preferably at the foot of the companionway so it can be ventilated. Line the basket with a heavy trash bag, which, when filled, can be tied off and left in the dinghy or hanging on a hook in the sail locker to wait for the next trip ashore. (Desirable and Undesirable Characteristics of Offshore Yachts, p. 140)
- Trash Can III – …substantial item is a trash bin. it has to be accessible and designed so that is stays open by itself (so that, for example, when dumping stuff off a chopping board, you can hold the board with one hand and wipe it clean with the other). It needs to be suitable size and accommodate a trash bag with a mechanism for holding the bag in place. It should be located so that pieces of food that miss the bag can be easily cleaned up, rather than becoming lodged in inaccessible joiner work and smelling after a few days. (Cruising Handbook, p. 138)
- Galley Stowage II – The galley should have room for pots and pans, tableware, and bins or cabinets for food that are dry and ventilated. Don’t forget drawers for the dozens of necessary small cooking utensils. Heavy pots must remain secure when the boat is bucking around. Thin veneer facings and shock cord will not stop a 10 lb. iron skillet from launching itself to the other side of thin cabin.
- Spices – Every galley needs a small cabinet or rack for condiments and spices and enough food storage capacity to keep the crew going for a few days without having to dig behind or beneath the settee berths in the saloon.
- Stowing Food VI – One cabinet has all of my dry goods such as peas, lentils, chickpeas, beans and rice. The other has all of my baking goods, which will eventually go in airtight tupperware and all of our coffee-making goods. Lastly, above the stove I’ve placed our canned goods, pasta and assorted, small sundries…hammock. I’m just using it for assorted herbs, fresh veggies and fruit and bread, or in other words, the squishy stuff (http://rebelheart.squarespace.com/charlottes-blog/2007/7/15/galley-organizing.html)
- Stowing Food VII – The quick access/condiment locker. Once again, CD cases keep things organized and in place. Replacement stuff is stored in back…Even the galley drawers have lift-out dividers to maximize the available space…’Ocean Spray’ juice containers work great for food storage. We also use other airtight canisters for flour and such…The canned foods lockers (behind the settees) are low to keep weight lower in the boat. They’re lined with bubble insulation to provide some padding and to conrol condensaton. Cans are also in zip-lock bags… (http://www.sailvictoriarose.com/Storage_Options.html)
- Stowing Food VIII – For food items that we use several times a day, we built in a canister holder behind the new sink. Here we keep coffee, sugar, flour, and dry cat food. In the upper cabinets, we have additional food canisters, designed especially to best fit the individual spaces and thus maximize use of the space. These canisters are refilled from larger quantities that are stored throughout the boat in spaces harder to access. In the larger spaces below the counters, we store things together in baskets that stack on top of each other. This allows an item at the bottom of the area to be retrieved by simply removing the top basket, and not needing to move lots of small items individually. This is an especially good practice to employ in the refrigerator….We were fortunate that there was already a great stack of drawers built in. Even though you lose a little bit of overall storage space with drawers and their sliding hardware, the benefits of easy access far outweigh any loss. The drawers took care of storing cutlery, kitchen tools, freezer bags, and other often used items…There is often dead space on the inside of cabinet doors that can be transformed into some of your best accessible storage. We buy the plastic coated wire shelves, available in all sizes, that best fit each of these areas and can store spices, cans, and cleaning products. (http://www.sailnet.com/forums/gear-maintenance-articles/19734-renovating-galley.html)
- Gear hammocks are wonderful for storing “fragile” items like chips, eggs and produce, and they also make use of space that is otherwise empty…don’t hang them next to a wall if you have anything fragile in them ― the hammock will hit the wall with the motion of the boat…I lined all my lockers (both shelved and top loading) and drawers with non-slip shelf paper to keep cans, utensils and other items from sliding around as the boat moved. (http://theboatgalley.com/store-food-boat-supplies/)
- Navigation Station Stowage I – It has a hinge-up lid allowing easy access to log books, cruising guides, current misc. charts, etc…..and forward of my knees, has 2 deep and heavy-duty drawers (odds and ends drawers) which hold all sorts of stuff that you just “need” to have handy…..As well as a handy storage bin, immediately next to the seat, which can hold even more stuff, such as more charts, bincos, flashlights, etc….
- Navigation Station Stowage II – I like an open box along the back of the chart table with partitions to house pencils, dividers, parallel rules, a hand-bearing compass, a magnifying glass, a flashlight and other odds and ends; these essential tools are always accessible but do not get thrown about the boat. (Cruising Handbook, p. 133)
- Navigation Station Stowage III – For reference books, there should be a handy book case with retainers. For pencils, dividers, parallel rules, and other tools, provide a long shallow tray above the table. (Desirable and Undesirable Characteristics of Offshore Yachts, p. 142 – 3)
- Navigation Station Stowage IV – There should be a bookshelf for the log, Light List, cruising guides, almanac, and other publications….The sextant can be stowed in its sturdy box in a special bracket or in a locker….Add a pencil sharpener and a drawer for pencils, note books, calculators, watches, parallel rules, and dividers. (Desirable and Undesirable Characteristics of Offshore Yachts, p. 224)
Image Gallery


Comment Form